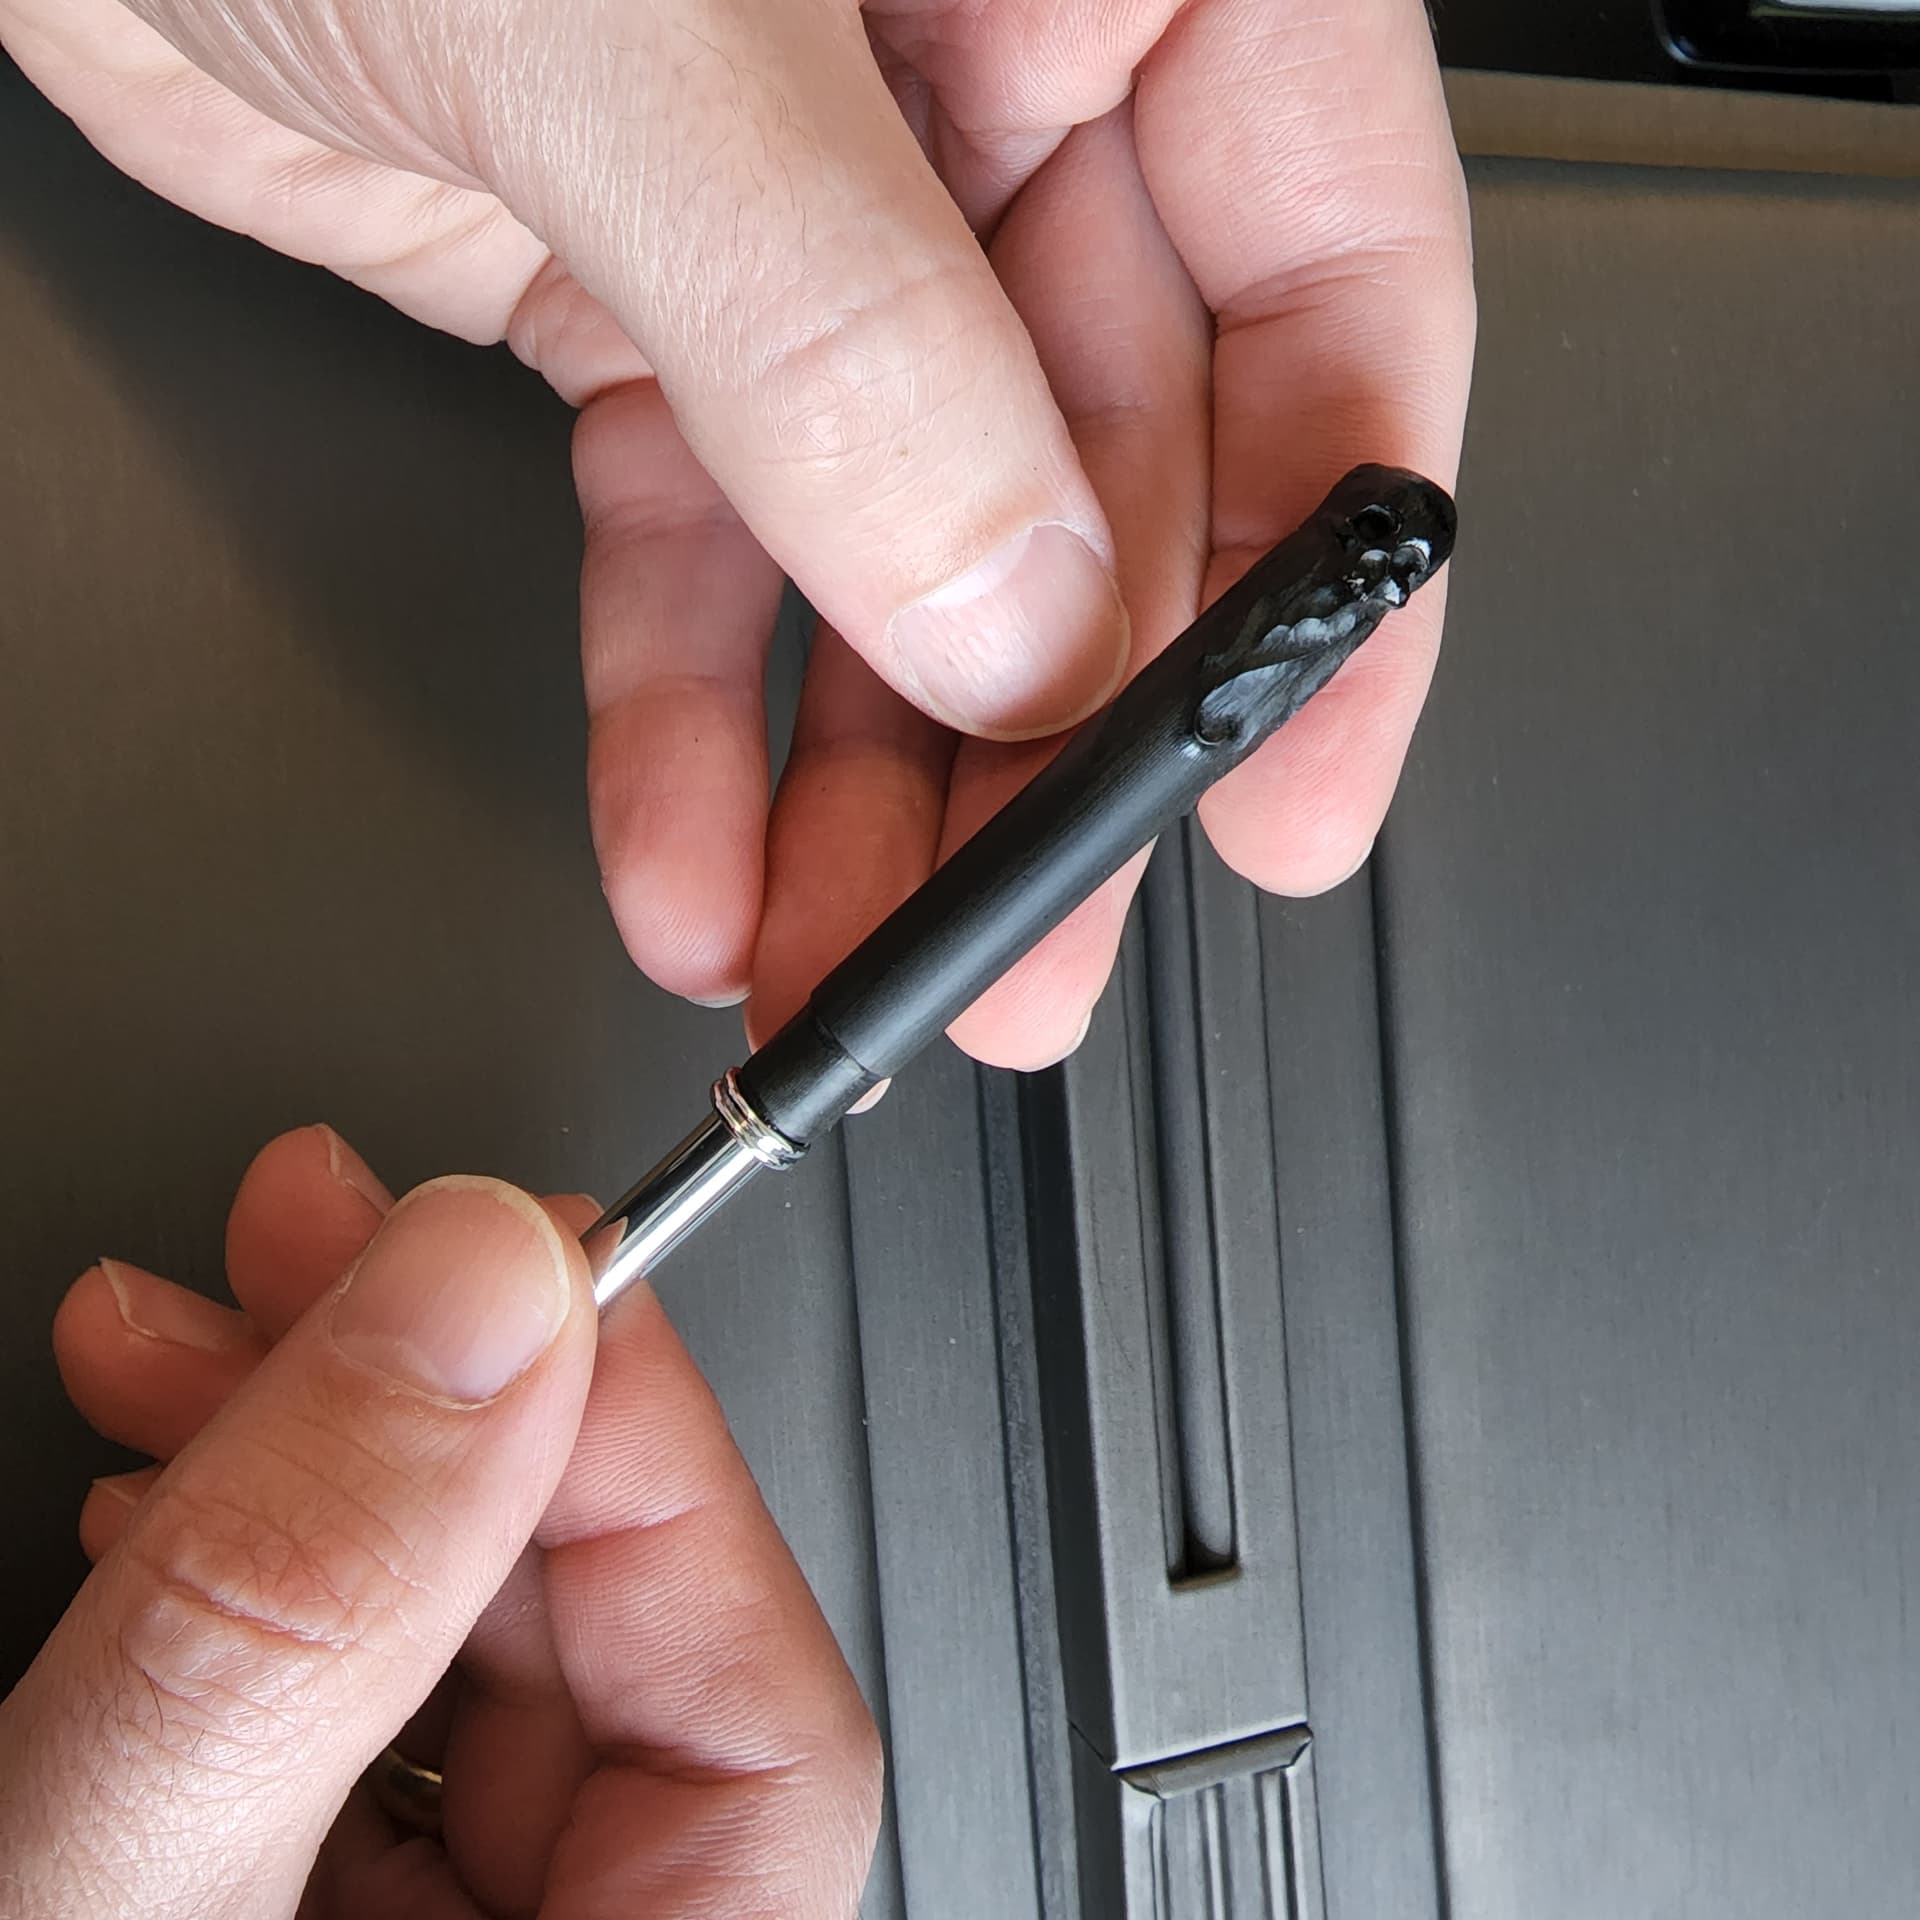
Chrome pocket pen with sculpted skull design in ebonite.
I used my new rotary axis as the slave Y. Works great but I do wish they would create a 4th axis controller. Hopefully in the near future.


7 Likes
Nice work! Makes me want to dive into the world of rotary axis.
1 Like
Thanks so much, it was a lot of tial and error… mostly error, but if you have any questions, I’m happy to pass along any info that might help.
Cheers!
2 Likes
Bruce,
Very nice work!
I would love to know more about your rotary and its setup.
Thx,
Alan
2 Likes
Hi Alan,
Sure thing! So I removed both of the Y motor cables from the motors and plugged in the Y slave to the rotary stepper motor. I bought an extra cable from Onefinity and spliced it so that I had the correct end to plug into. Make sure you wire the motor up correctly, the colours of the wires are not all the same so you need to do some simple checks using a voltmeter.
Next you need to go into the controller settings for the Y slave and switch it to A. You’re going to need to know the settings for the rotary stepper motor so that you can put the correct settings into the Onefinity controller.
Mine has a 1.8 degree step angle but it also has a 4:1 pulley ratio so I had to divide the 1.8/4 to give me my step angle in degrees. Then make sure you put 360mm for travel per step for 1mm=1 degree in this case.
I had an issue with the rotary knowing where 0-90-180-270-360 was. When I told it to go to 90 it would go to 0…etc. But then I switched the microsteps from 16 to 32 and everything worked like a dream. I bought my rotary axis motor setup from China so it didn’t come with any info on the motor. I had a lot of guess work and trial and error until I got everything to work well together. So if you do buy one, make sure to get all the stats you can. It’ll make setting up a w lot easier.
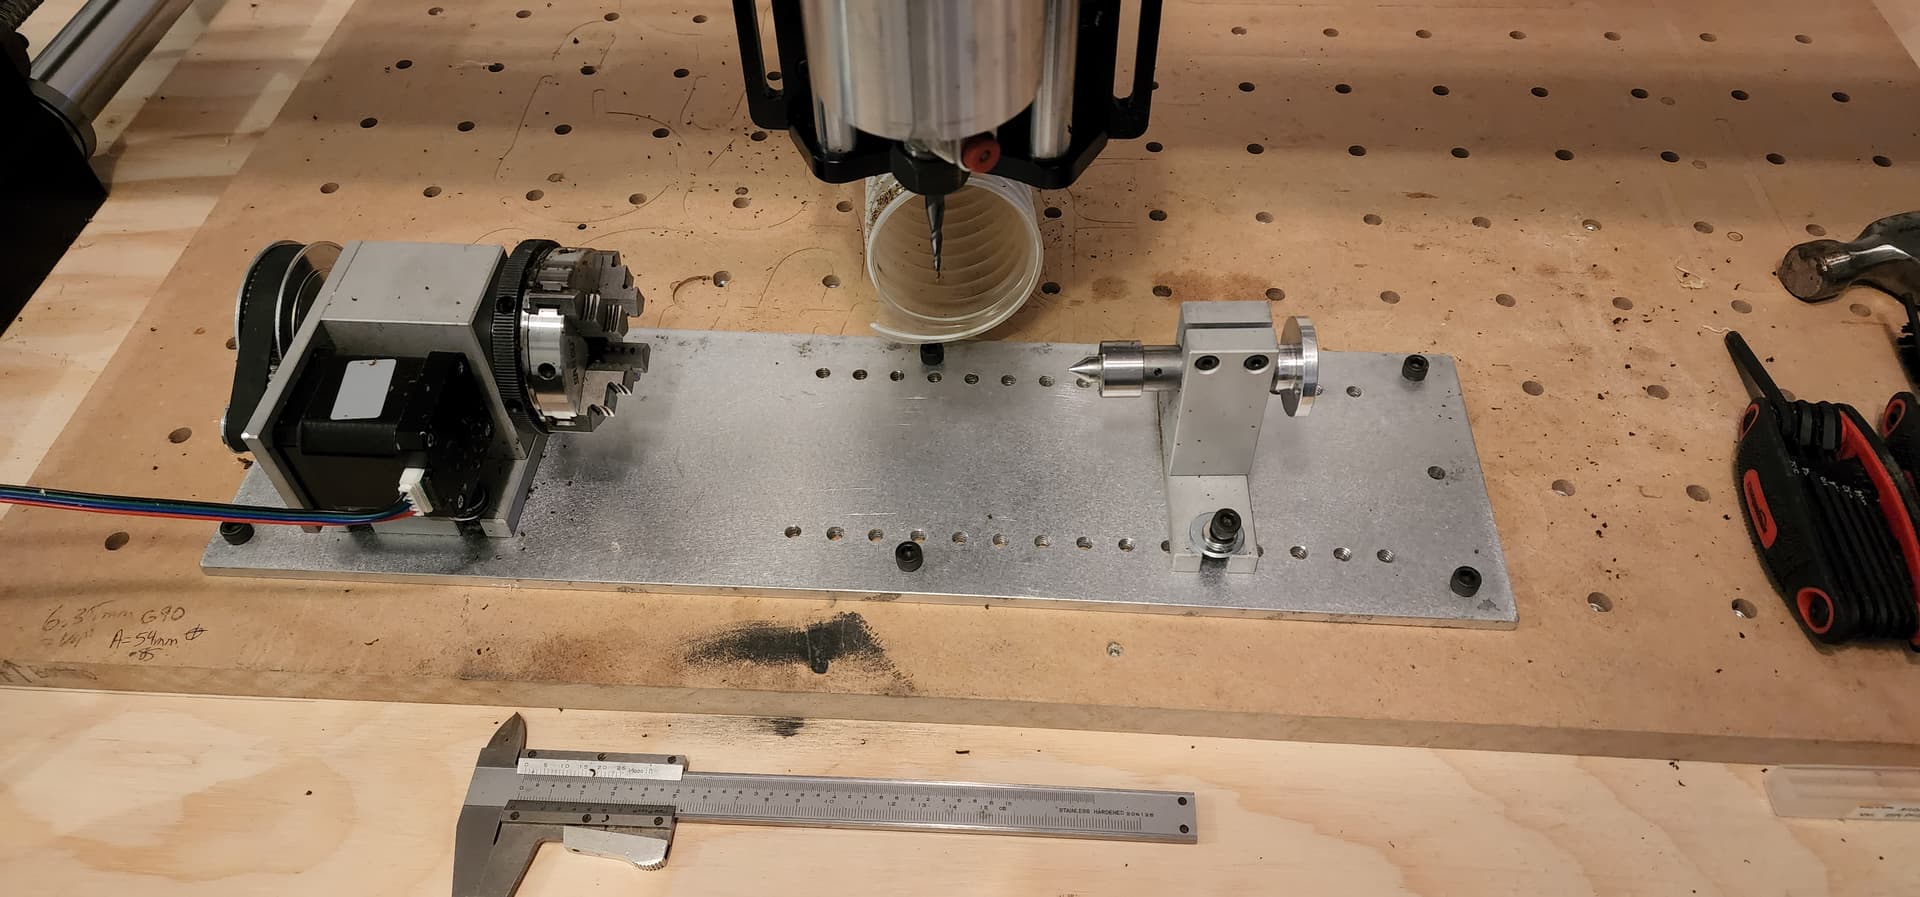
I mounted my rotary to a 1/4" aluminum plate and then drilled holes every 10cm or so, all down to the end of the plate. I threaded them all so that I could move the tailstock where I wanted. It’s not ideal but it works very well.
Here is a shot of my settings and my setup.
I hope this helps. If you need more info, I can send a great video another member sent me when I was setting this up.

3 Likes
That is great! any chance you have a video showing what you’ve done?
1 Like
Sorry I didn’t. Next time I do something like this I will remember to make a video as well!
Let me know if you have any questions, I’m happy to help any way I can.
Cheers!
This looks great! Cant wait to see more examples.
1 Like
Hi Bruce,
I got my rotary working two days ago. Still working out the errors. I had a similar problem, the 1F started the carve on the underside, so 180 deg off, basically upside down. It matters to me because my model and the stock are asymmetrical. Also working on a precise way to probe the Z, I used the touch probe on the surface of the Rotary and then added 35.3mm, although that measurement seems to be a little off.
I think I will try to find a way to stop the y axis in the right spot using the touch probe next time too.
My question is when you change the micro steps from 16 to 32, do you have to change the step angle too? Mine is set to 0.3 now.
Thanks, Tom
1 Like
Hi Tom,
No I didn’t change the step angle when I switched the micro steps. I did the calculations but didn’t know enough about my motor so a lot of it was guesswork. If you have the step angle I htink that’s the most important part. Then just tell the machine to move to 90 degrees, mark it, then do 180, etc and see where it’s moving. If it’s not correct, try switching the micro steps (unless you have all the details on your motor, then go by those calculations).
I hope that helps,
Cheers!
1 Like
Mr Bruce how are you sir great job I like to ask you a question what machine do you have do you have the upgraded journeyman Etc the reason I’m asking is it has a different stepper motor and I’m wondering if the settings that you used would have to be different for that stepper motor I had mine set up I haven’t used it since I’ve upgraded to the journeyman I appreciate your help
Hello Mr. Gregory!
I have the Journeyman. As for the stepper motors, yes it will matter, but not the stepper of your CNC, the stepper on the rotary is what matters when setting up the rotary axis. You need to add the correct settings for the motor that your rotary stepper motor is using so that the controller knows how many steps it has, etc.
I hope that helps.
Good luck!