While this FAQ was originally wrote for the Non-Elite Machines, the same principal applies to both. Over/under on non-elite controllers and soft alarm on elite controllers mean the same thing, so the below principals apply to all machines.
Many new users to the Onefinity CNC often get the machine unboxed, assembled, and moving in a few minutes without ever needing to look at instructions.
But then they home the machine and are alarmed when their screen looks like this:
(Left picture is non-elite machine, right picture is Elite machine)
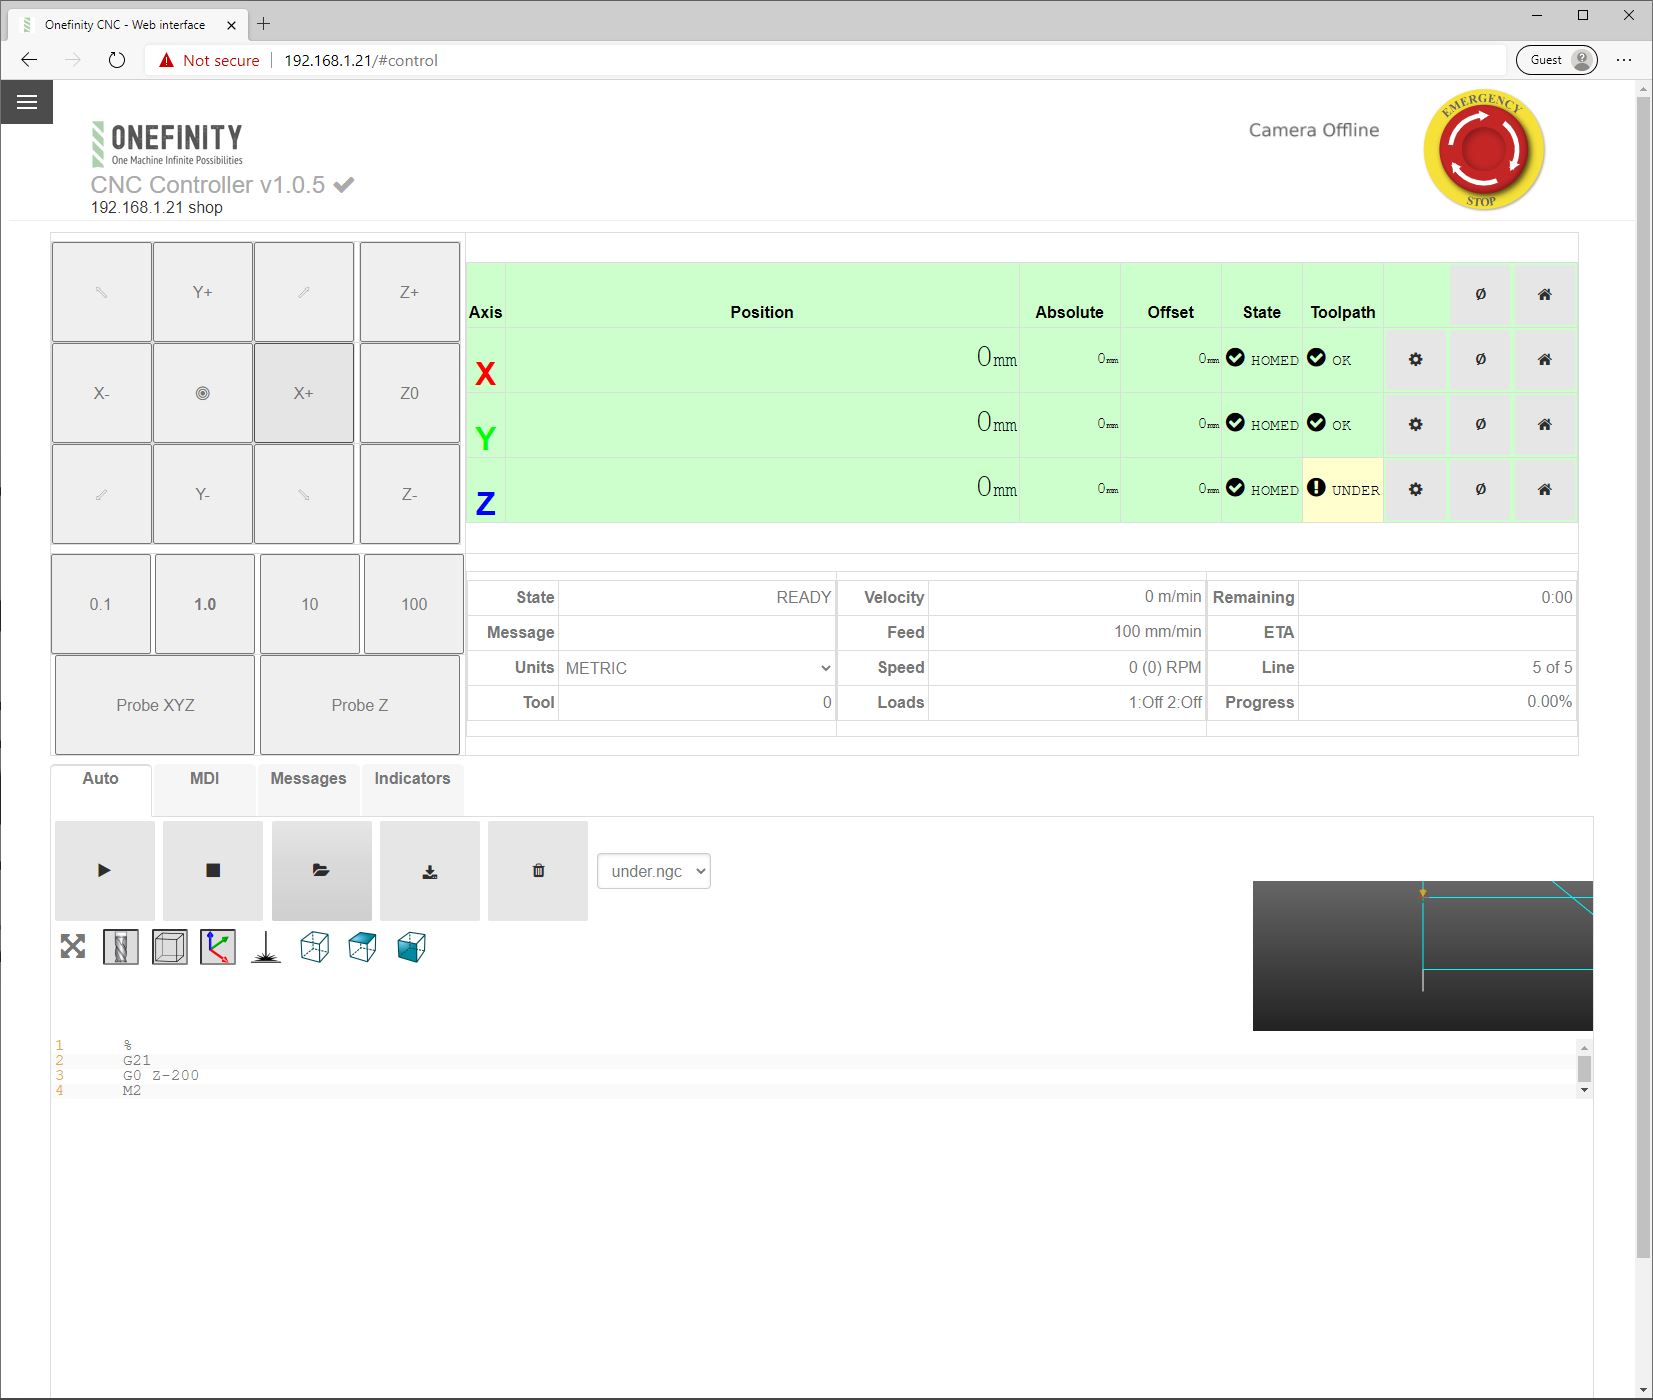

The dreaded ‘under’ in yellow. You might think to yourself, “My machine is broken!” Don’t fret! The machine is working perfectly fine! In fact, you’re looking at one of the unique features of the Onefinity CNC!
READ THIS FIRST
TLDR (Threads to long, didn’t read): Ignore any toolpath warnings until you do this list
1) Boot up
2) Home the machine
3) place material on wasteboard (or install wasteboard)
4) Load file you want to run
5) Zero (different than homing) xy and z axis
Only after the above steps does “toolpath” status matter.
The awesome thing is that you purchased a ‘smart’ CNC machine. Most hobby CNCs would just let users run the file in its current state and damage either the bit, material, or even the machine! The Onefinity is capable of knowing if your current file will be able to run with the settings you’ve input and will save you from destroying something!
Most users experience this issue when doing their first project, which is unfortunate flattening a wasteboard. Due to the complexity of working with the extreme limits of the machine, we do not recommend new users to attempt this or worry about it until you have some smaller, successful carves logged on the machine. This way, you’ll avoid ‘beginners frustration’ and experience the joy of what a cnc does, moves the way you programmed it. Once you have used the machine successful, you can revisit flattening and/or tramming (the advanced operations) with more knowledge to simplify the process! We want your first experiences with a CNC machine to be a pleasant one  !
!
One of the top questions we get asked often is, “what is the difference between Homing and Zeroing on a CNC?”
Homing
When you first boot up your Onefinity CNC, you’re presented with a screen that asks if you’d like to ‘home’. If you choose yes, it will move the z axis to the very top of its travel, the x axis to the very left of its travel, and the Y(s) to the very front of their travel. You’ll end up with a spindle in the front left of the machine. This process tells the machine how far it can travel. After you home, you can jog all the way down the rail to the opposite end and the machine will stop, knowing it can no longer travel any farther (these are called ‘soft limits’). If you were to skip the homing process, the machine would not know where it is in relation to itself, so if you tried to jog the machine from one side to the other and kept jogging, it would keep trying to go beyond the end of the rail and you’ll hear a horrible grinding noise (these are just the stepper motors ‘skipping,’ don’t worry, although it sounds horrible, it won’t damage anything). If you’re experienced in CNCs, you can run the machine without ever homing it, as long as you know that your project is within the machine’s limits (32x32x5 (ish) cutting area).

You’ll notice in the picture aboveThis text will be hidden, if you look at the control screen on the Onefinity, there’s a vertical column called ‘state.’ This will show you a check mark and say ‘homed’ and turn green if your machine has successfully homed. This is different from the vertical column named ‘toolpath.’ (See “Zeroing” for toolpath info.) Basically, if you have not zeroed after homing, disregard any 'over’and ‘under’ warnings in the category at this point.
Zeroing
Zeroing is different from homing. Where homing tells the machine its limits, zeroing tells the machine where the material you’re going to cut is located within those limits. Zeroing IS essential before every cut. Without it, the machine would have no clue where the item you want to cut is in relation to the bit. This is where the the toolpath will become relevant. The toolpath status will always check against whichever file is located in the file selection in relation to the zero.
In the picture below, you can see the blue square. That is the machine cutting area (which will show correctly after homing). The white square is the material. The yellow dot is the end of the bit. The red lines and the green lines are the paths the tool will follow when cutting out the file. We’ve zeroed the bit with our touch probe via the xyz probe button and now the machine knows where the material is located in its cutting area.

Most people create a wasteboard for their first program. What’s suprising to most is this is one of the hardest things to create. You’re dealing with the max limits of the machine, and that’s where things always get harder. This requires cutting at the lowest point the machine will ever cut (everything you’ll cut after you create your wasteboard will be on TOP of the very wasteboard you’re creating, so it will be up around 3/4" higher). The machine needs to reach the farthest point it can travel to. At this point, you’re most likely seeing the under warning because the machine cannot reach as low as you want it to.
(Although this is in reference to z, the same applies to x and y, instead of vertically like z, it’s horizontal)
**“Under” Or “# is LESS THAN the soft limit #” means your bit cannot reach down as far as the file is programmed to go.
It will run into the bottom of the z. If it says this for x, your toolpath is out of bounds to the left and for y its out of bounds towards the front of the machine.**
To remedy this you need to
1) raise up the material you want to cut
2) move the z slider down closer to the material (to the top hole of the 3 hole pattern on the z)
3) use a longer bit or stick the bit further out of the collet
Here’s a visual example of the toolpath ‘under’ from the side view. You’ll notice the blue box of the cutting area of the Onefinity. The white box is where the material is. The green is the toolpath, where the bit will go. You can see from this side view example that the white and green lines are BELOW, or “under” the cutting area. The bit will not be able to reach below the blue line.

“Over” or "# is GREATER THAN the soft limit #"means your bit cannot travel as high as the file is programmed to go.
It will run into the top of the z. If it says this for your x, your toolpath is out of bounds to the right and for y it’s out of bounds towards the back of the machine.**
To remedy this you need to
1) lower the material you want to cut
2) move the z slider higher, further from the material (to the bottom hole of the 3 hole pattern on the z)
3) use a shorter bit or stick the bit further into the collet
4) Ensure your only have 1 tool in the toolpath
5) Check your retract and saftey height in your CAD program
Here’s a visual example of the toolpath ‘over’ from the side view. You’ll notice the blue box of the cutting area of the Onefinity. The white box is where the material is. The green is the toolpath where the bit will go. You can see from this side example that the white and green lines are ABOVE or “over” the cutting area. The bit will not be able to reach above the blue line.

So, some things to keep in mind when you are seeing the under or over warnings in the toolpath column are:
- Did you zero X, Y and Z?
- Did I load the correct file?
- Is my z slider in the top, center or lowest hole position?
- Is my tool too short or too long?
- Is my file programmed correctly?
We hope this helps you get carving!
- If you’re not seeing the visual simulation, it is because it’s only available via a computer remotely connected to the controller on the same network as the Onefinity. It is not available on the screen that is directly connected to the hdmi port of the controller. This is a limitation of the pi inside the controller.
To connect a computer remotely to the controller, follow this video: Connect the Onefinity CNC to a network
These two videos will help as well:

