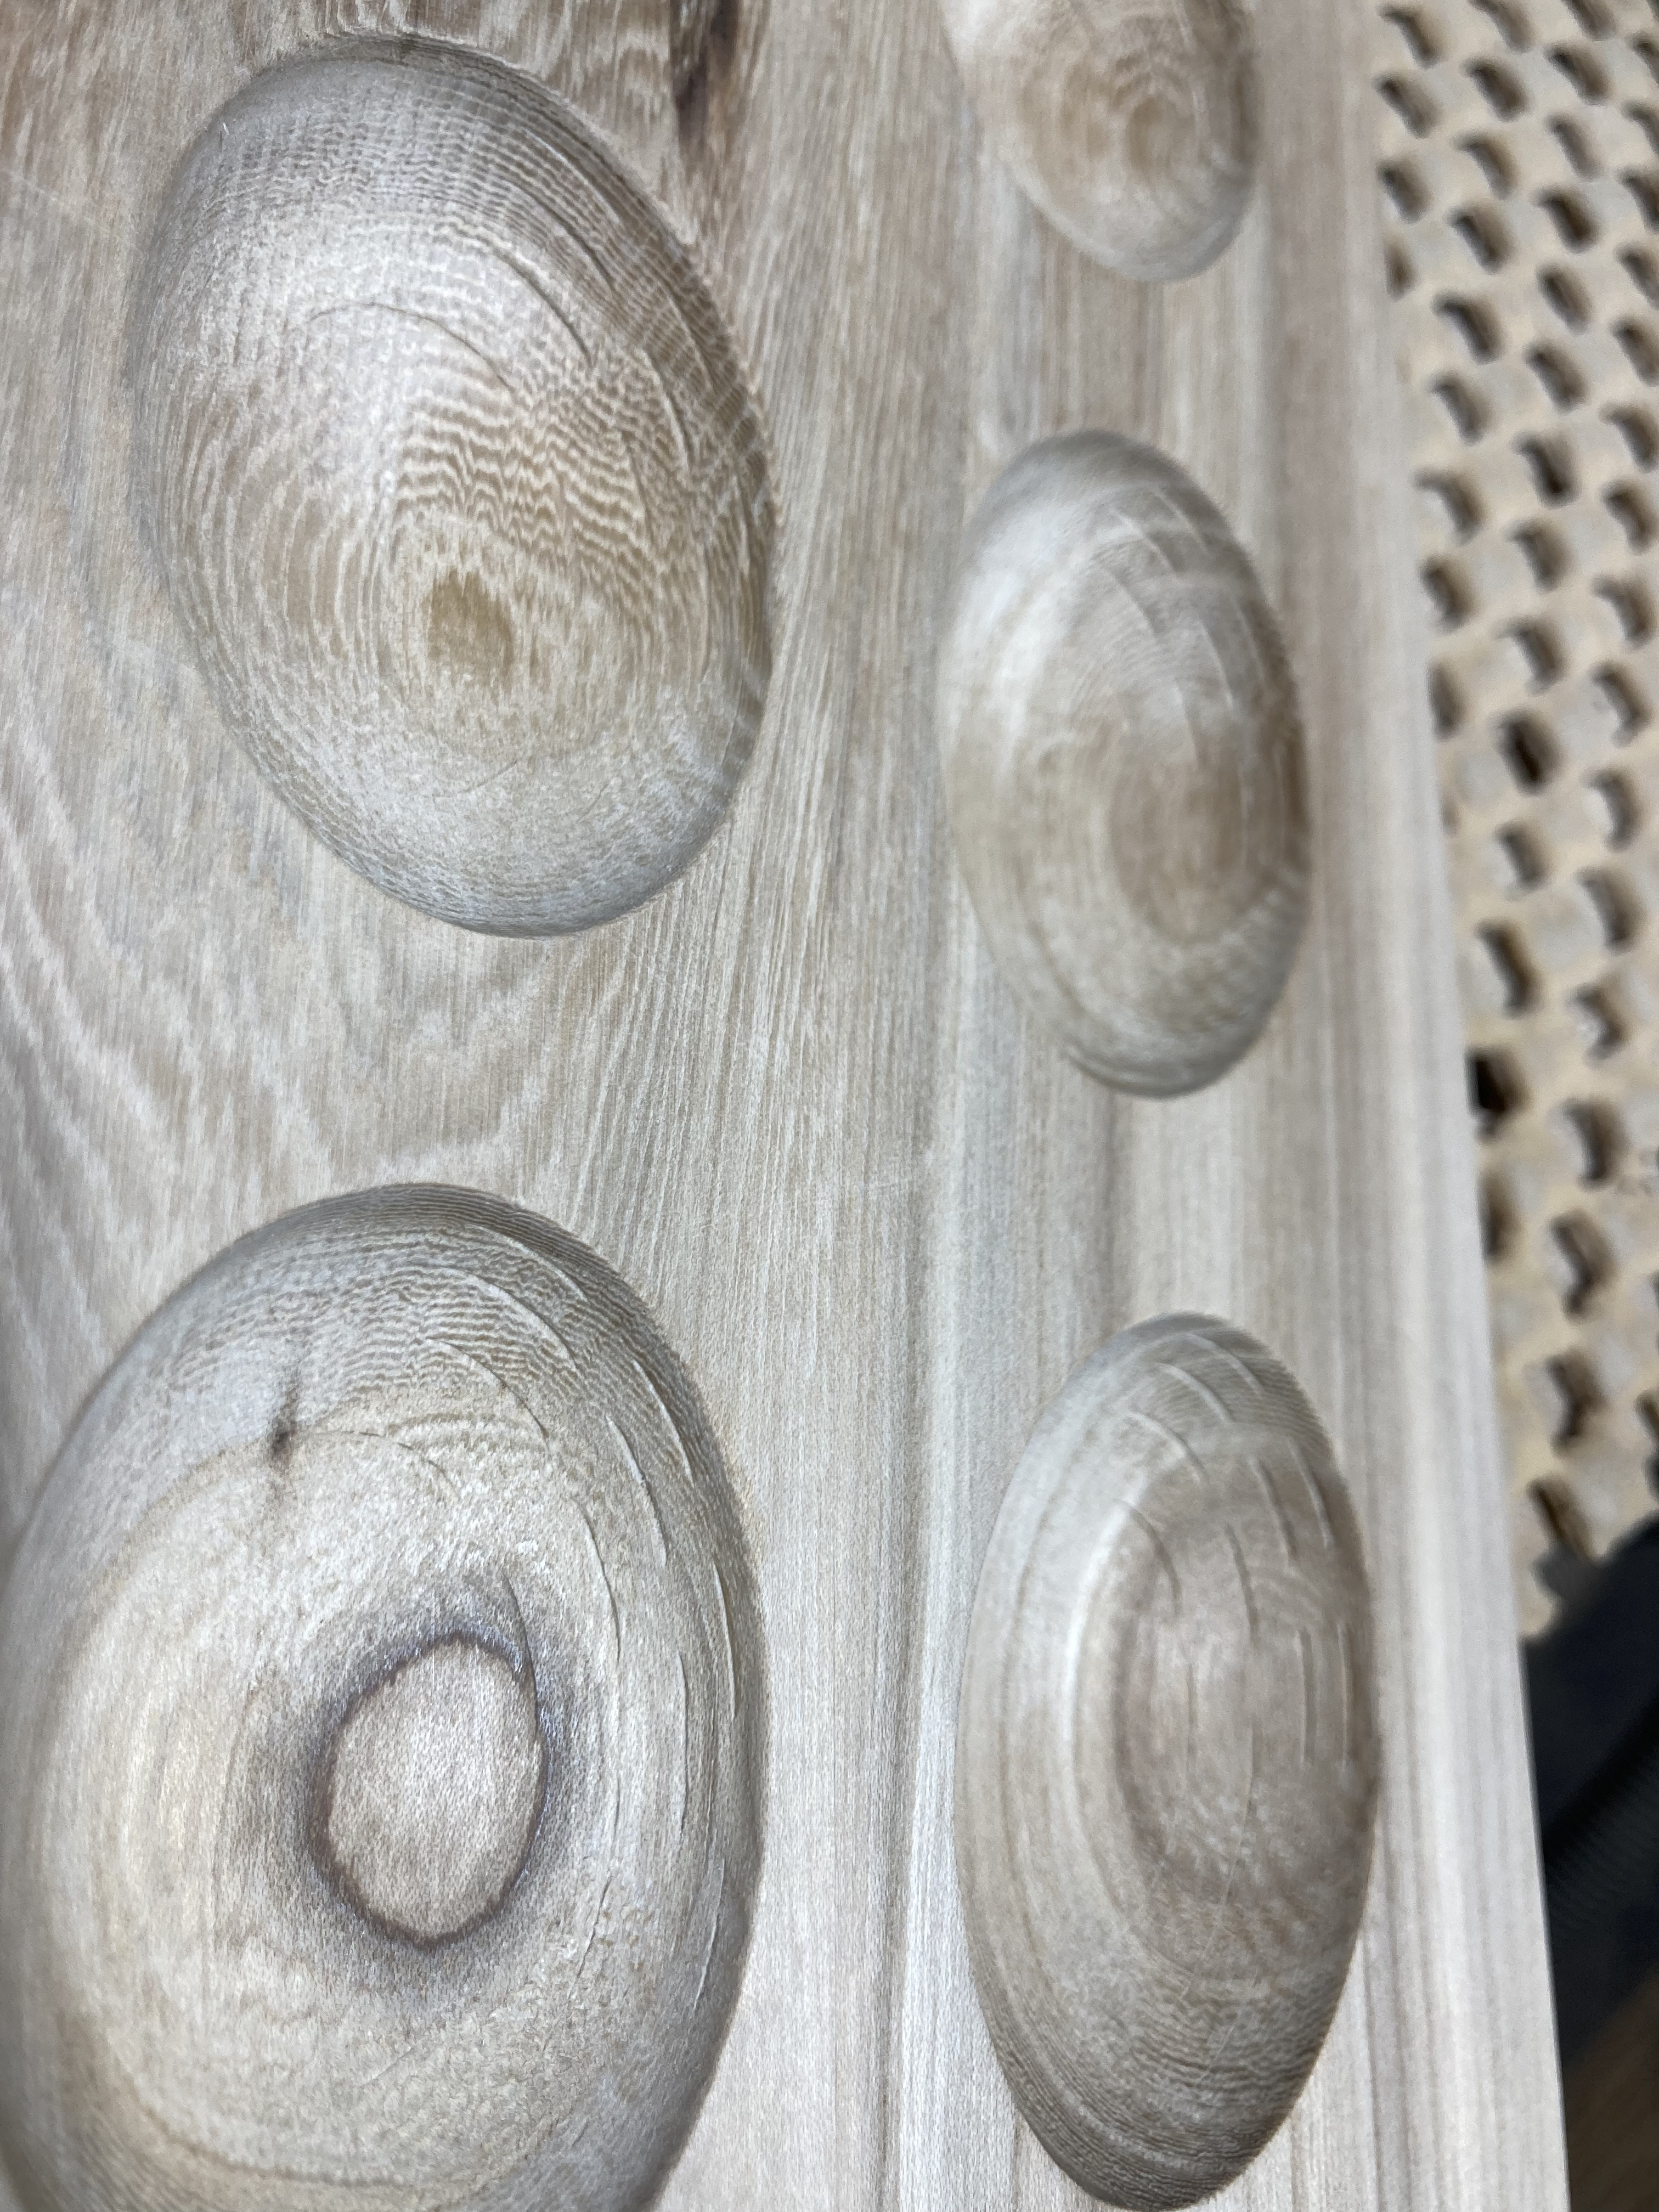
I have done this finish relief many times with no problem this time there consistent marks on the side of the relief as shown in the picture. The marks are deep enough that they will not sand out without great difficulty
I used a 1/4" Jenny ball nose with
step over .02
step down .100
feed 100
plunge 40
X35 and carveco maker
the material was rock elm wood
wondering if it was the wood? I figured I was going slow enough for the wood
any thoughts
I’m not familiar with Carveco and have never used Rock Elm, but can you tell if the gouges are consistent with the carve direction? You would probably agree they appear to not follow the wood grain.
they don’t follow the grain and each one is consistent with the other. Each relief has the exact same markings. I will be using a different wood shortly, hopefully they won’t reappear
Zooming way in on the marks, they don’t appear to have been made with a ball-nose bit. Did you use a square-edged bit for roughing, perchance?
The marks are in the same sector on all of the pockets, which makes me think that something may have shifted laterally between roughing and finishing passes. Perhaps a workpiece shift, or maybe a few missed steps.
the marks were done with the ballnose because I watched as it carved. The model was solid it wasn’t going to move.
What do mean a few missed steps
What I was going to do was delete the tool paths and start over again? Just because I am at a blank. Am going to do another of different wood hoping it will be better . Done this several times never had a problem, maybe the rock elm
The axis motors on the Original/Pro (Buildbotics) controls are open-loop stepper motors. If they encounter a cutting load that exceeds their maximum output torque, they will stall. Then, assuming that the stall is temporary / transient, the motors will resume moving, but with a position-offset error that is an integer multiple of the motor step size. Hence the term “missed steps”.
The motors have no position sensors, and thus the controller has no way to detect that missed-step error. But any features subsequently carved into your workpiece will be offset by the cumulative step error.
The rock elm, being hard, will likely require more cutting force than softer woods, which may make missed steps more likely. Ditto for a dull bit.
So did you first rough-cut the pockets with a square-edged bit?
1 Like
Dennis
the marks were carved with the first rough cut with a standard 1/4 end mill
As I watched the second pass it revealed the marks, but didn’t cause them, I was wrong they were created in the first rough pass which coincides what you are saying which makes sense now.
I checked some oak that I had previously done and there were marks but almost un-noticeable
I am assuming that my feed rate should be slowed down considerably I was roughing at 125 in/min and plunge at 60 I am thinking for the harder wood 100/40?? or slower??
Hi Dennis,
If the cutter is able to handle that feed rate then I don’t think those feeds are too fast for roughing. I would leave more stock for finishing. Roughing should go as fast as the cutter can take - and the machine can take. If you are missing steps then that may require slowing down. But I would think the machine would make some banging or clunking noise when it misses steps?
Are you climb milling? The cutter will deflect away from the wall that way. It will deflect into the wall if you conventional mill - especially with harder woods.
What are you leaving for the finish pass?
Also has anyone mentioned checking if the connections between the motors and the axis screws are still tight?
2 Likes
If steps were getting missed on the roughing pass, you should still have the same position offset on the finishing pass (assuming that you’re not re-homing or re-zeroing X & Y between the passes). So the finished pocket might be slightly mispositioned, but would probably still clean up ok.
The cutting edge of a ball-nose bit has zero radius at the very tip. So when milling the bottom of a pocket, you’re essentially just dragging the tip across the wood to shear it. I would expect that to require some pretty high axial forces for hard wood. So slowing down the finishing pass, and/or reducing the stepover distance, would be good experiments to try.
Chris Moore makes some other good points in the post above.
Yet other possible reason for missed steps occurs to me. If you run the toolpath just cutting air, does it run smoothly, or does it sound rough when machining tight circles inside the pockets?
When I was running a Buildbotics controller, I had issues with it chattering during tight circles and spirals. I eventually figured out that the root problem was “controller overload” – i.e. the controller wasn’t able to process the little piece-wise linear motion segments rapidly enough. This caused discontinuities in the commanded axis positions, and would sometimes result in missed steps even when just cutting air.
So if your machine sounds rough when dry-running the program, “controller overload” may be your problem. I found that cutting the default “junction acceleration” setup parameter in half, to 100,000 mm/min^2, helped greatly. That basically tells the machine to slow down more during tight arcs, thus giving the controller more time to process the segments.
1 Like
The marks in the reliefs are about (best guess) .010 thou deep which have to made by the rough cut, but if overload was a problem why do all the reliefs have exactly the same marks and depth on every relief. One would think that perhaps there would be a variance in one or two of the reliefs. If overload was an issue would every relief have exactly the same marks and depth.
I appreciate the response I have never seen this before
Good question. It appears to me that a position offset appeared sometime after the machine finished roughing the sides of the pockets, but before it completed the finishing toolpaths. And then the offset never changed afterward. Ergo, the offset between the final roughing pass and the final finishing pass is the same for all pockets, and so leaves exactly the same amount of rough-cut grooving exposed on every pocket.
Without knowing the details of your toolpaths, I can’t even speculate as to exactly when the offset may have occurred.
I’ve been assuming that you are not re-homing or re-zeroing the X & Y axes between the roughing and finishing toolpaths, when you change bits. Is that in fact the case?
1 Like
every time I change a tool bit I re zero X Y & Z because I was told that not all bits are created equal. right or wrong?
Z does need to be re-zeroed after bit changes, as the bit stickout is unlikely to be repeatable.
X&Y do not need to be re-zeroed. The software always references the central axis of the spindle, and thus of the bits. Collets are very repeatable radially, which is why there is no need to re-zero X&Y after bit changes. If you do, you run the risk of introducing offset errors within a carve.
Personally, I always mount a 1/4" precision dowel pin in the spindle when I zero X&Y, which eliminates bit variations as a source of offset error. If you do use a cutting bit when zeroing X&Y, you must:
- Ensure that you’ve entered the correct bit diameter in the zeroing dialog, each and every time.
- Ensure that the point on your cutting flute which contacts your touch probe is oriented at its closest distance to the probe. This may require you to manually rotate the bit.
- Never use a tapered bit or V-bit for zeroing, as the touch-off diameter will then also depend on the bit height.
So I find it much easier to just chuck up a precision dowel pin. Or you can use a good straight shank cut from an old bit.
3 Likes
everything said about X Y makes perfect sense,
but not to zero Z when changing a bit goes over my head
If I had an extra long end mill to do the rough cut and then changed to the finish and put in a reg ball bit, it could be 1/2 shorter, how does not zeroing the ball come into play
Sorry, Charles, I must not have been clear. You DO need to zero Z after every bit change.
1 Like
![]()
Thanks for the info was helpful
Glad I could be of help, Charles. Please let us know if your follow-on carves come out good.
I do the same. Folks can get a gage pin from Amazon fast & cheap.
I’ve got several and they all mic out at .025" despite the low price.
Thanks for the info
just curious about the price in the corner $2.57 what does that denote?
Amazon does that in links - that’s the price of the item. Except when the item has options (the link has a ton of sizes available) and then that’s the lowest priced option.