Pretty cool project BGuill. Reminds me of some of the stuff my grandpa used to make…albeit with conventional tools and not a CNC.
Some live edge 2" deep epoxy river countertops with cherry wood and white rock I made for my bathrooms. I used the 1f to flatten the slabs, backsplashes, and cut the sink holes. Next will be to paint the bathroom, cabinets and hang the vanity mirrors. The mirror frames I am going to hang are made out of the same wood and also cut on the 1F but they are still being put together. The clarity of this epoxy is pretty unreal. Some of these pictures its hard to tell the rocks are covered. I am super happy how the project turned out. I plan to make similar countertops in my kitchen remodel coming up. The 1F saved me so much time being able to flatten these huge wood slabs made the job easy.


12 Likes
much easier now days with the cnc cutting it out for sure, but still plenty of assembly, sanding, and finishing work. but also very enjoyable doing it, and can’t wait to see the look on her face when I give it to her!
2 Likes
very impressive JDog, that look great! I really want to try some epoxy soon, any suggestions on a brand friendly to beginners?
1 Like
I can never get all the air bubbles out when I do a pour with all those small pieces. What’s the secret?
1 Like
JDog,
Can i ask you why you chose to install the top and backsplashes before painting and the other work? Or are my eyes deceiving me and you just have it sitting on the top for picture taking? Just figuring it would be difficult to stay in the lines/keep it pristine while doing all the other work.
Looks great, by the way what epoxy brand are you using?
Dean
1 Like
This is the epoxy I used for the river portion. EPOXY RESIN 3 Gallon Kit Deep Pour, 4 Inches Per Pour CRYSTAL CLEAR | eBay
I do a final coat with total boat counter top epoxy. The deep pour epoxy does not get as hard as the counter top so putting this layer insures long scratch free life.
The trick to no bubbles is number 1 make sure the epoxy is not cold. I sit it in front of a space heater for about 10 min before pouring. Number 2 you must torch out the bubbles after you pour the epoxy. The heat releases the air from the epoxy and leaves it clear. I use a regular propane torch to do this. Just go fast and do not stop on any one spot and you can see the bubbles release.
The backsplashes and sidesplashes are sealed to the countertops but not to the walls. I plan to seal them after the 2 coat and before the final coat. I can do all the repair work to the walls and cut them in without touching the countertops. I am also attaching a large mirror vanity in front that will cover a large portion of the wall. This was all mainly for organizational purposes. I have some people coming to help me in a few weeks to paint, so I wanted to have the countertops done. When pouring epoxy it is important not to have a lot of dust in the air and when I start painting and sanding paint coats there will be tons of it.
1 Like
J
Thank you for the response,I do use the torch for top bubbles but usually the small pieces like stone shells quartz seem to trap bubbles under the pieces and then you can see them after it hardens. The suggestion to heat the two parts prior to the pour I have not done. My shop is always 70fwith humidity controlled.
I will heat the epoxy up to 95 f prior to my next pour .
Thank you so much
This is my last epoxy job
It is a cross section of an American Elm tree that was cut in the late 1950’s
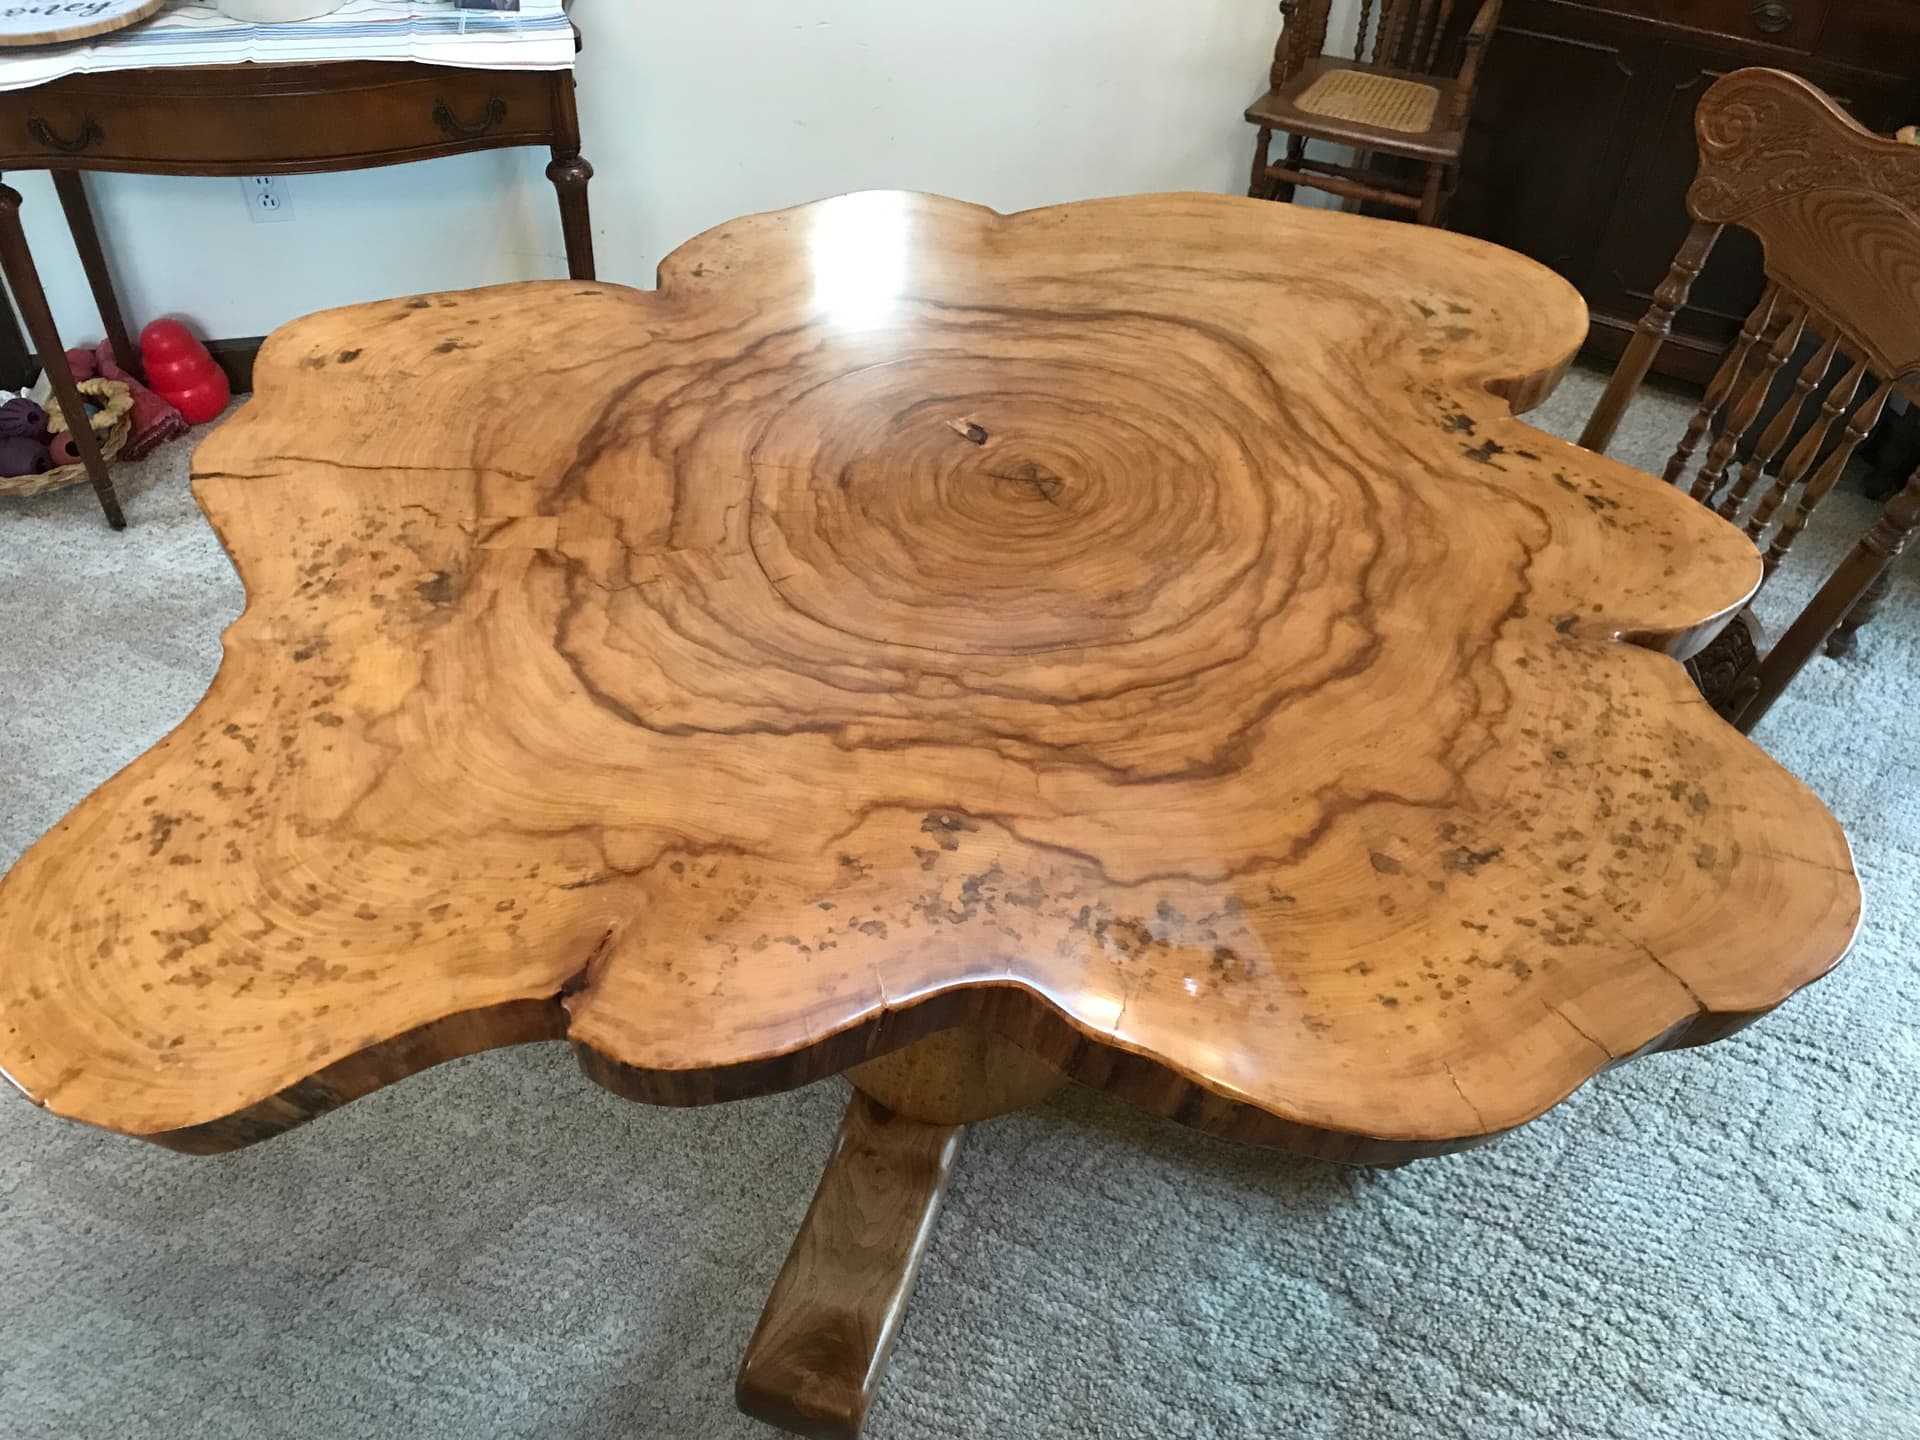

To give some scale the top is 68” across
9 Likes
So another tip is doing a seal coat when epoxying wood, shell or rock. I paint on a thin coat over the wood and rocks and give it around 12hrs to get really tacky and then pour my flood coat. The first thin coat will trap any air into the wood or rock and keep it from releasing into the larger pour. I let that get hard then sand it down flat with 180 grit sandpaper. After its perfectly flat I pour my final coat with countertop epoxy.


3 Likes
Thank you so much for you insight ,sorry for a divergence form OF and CNC work
Dave
1 Like


My future brother in law asked if I could make a ringbox that reflected my sister’s love of travel. Extra heart added for the location where the proposal is going to happen.
18 Likes
Very nice.
What end mill did you use? Working on small items myself.
They getting engaged on Diego Garcia?
I used an 1/8" endmill for the pocket and profile cuts and just a 1/4" 60 degree bit for the globe outline.
They are going to the Maldives.
very nice, I live in Flushing so we are neighbors
@PaulC Not quite… I haven’t lived in the area in quite awhile. Lived in Fenton/Grand Blanc for many years up until around 2004, then a few moves/jobs later and now I’m in Phoenix.

14 Likes
Mike, very nice work.