Complete newb here with CNC. I got my Gen 2 elite fully assembled and have validated everything is working correctly, updated the firmware to the latest available, and read all the manuals (RTFM covered). I downloaded the bundled software and fumbled through creating a tool path for flatting my waste board. I somehow got it done, but had to cheat by purchasing a larger flattening bit than what I specified in the tool path because it didn’t get the sides. I have yet to setup the tool setter or do anything with the tool changer (feature not fully implemented). The tool setter is a bit of a mystery to me, it sits above my waste board and is somehow supposed to be able to figure out the correct Z height for a new project? I am definitely at a disconnect with this one. Bigger issue, I don’t even know where to start with the software. The software asks me to specify a work area, that could be the size of my piece or the size of the CNC itself, not completely clear to me. I am at a point where I don’t know where to begin… I could overlay my waste board with another sheet and try to figure this out, but there has to be a better resource to help me get started. I would like to carve some of the test files, but I don’t know which bit to use or where the origin point is to begin the carve, among other things. Is this a fuss around and find out type of situation or is there a good blog or resource to help me get started? I have watched a couple of Youtube videos, but with the new Redline controller and Carvaco Maker, there isn’t a lot of let’s get started from no prior knowledge out there. Please send help, thanks.
I would start by looking for carvco maker youtube videos. The cnc is just the tool to follow what you made in the design software.
I taught high school students for 20 years on cnc projects. While I used V-Carve, the processes are the same. It all revolves around the machine will do what ever you program, so double and triple check all your parameters.
- Work from the center of the workpiece- This allows time to stop the machine if its doing something unexpected and helps stay away from your clamps. If I had a job that was 4"x4" my blank piece would be 5 1/2"x 5 1/2"
- Check your settings- 100 mm is smaller than 100 inches ( I had another teacher crash the school cnc because of the wrong job setup)
- Make sure you have selected the correct post processor.
- GO SLOW. Start your feed rates at 25 ipm until you get used to the machine.
- Check your Z gap and Z clearance before proceeding. Learn to set your job origin.
- Never use an Etsy file (at the start). Learn to read the Gcode so you know what’s going to happen.
- Check for clearance around the machine and keep well back when in operation (some rapid movements can go insanely fast and unexpected)
- Ask for help. This forum has many extremely knowledgeable people
Thanks, this is a good starting point and likely will help me avoid many common mistakes, such as running into my clamps. I know there is a learning curve, just trying to take it all in at once so I can put everything together to take my design and execute a tool path to bring that to life. 
Right now I am trying to learn how to establish the job origin. What I mean by that is I know the controller on the CNC has a work position and a machine position. First step is to home all the axises, makes complete sense. If I put indexing pins in my waste board and establish a job origin, I can zero my work position or I can take note of those coordinates based on the machine position. I don’t know which way to go with this and why it will matter, any guidance on this? The other missing piece for me is the design software… in my mind I separate the CNC software as a g-code processor and the design software as a drawing to g-code. The design software asks for the work area when I create a new project, is that the X and Y maximum or is it based on the size of my project? For example, if I am creating a 4in x 36in sign, is that my work area or is it the maximum X and Y? What does zeroing the machine position do for me vs. noting the coordinates for the first pair of index pins and perhaps additional origin pins?
If I was going to cut a 8in by 8in square 3/4 deep and worked from my machine position to get to my origin point (bottom left for the same of this example), I believe this is what the g-code would look like to accomplish that (see below). I roughly understanding I could set G54 in my CNC software (offset) and use that in my g-code so my starting point will be X0 Y0 vs. X5 Y5 which is relative to machine position. I will do a G00 based on the machine position, completely ignoring the “work position.” What brings in the confusion in the above is machine vs. work position coordinates and how that ties into the design software.
(8x8 Outside Square - 0.75 Deep)
(Tool: 0.5in End Mill - Manual Offset Applied)
(Material Corner is X5 Y5)
G20 (Inches)
G90 (Absolute)
M03 S1200 (Spindle ON)
(Move to safe start position - 0.25in off the corner)
G00 Z1.0
G00 X4.75 Y4.75
(Pass 1 - Depth -0.25)
G01 Z-0.25 F10.0
G01 X13.25 F20.0 (Cut along bottom edge)
G01 Y13.25 (Cut along right edge)
G01 X4.75 (Cut along top edge)
G01 Y4.75 (Cut along left edge)
(Pass 2 - Depth -0.50)
G01 Z-0.50 F10.0
G01 X13.25
G01 Y13.25
G01 X4.75
G01 Y4.75
(Pass 3 - Depth -0.75)
G01 Z-0.75 F10.0
G01 X13.25
G01 Y13.25
G01 X4.75
G01 Y4.75
(Retract and Finish)
G00 Z1.0
G00 X5.0 Y5.0 (Return to corner)
M05
M30
Ok lots of question which is good.
The machine will home on startup(machine origin)
Using the jog function on the display, move your x and y postion to create your work origin (0,0) I use a vbit and tape on the work material to locate that spot accurately. This is where the machine knows as centre (if you chose centre of the workpiece as your datum) (See pictures in the bottom of linked post)
As for aligning your piece first make sure your clamps can reach the piece (4 clamps if possible to be safe) In order to align to the spoilboard I manually cut a 1/16" deep v groove into the spoilboard in both X and Y positions. This ensures your work piece is parallel to the machine regardless of the clamps and t-tracks.
So the software asks for a size, think of it as canvas for a painting (generally you don’t go all the way to edges on a design- so if your canvas is 8x8 (Maximum size) and your design is 6x6 in the middle then no problem hitting clamps
If you work from centre (initially) you avoid offsets and indexing. Once you have mastered the basics then go to more advanced setups
Depth of cut- start small 0.0625 per pass- feel the machine 0.25 is too aggressive for a first cut
If the piece you are using is .75 thick you want your depth of cut to be .745 or use tabs on the edges. I rarely ever cut into my spoilboard 1. because it leaves and uneven surface and 2,- the remaining “onion skin” at the bottom holds the work piece from breaking free and being damaged by the spinning bit
Looking at your G-Code- remember to always have your work blank bigger than your project piece and always do the perimeter cutting last
Here’s a link on homing and setting up a work origin (the pictures are near the bottom of the post and its for the Masso but the process is the same.
as to using locating pins..YES they are very helpful and yes write down the center of the work peice absolute coordinates so that the job will be easily repeatable. but i have only done this with a fixture located on the locator pins then i clamp the work in that fixture as shown in this picture.
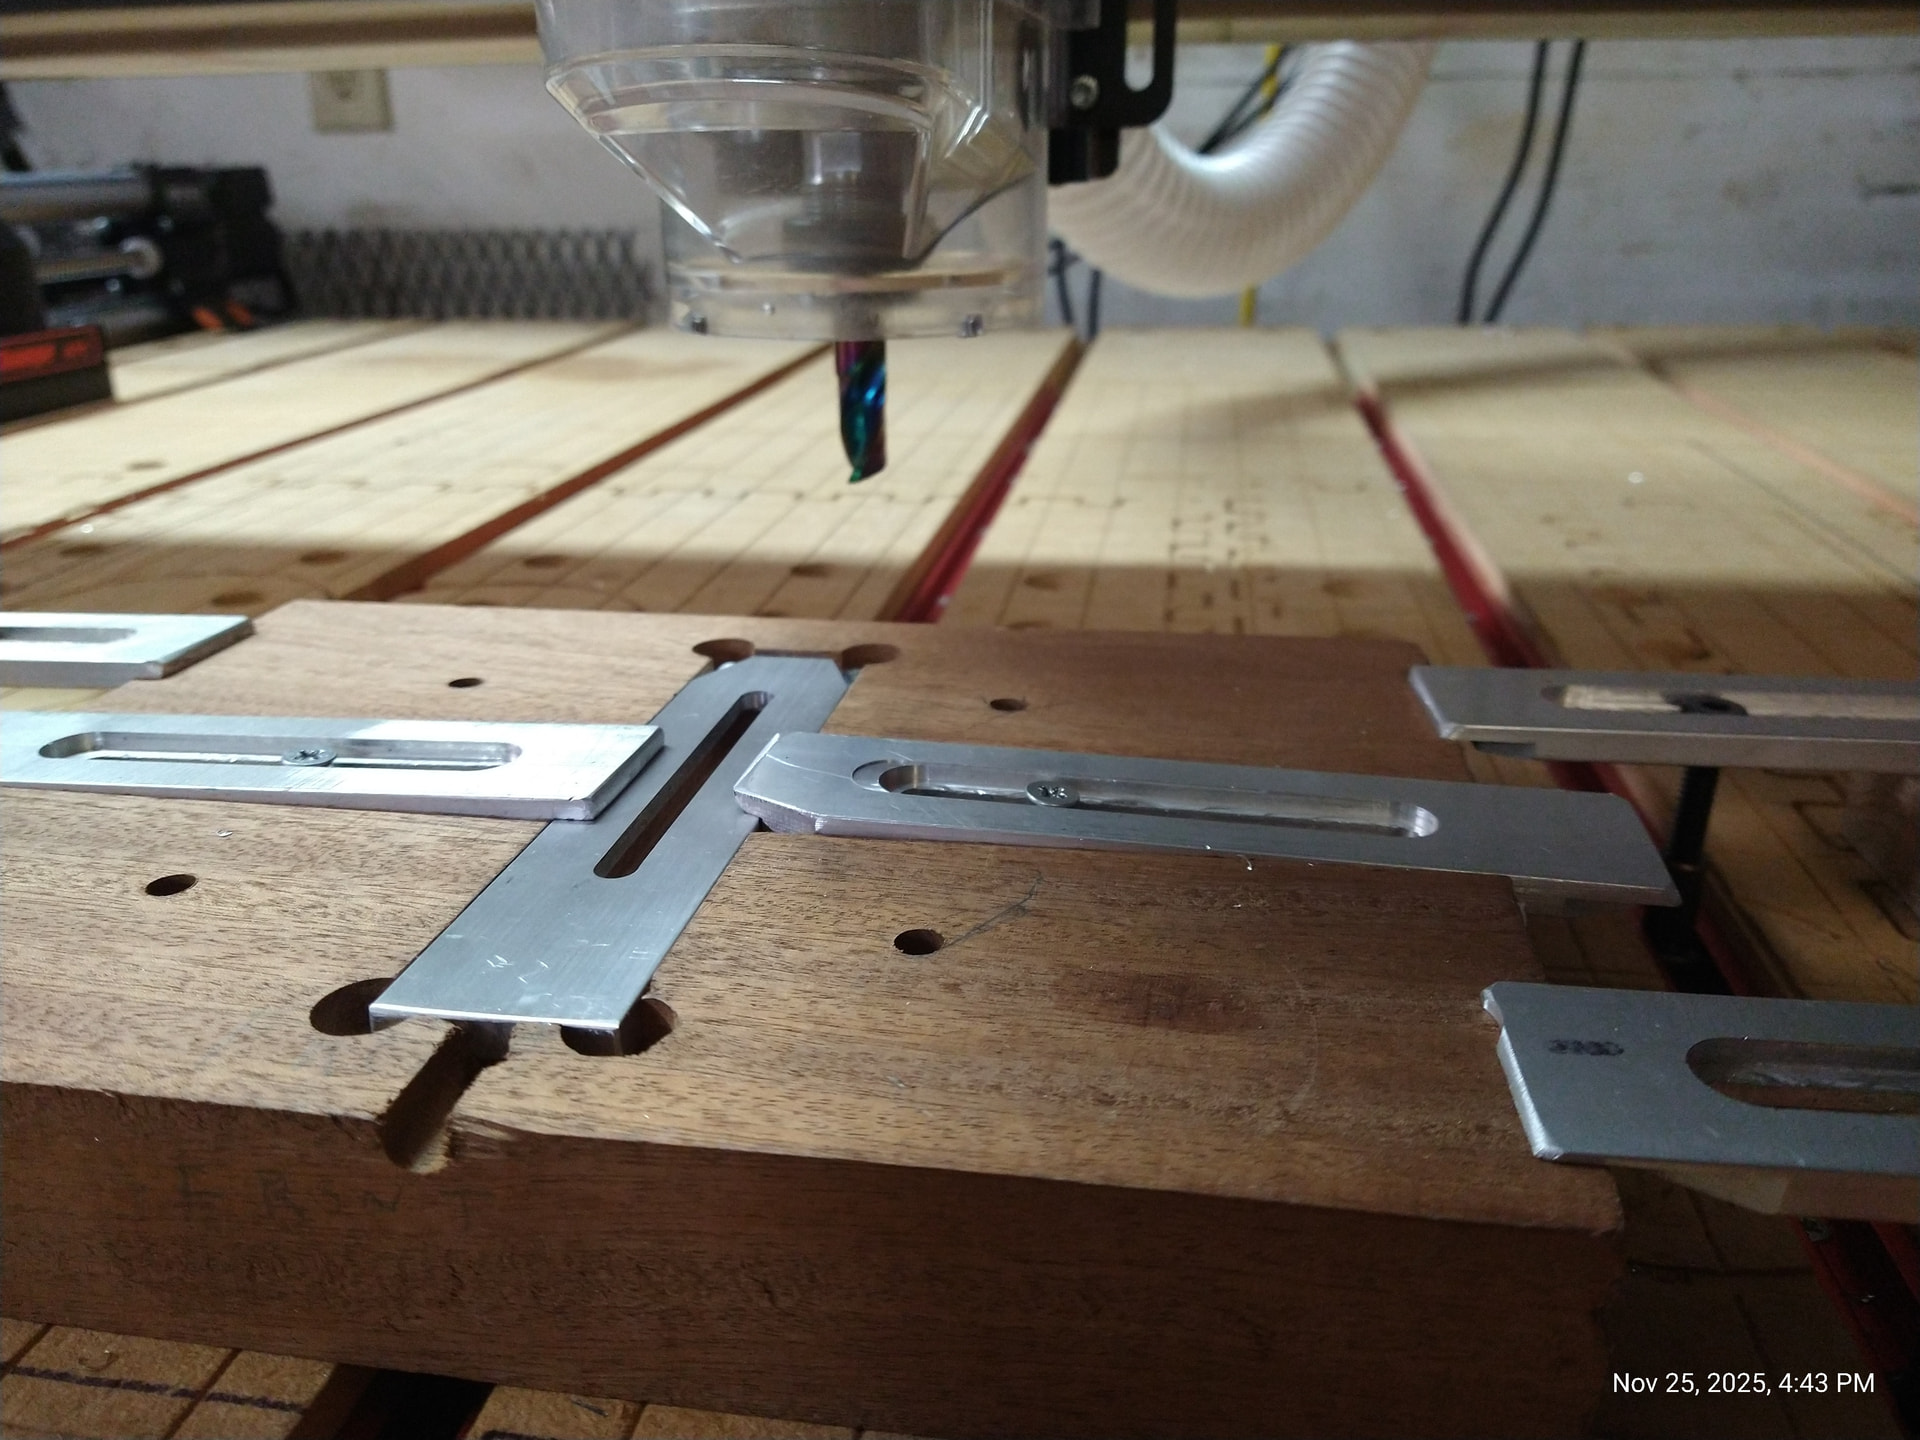
Another way of repeatably locating a job is to use a dog hole fence. A line of round dogholes in a 90 % pattern and then clamping the work against that. assuring that you have it in the same place and at right angles to your machine axis. By the way in a display of utter self-promotion, the clamps shown are made by Hilljack fabrication. I have been making and selling these for a while now and they work great and are the lowest profile clamps I know of. you can see them at hilljackfab.com the website and there is an independent review there as well.
good luck on your CNC adventure
Very smart, I am going to need to completely revamp my spoilboard so I can use micro jig clamps in a dovetail keyway.