Nice! Anymore, I probably make more utility items or parts for Xometry than ‘artsy’ type items, although I still do a bunch of those, most of which are contracted for me to make.
1 Like
Thanks for this! I just watched the video (can’t believe I’ve missed it since I try to catch as many of his videos as I can). This will definitely be a future project for my shop.
1 Like
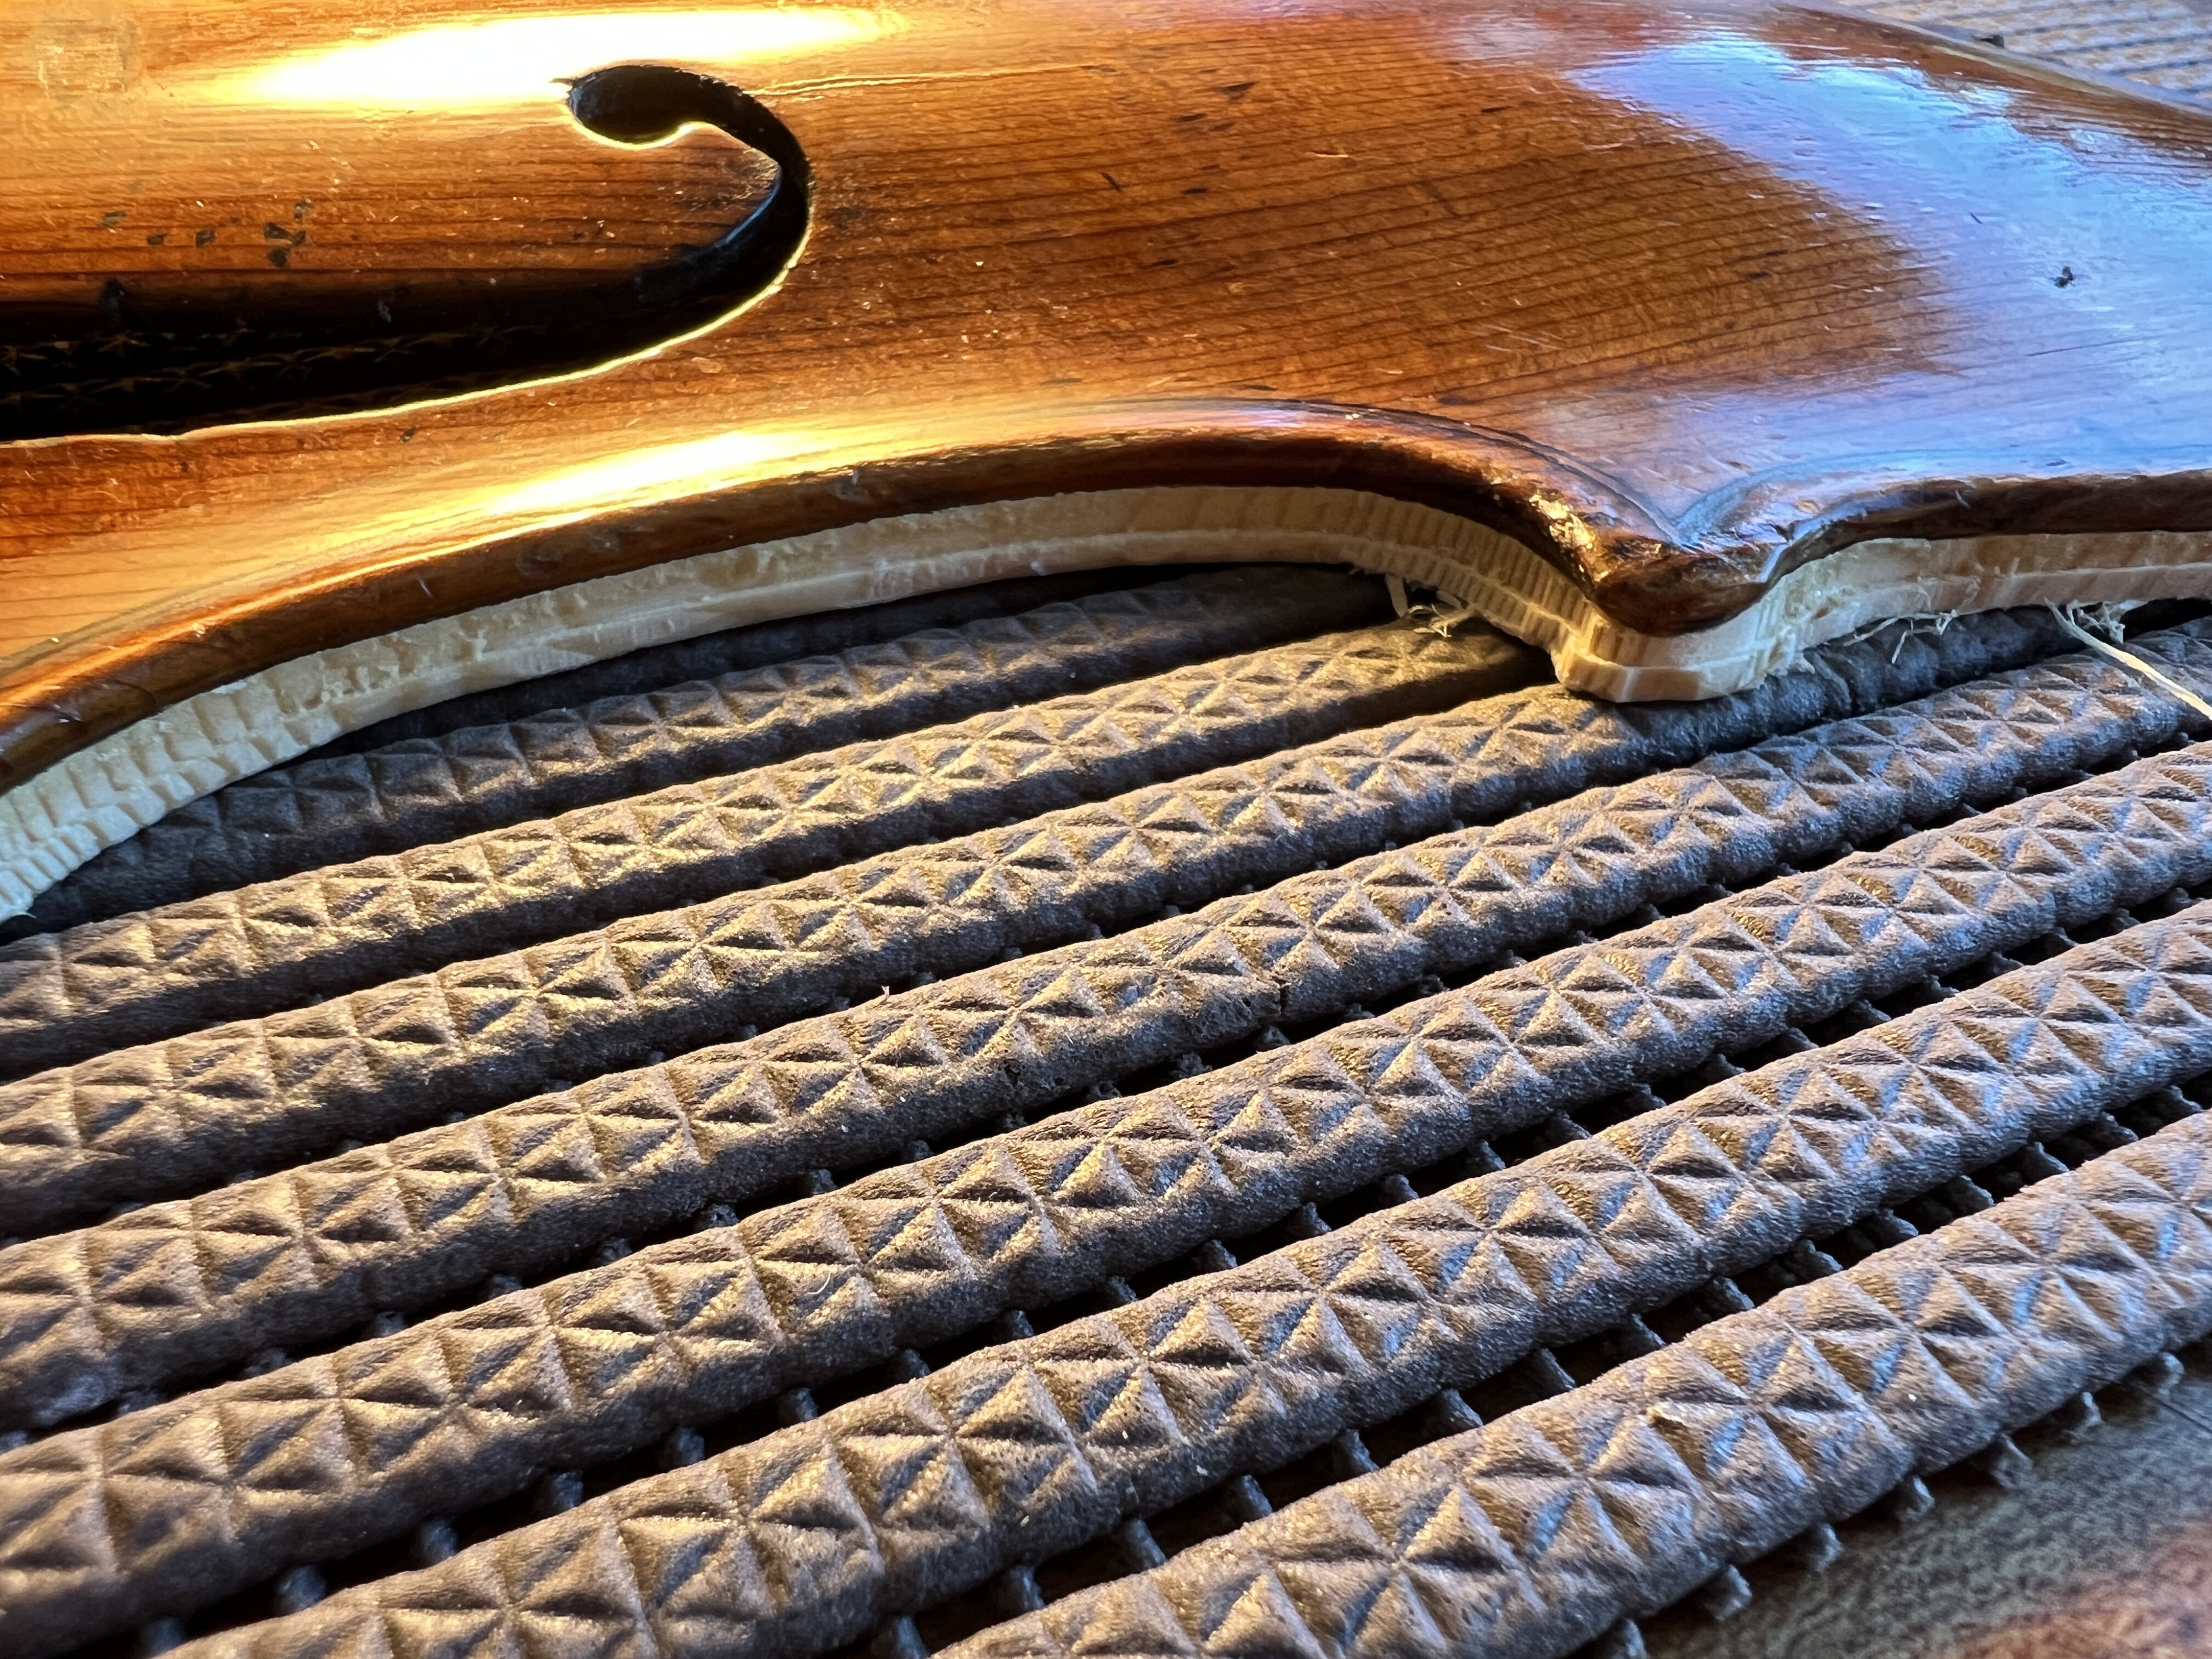
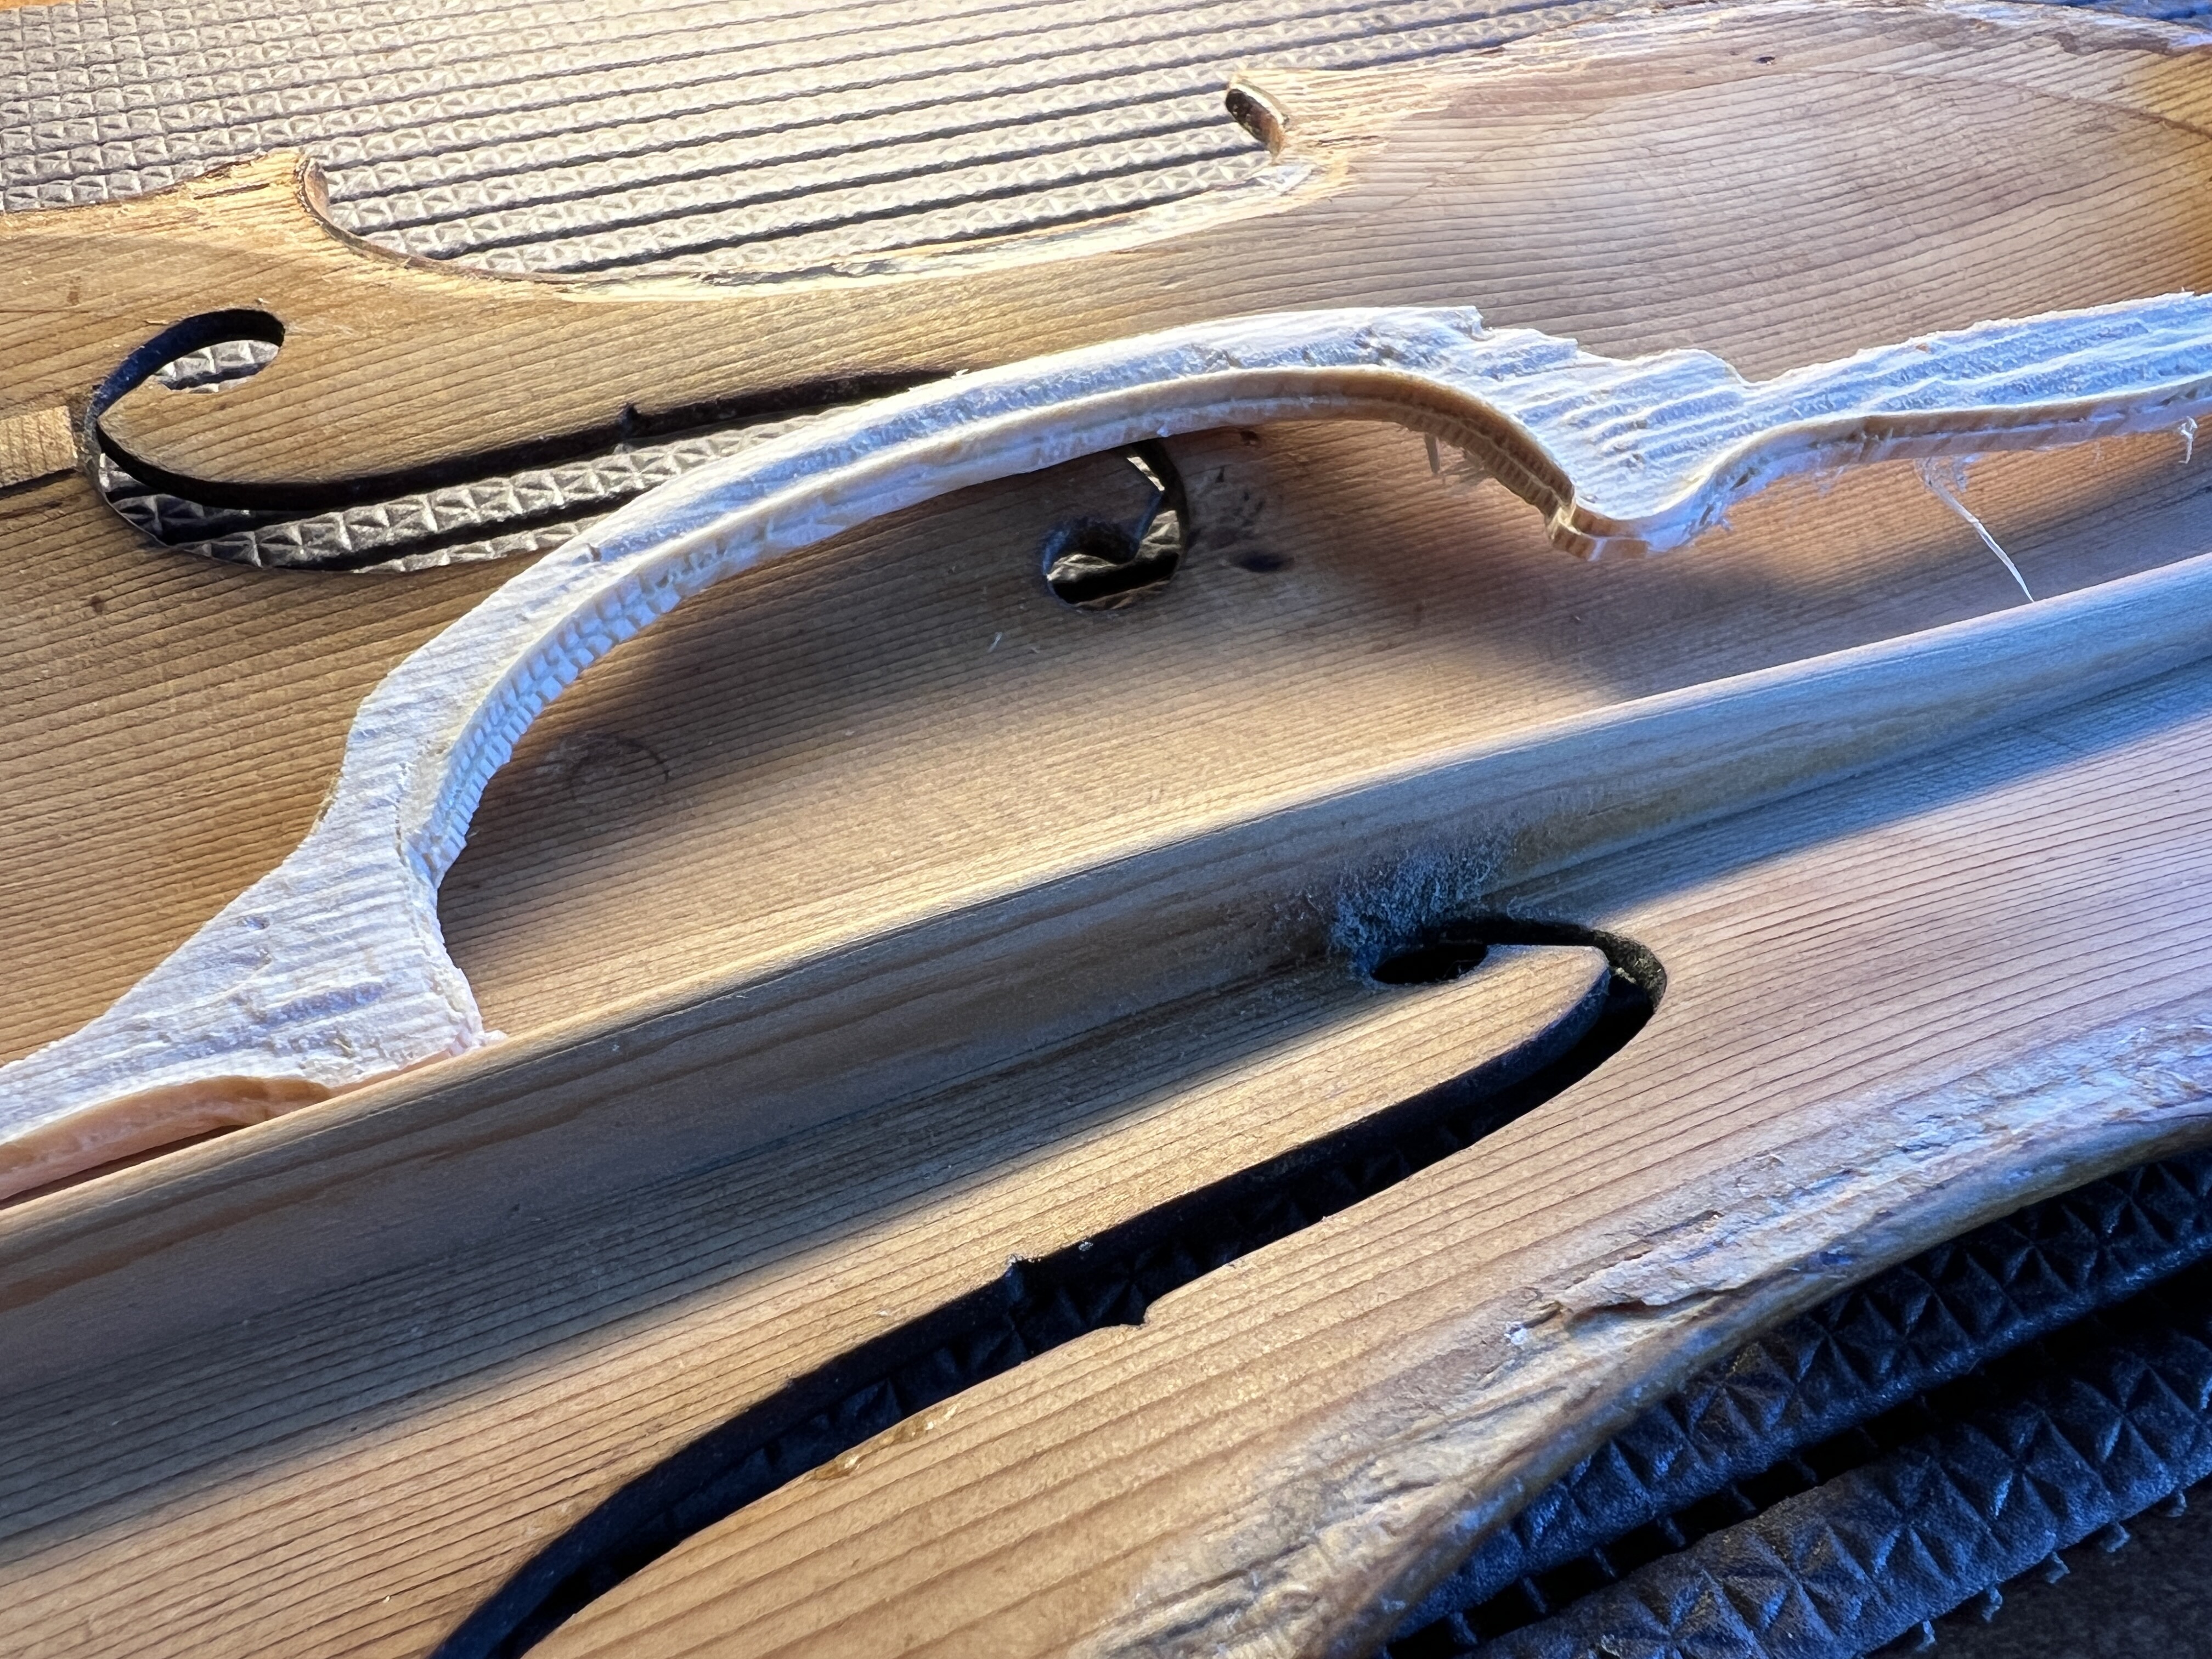
Inlays to fill violin underedge damage.
Basically what a dentist does to make an inlays.
There is a 3D scanner involved
6 Likes
Amazing to use your 1F as a tool for this work. My wife is a violinist and was able to appreciate the application…I just hope she understands nothing I do with ours will compare though.
This is beautiful!
What program do you use for the laser engraving? I’ve been using Lightburn, but it doesn’t do anything in 3D.
I use vcarve. I tried for a long time to laser mark my topos without it. I think it can be done to a certain extent without vcarve but with every solution I could find, you need to either make some big compromises or do very laborious computer work.
1 Like
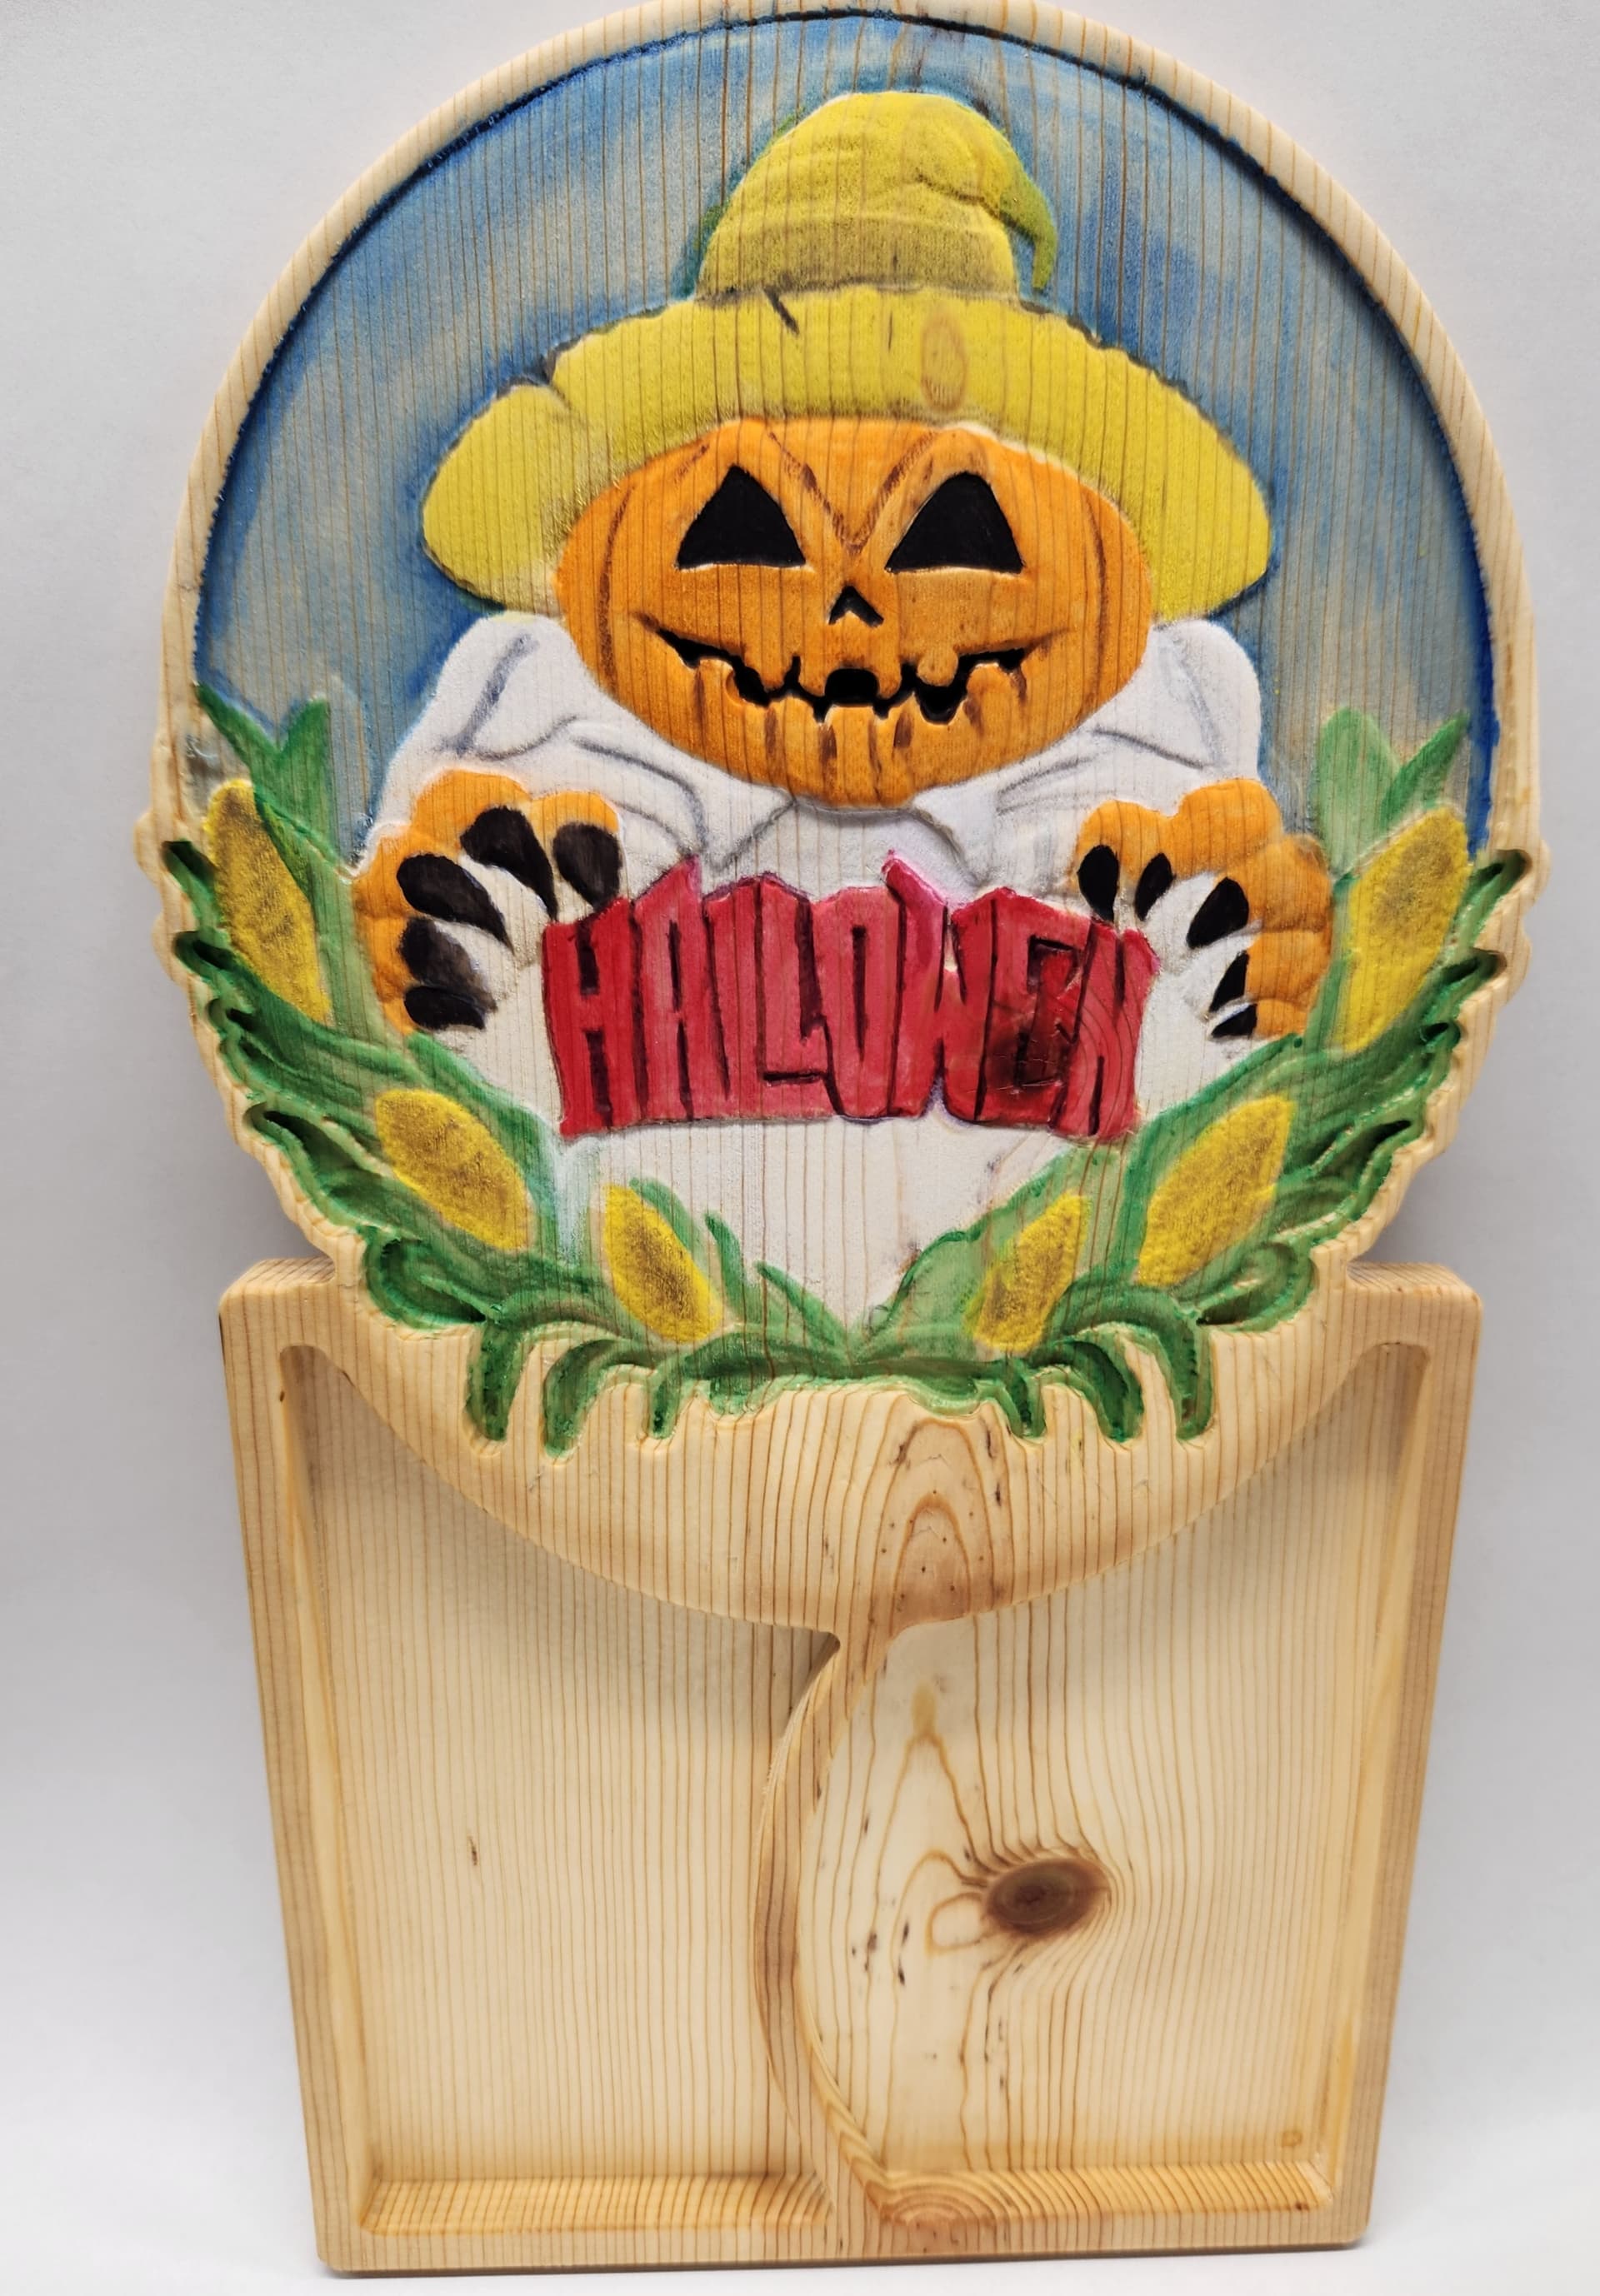
Quick carve for Birthday party for grandaughter…it’s being used to hold Candy Corn and peanut mix
Elite Journeyman, Aspire11.5, Jdnny bits. About 1.5 hrs for machine time. 2 hrs post processing to sand paint and finish. Crayola acrylic paints treated like watercolors to let grain bleed through from cheap pine board.
6 Likes
Very nice! I like how the colors bled.
Pony
Thanks, contolled chaos…lol
Is that a Mini-Gorilla cartridge? Looking to do this too.
Yeah, good eye. I looked at a lot of drum filters and this mini gorilla one seemed perfect for me. $220 (at woodcraft) is pretty steep but a good price for merv 16 level filtration. Size is great, it’s durable and can take a high flow rate, has a vacuum clean out port, and the sound reducing foam does seem to work. I hated spending the cash but it’s really nice knowing that I won’t need to buy a replacement filter in the foreseeable future.
2 Likes
Thanks! My brain needed confirmation for dimensional purposes as images can sometimes be deceiving. The vacuum port is a solid feature. This is looking like it could be a winner.
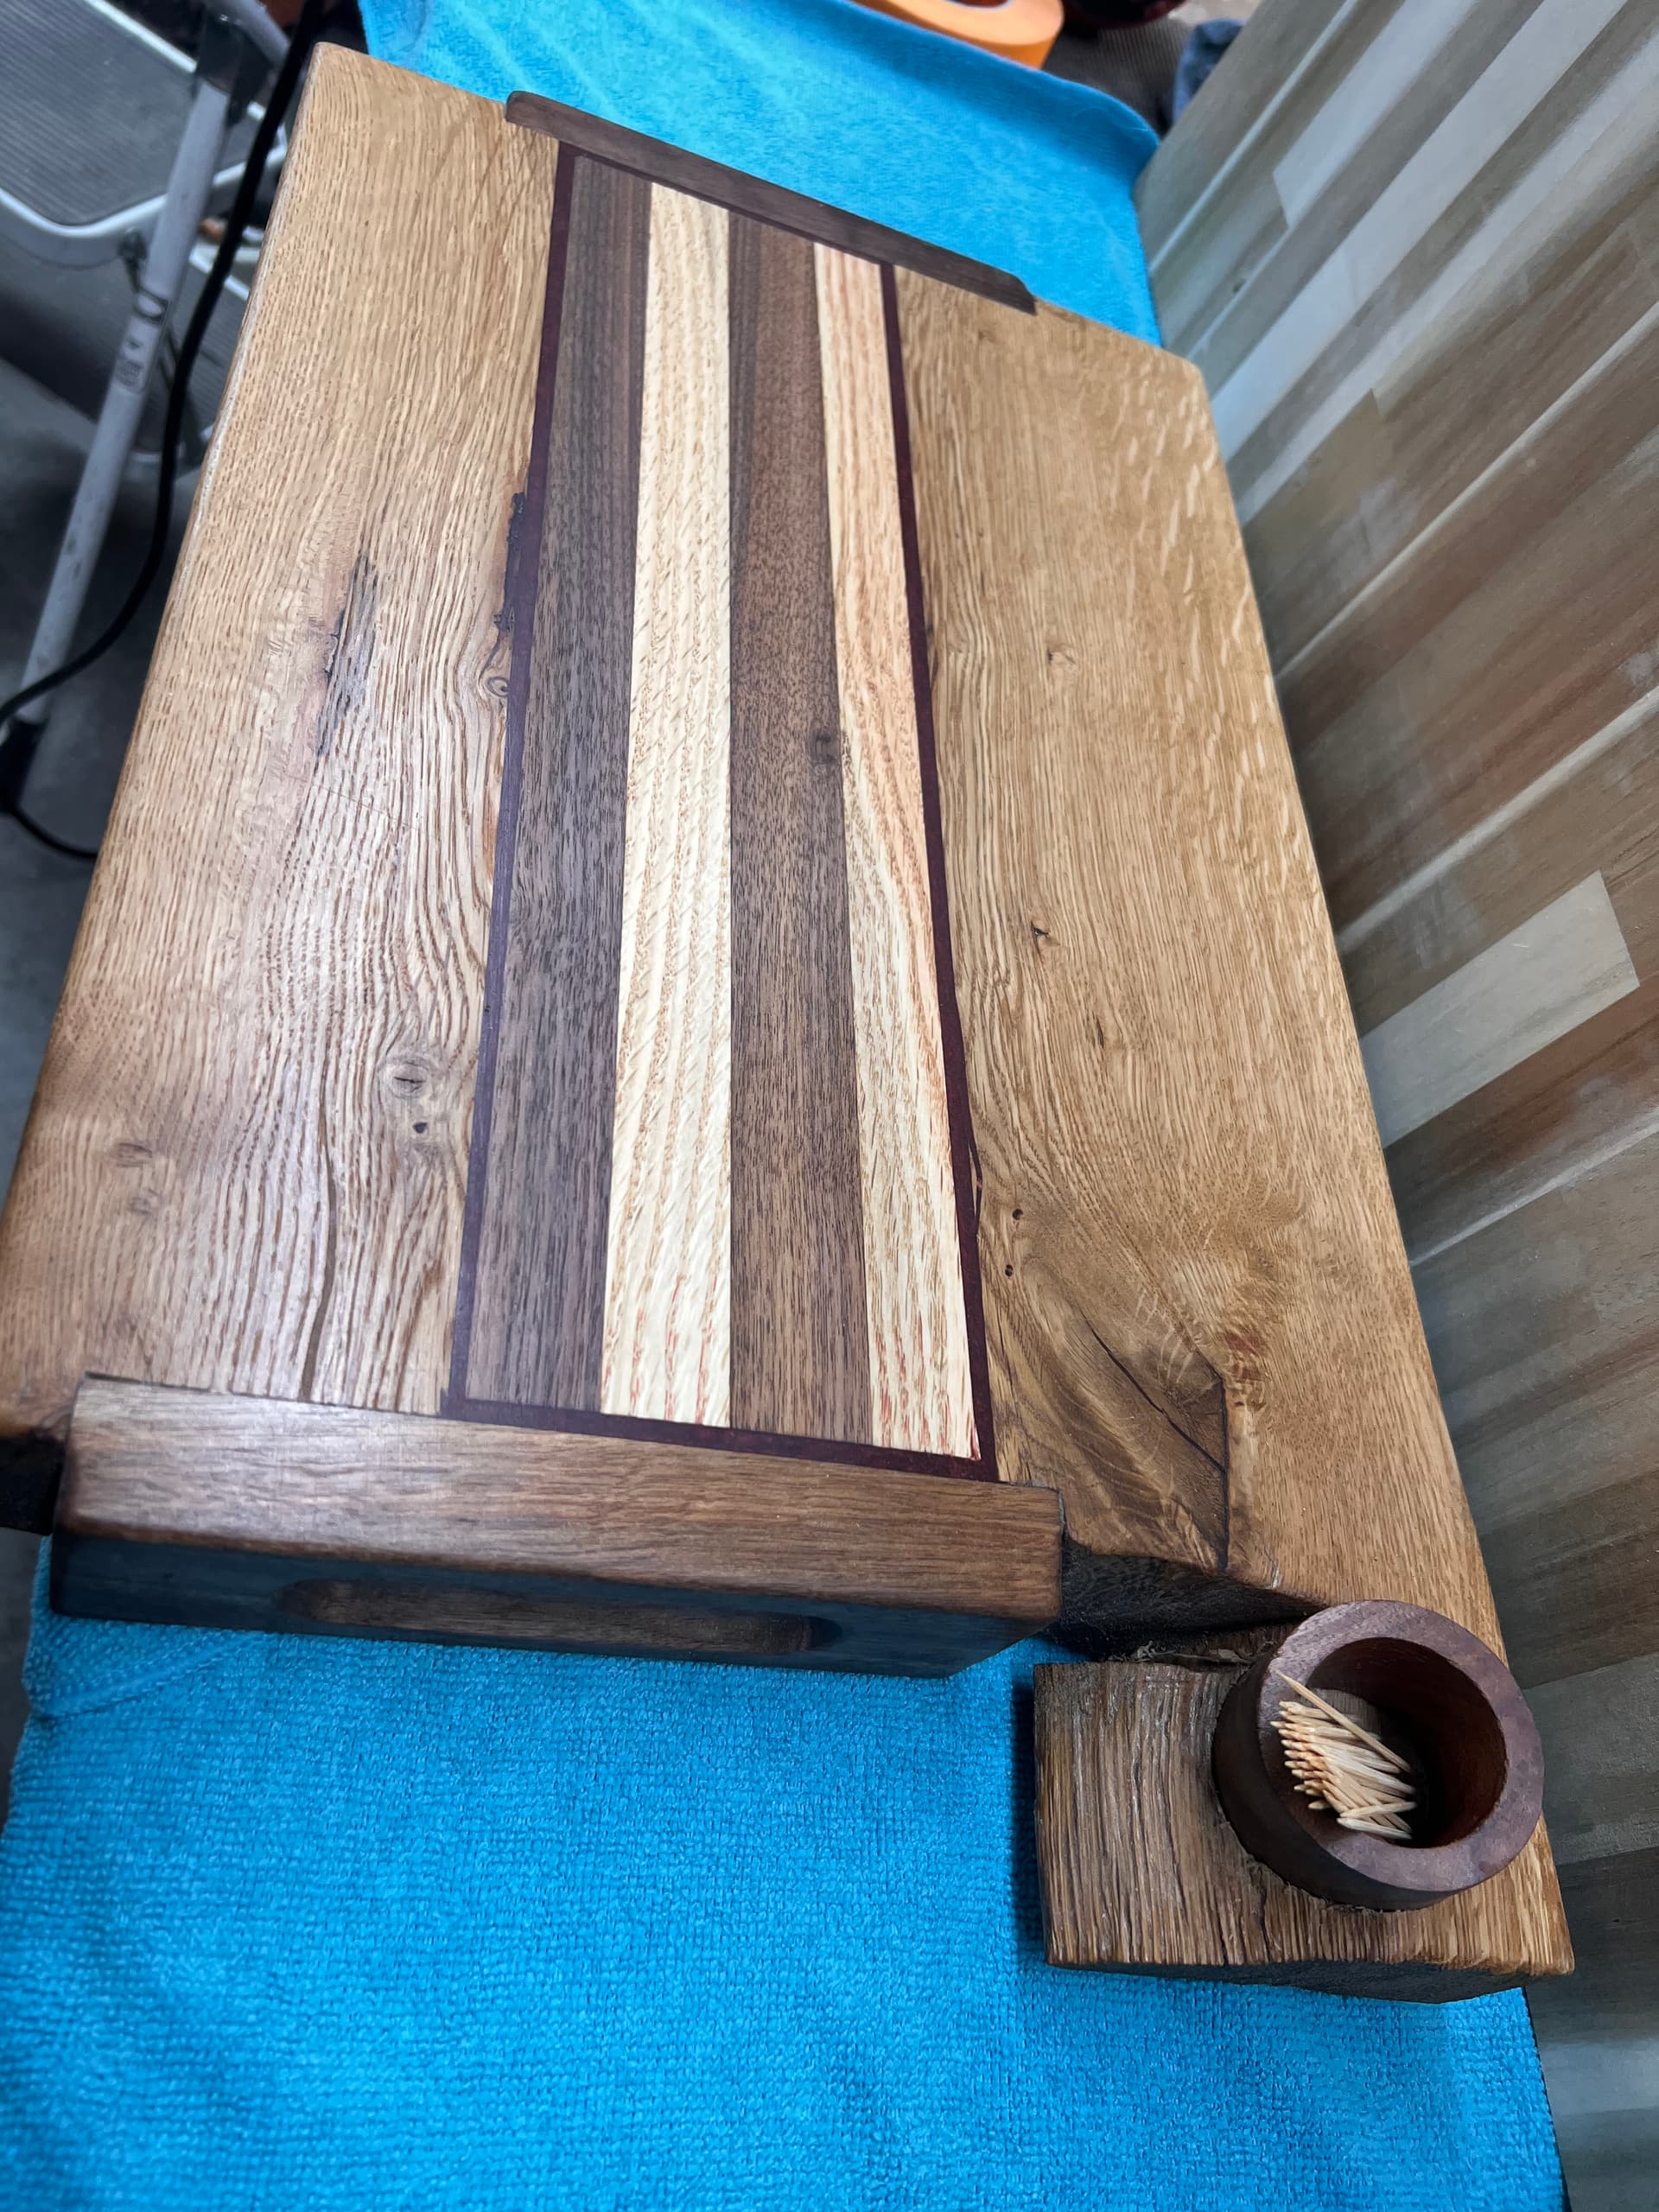
Black Oak With Black Walnut and White Oak and Red Epoxy
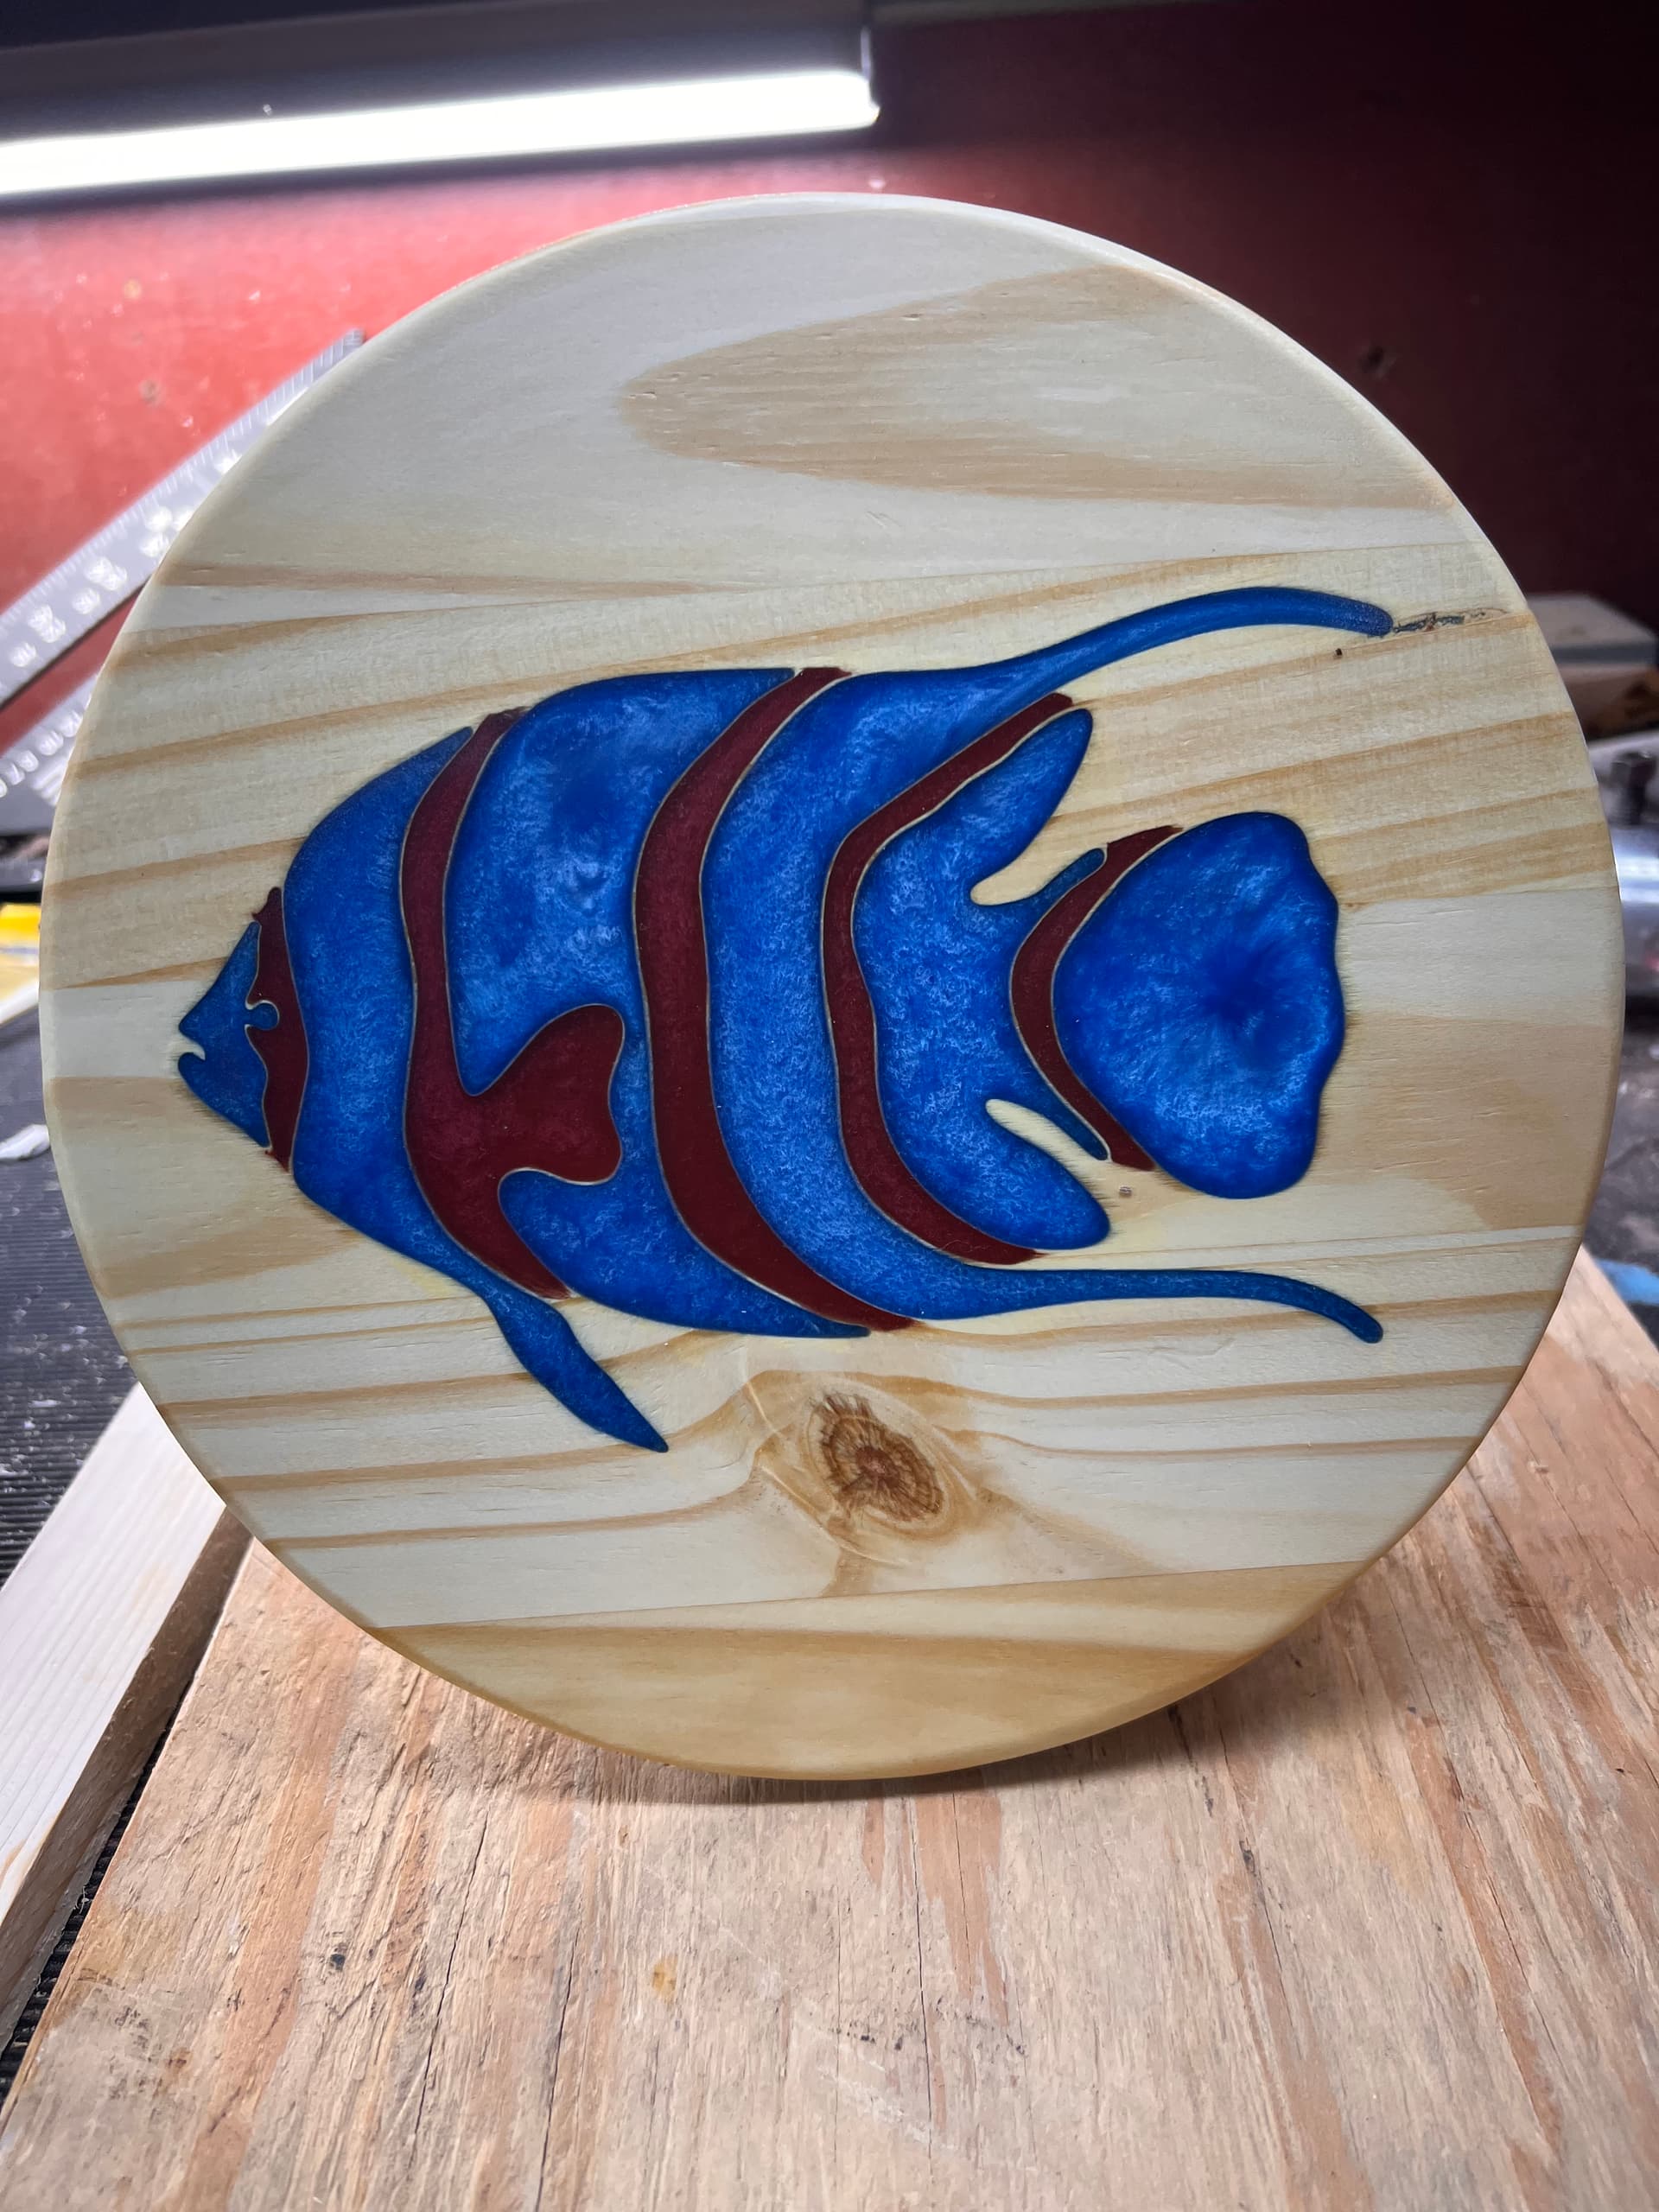
Red Epoxy and Blue Epoxy experiment
Green Epoxy in Kentucky Yellow Pine

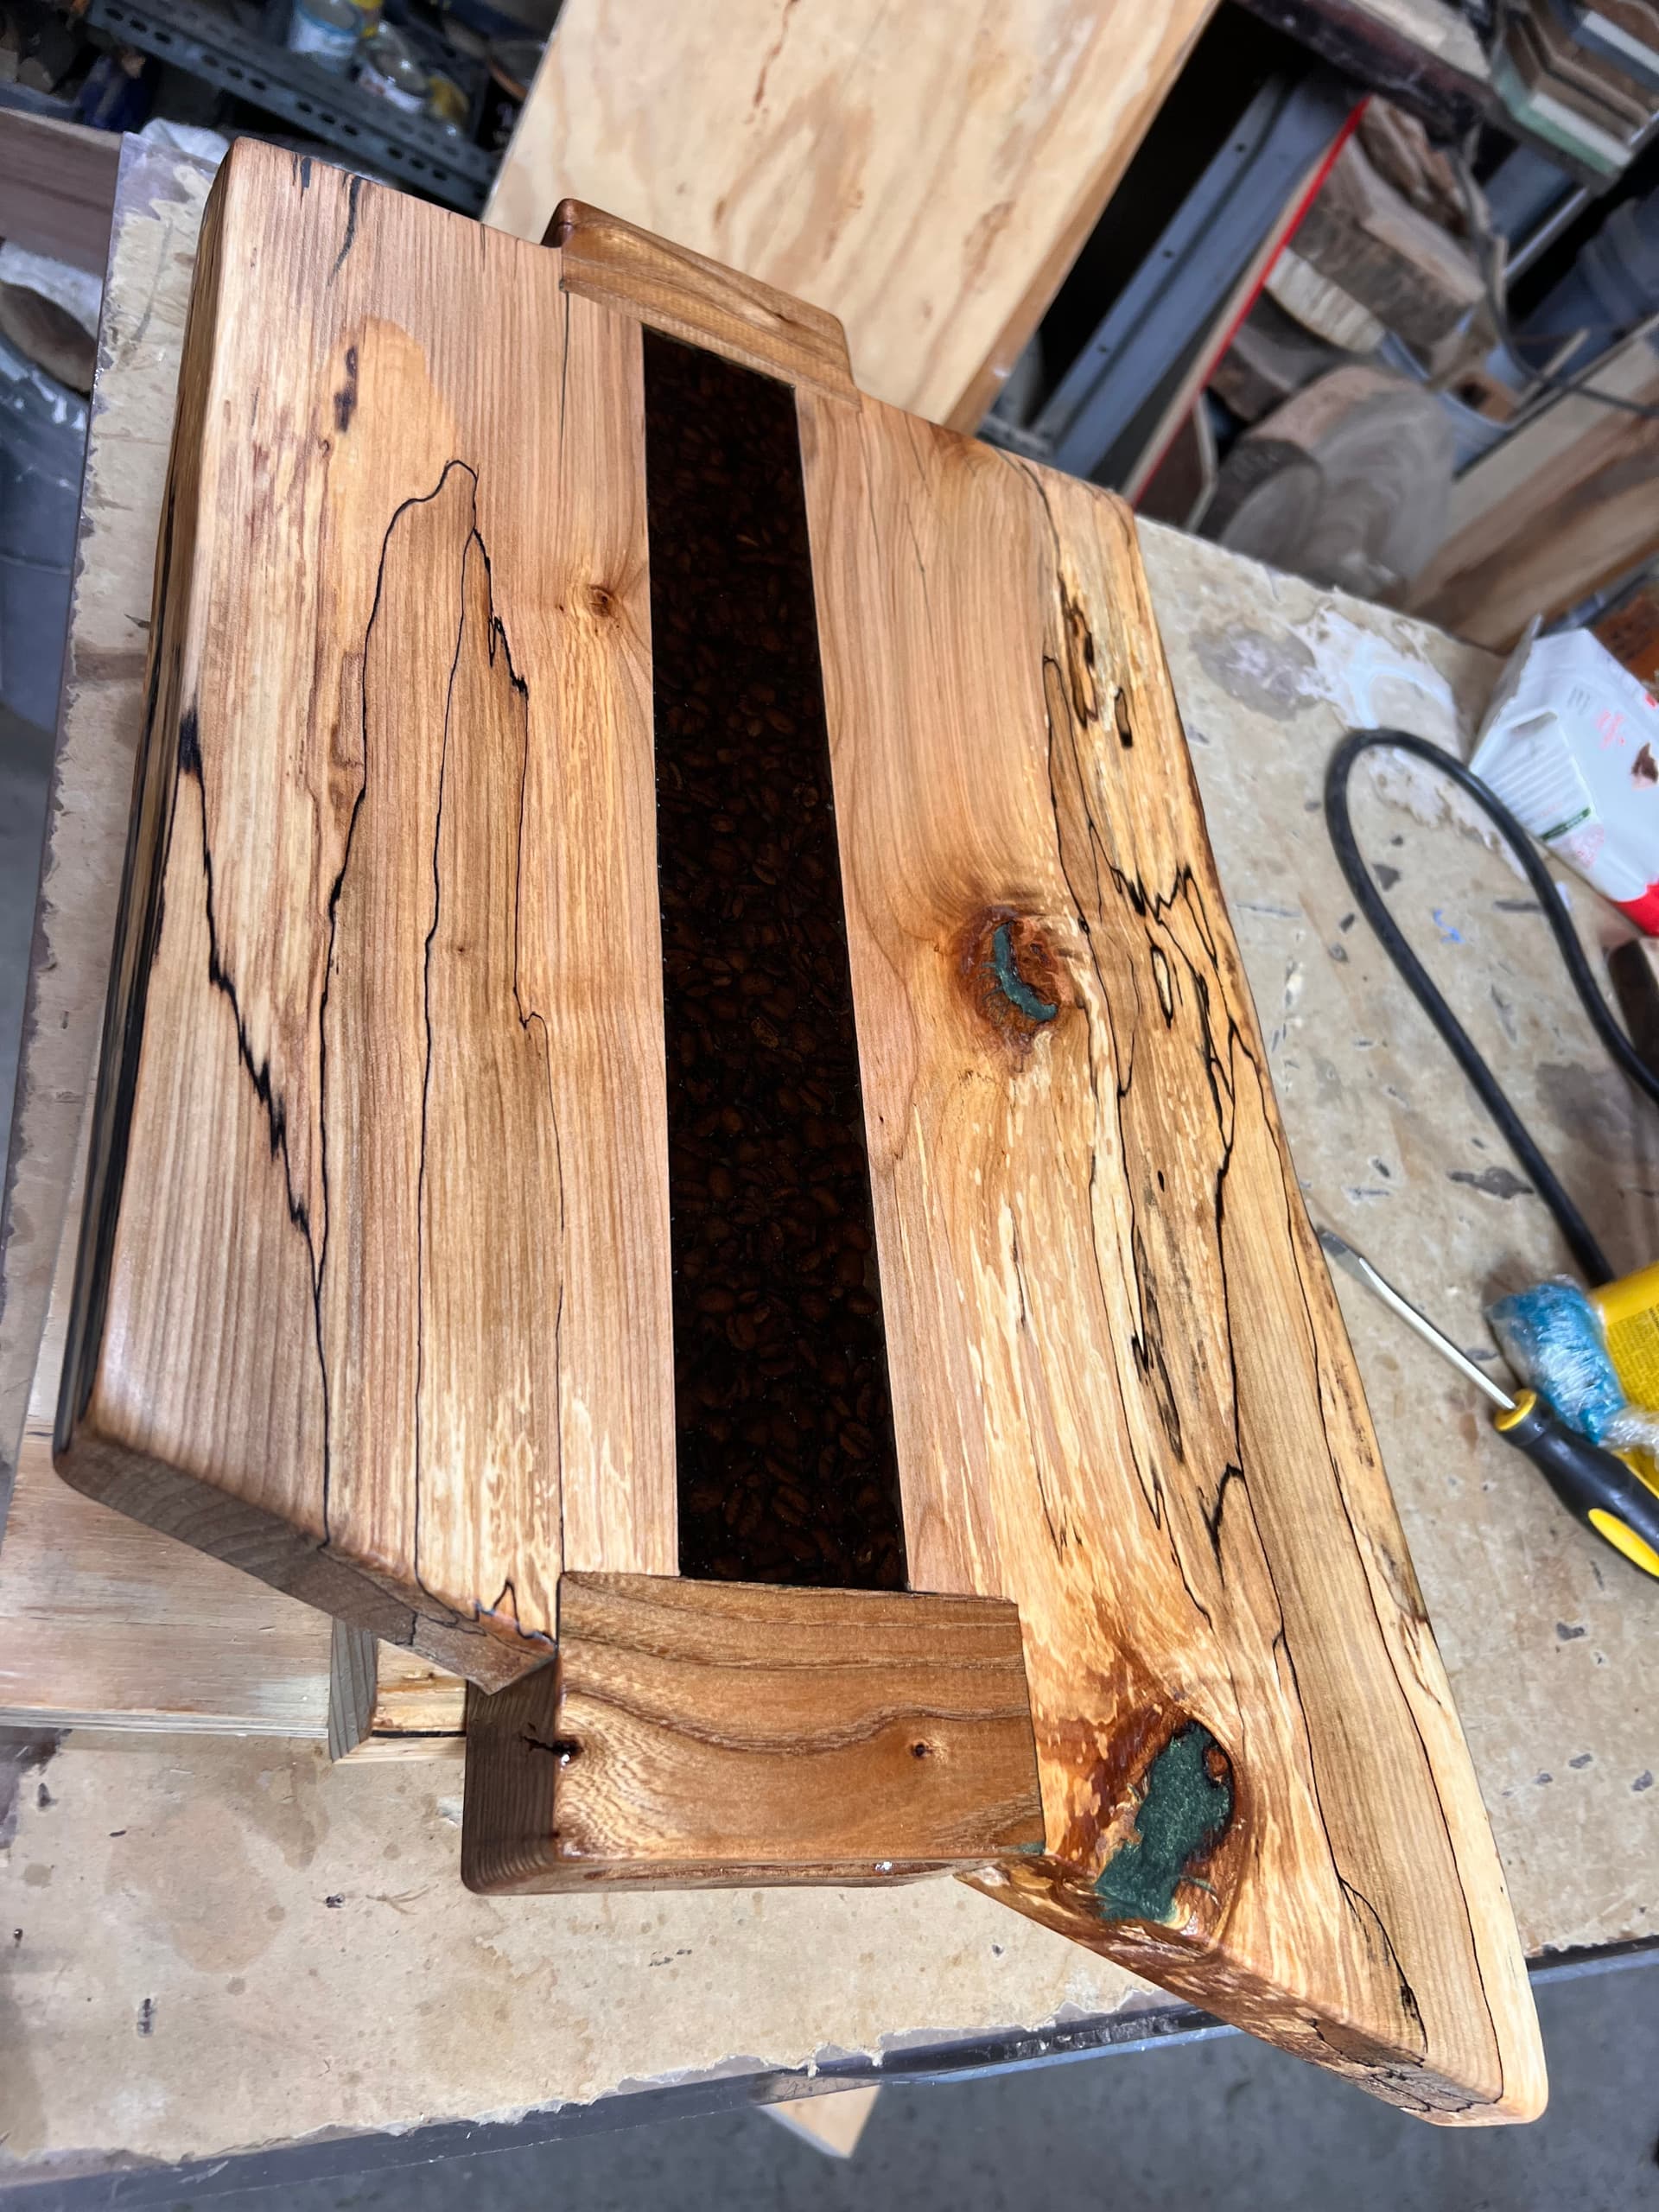
Coffee Beans in clear epoxy - Spalted Maple Not sure of the ends, salvaged from a table going to the dumpster. Think it’s Butternut

3 Likes
Very nicely done!
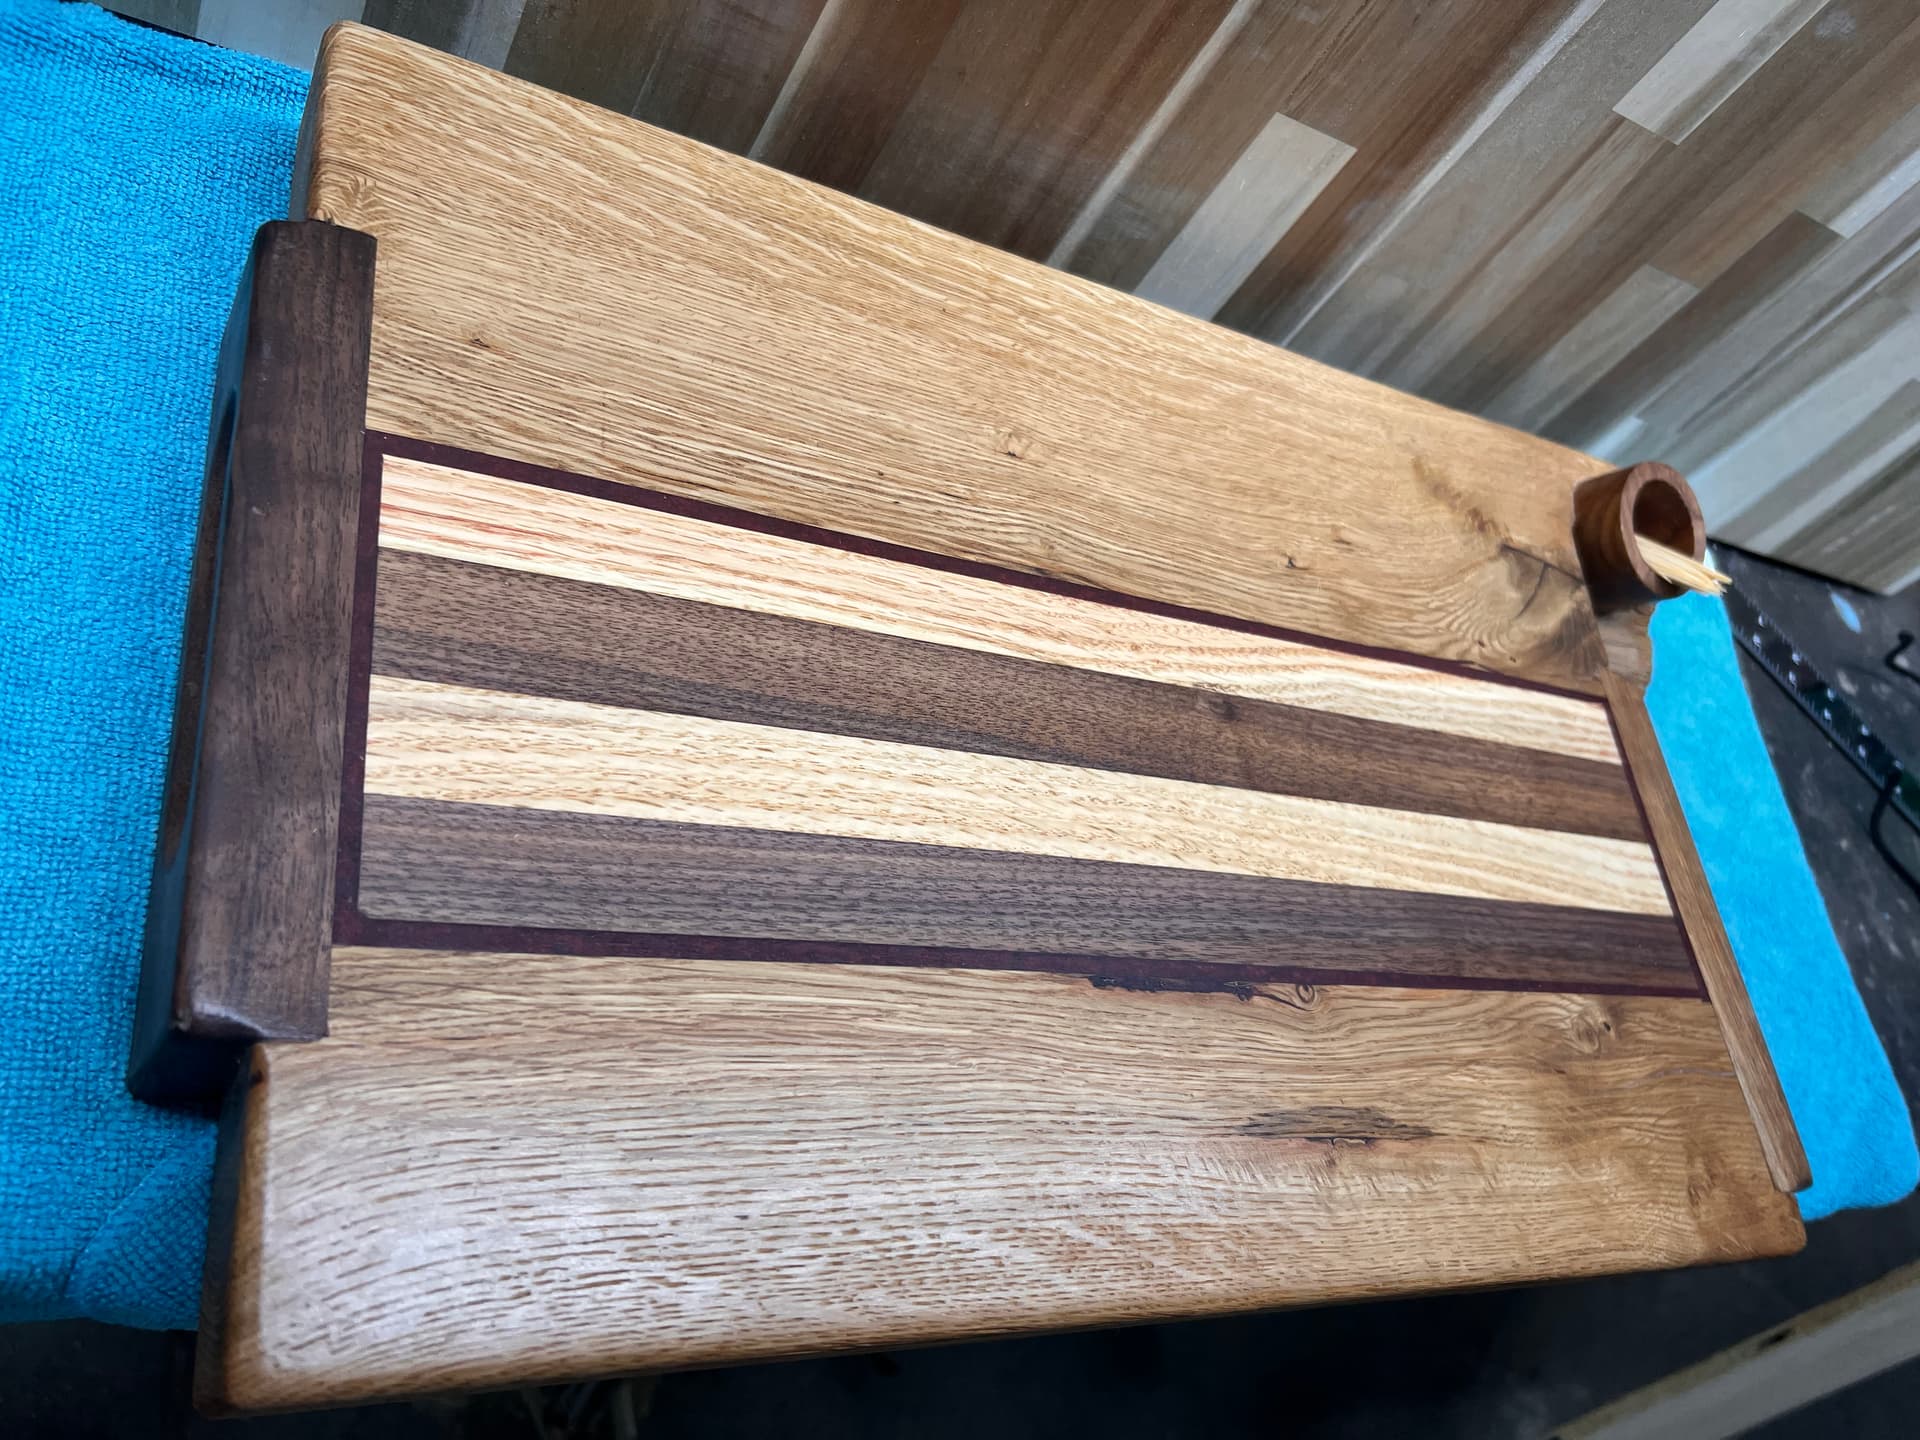
I really like the way you did your asymmetrical ends on the serving boards, gives them a very unique look.
Questions:
On you Angelfish? How thick did you leave the dividers between the epoxies and what bits did you use?
On the coffee beans in clean epoxy. Why did it turn out that dark or is the picture?
Suggestion:
I noticed you got a little bleed of the dye color into the wood around the epoxy. I’ve found that a coating of shellac (that you let dry obviously) before the pour, stops that from happening.
Thanks,
Pony
I liked the asymmetry as well, make it obvious the blend of geometric and natural.
On the angelfish, i did that in two steps. I poured the blue using a .0056 offset when I designed thinking that the thin wood wouldn’t show on the finish. Ended up I liked it so my next one, Wahoo, is being done the same way. I then poured the red after cleaning out with a razor the areas that red/blue met that my .0625 TBN did not get in. The pour was .25" and i used thin pour epoxy. easy to work with and sets/hardens overnight so I can do the next cut/pour without long delays. I left the piece on the machine because resetting it perfectly takes too much time and isn’t always successful (all though I’ve been lucky up till now)
I use center for layout and cutting, simpler to reset after you shut down at the end of day and reset the next morning. I also use machinist gauges to set ‘Z’.
I kind of thought that I would get some bleed on the bonefish. Kentucky Yellow pine really drinks everything up. I usually use a clear epoxy brushed on to seal the cut areas since I use either Tung oil for my charcuterie boards or Teak oil for signs that will likely go outside. Right now I am making different fish and fish bones for a customer who wants to hang on his bar/outdoor kitchen down in the Keys.
The ones I’m working on now are a test run (unless they turn out nice and he likes them ;–}
I have used sanding sealer previously and it works quite well to deter bleed (Kentucky yellow pine is thirsty and sometimes it still bleeds if I don’t take enough time to be thorough.)
The coffee beans were done in two pours of .25". the first pour was a mix of beans and just enough epoxy to make them adhere. The second pour was .25" to bring up to level. I think it’s too dark because the second pour is too shallow. There wasn’t any staining from the beans because they were hard set in place and completely coated. It may also be because the beans were really dark in nature and were too many in volume. I didn’t like the square cut for their recess.
I really like the toothpick holder in the first picture. It is a walnut napkin ring.
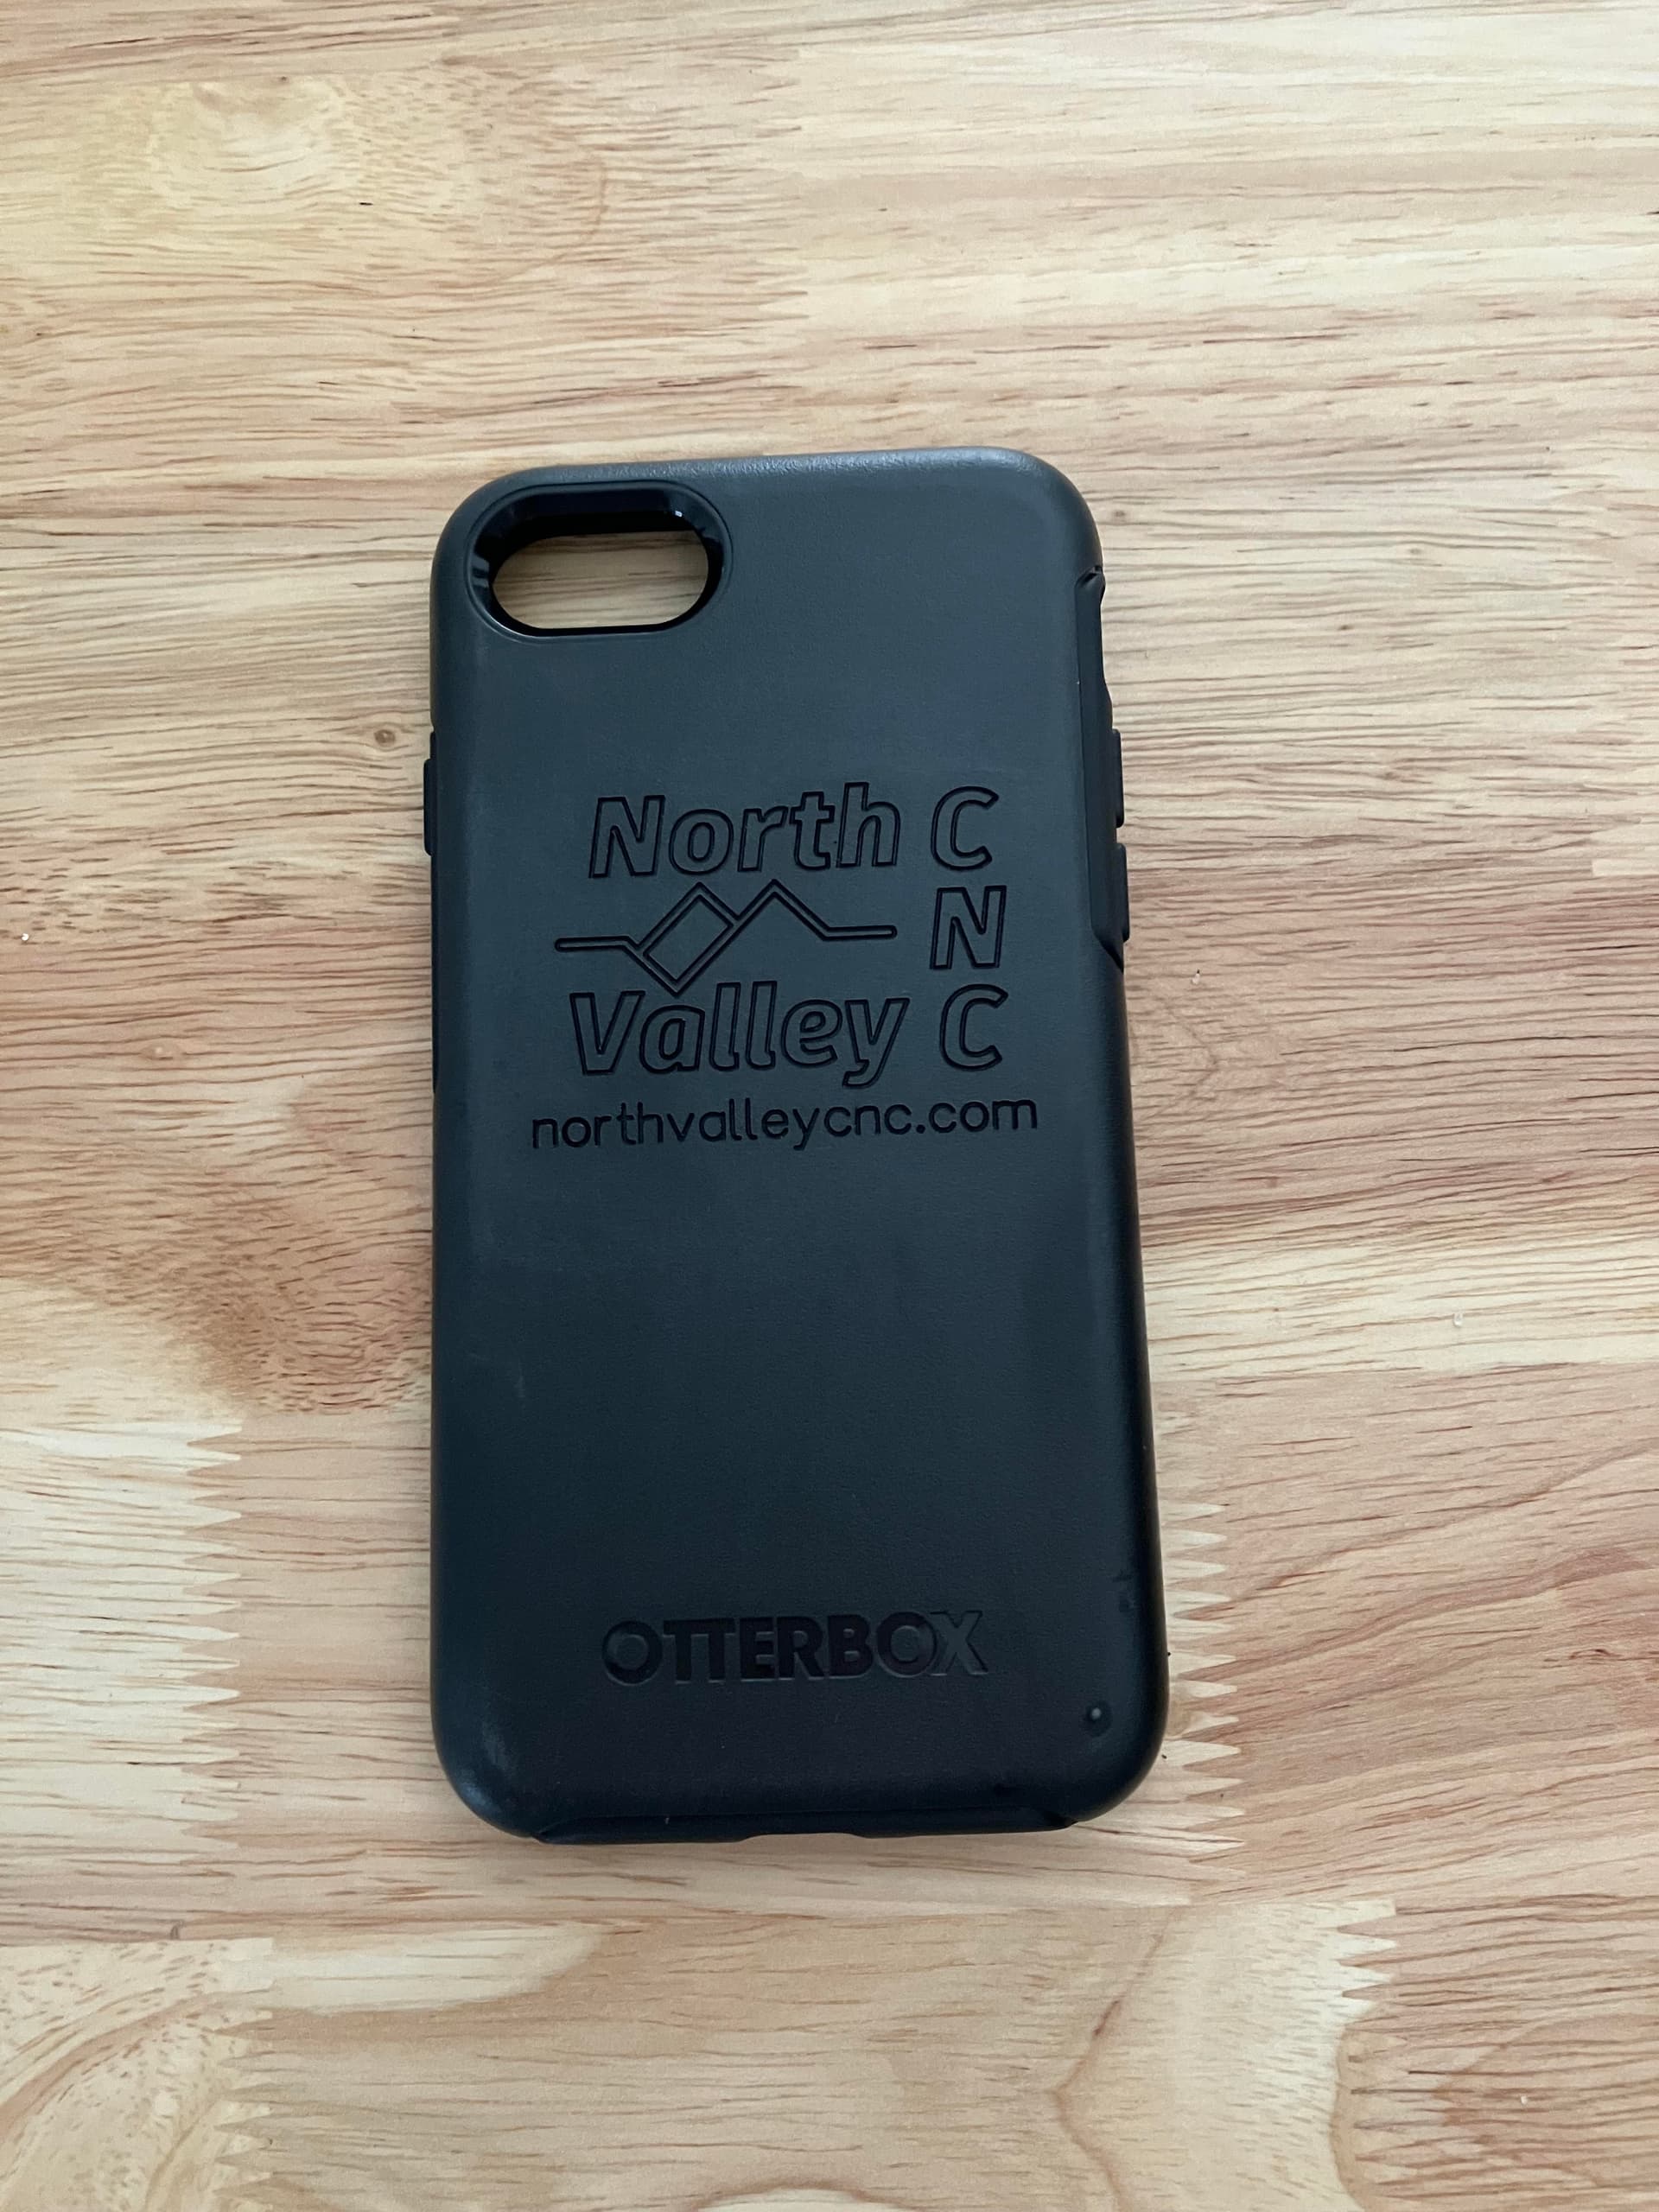
Engraved phone case I just completed. This is my 3rd or 4th one that turned out decent. It requires a very specific type of outer case material to work. Some materials just don’t do well.
11 Likes
What type of bit are you using?

Probably a v-bit, I don’t think anything else would be able to get the crisp corners.
1 Like
Sorry for any confusion, but I wanted to know exact bit for the case engraving? Assuming V-bit, but what angle, brand?