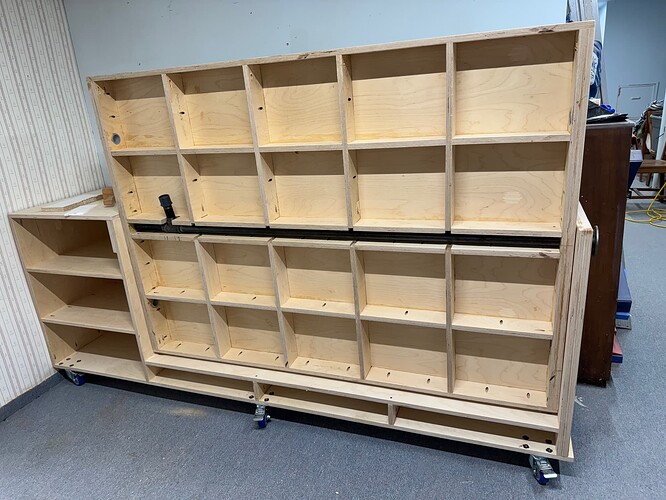
Thanks for the response. Would you mind posting a picture of your table so I can see your caster/leveling setup? I am building a 6 x 6 table for my Foreman but will use 6 or 8 casters because of the weight of the bench, CNC and what i expect to store underneath (wood, etc.)
Very interested in your table design. I have also purchased the Fisher plans on-line. I am interested in;
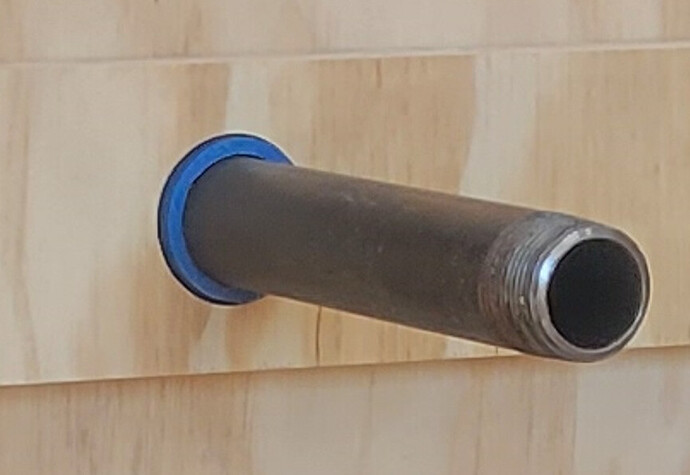
how much did you end up offsetting the pivot point from center? and what did you end up using as “bushings” for the iron pipe to rotate in? I note the Fisher just says " I found some plastic things at the home store"…I haven’t found those yet - wondered if you might have identified something more specific?
Thanks for the very thorough details of your built. It is very helpful!
I used some PVC pipe couplings when I built mine (but for a Jman). I did find the same fittings Drew used in my local ACE hardware store with some pool fittings. The PVC has been working fine, no issue.
the offset i used was 3.5" from the edge, 2" down from the top was to offset my torsion box thickness so it was flush. your milage will vary.
the ‘bushing’ i used is what Jim also referenced. i believe it was this one linked below and works very well.
I really like my table, but honestly don’t flip it that often unless i need the most out of my SF, but when i do it works great. i can’t really think of anything i would change other than maybe the legs, but thats mostly because of my uneven floor. i am sure its twisting things, but i have cut some pretty precise pieces that have tight tolerances and works good enough for me.
i am in the process of moving cross country and looking for a larger shop space with the hopes of a permanent cnc station.
Thanks so much for the help!
Chris
I store mine flipped and only open it up when I’m working a project. I did add a HF winch with remote so I can flip it open easily. I don’t worry about lining up the X rail so it puts the COG over the pivot pipe which makes for an easy flip open. Usually I have the X rail to the front which makes the flip close really easy, because …gravity ![]()
I put threaded inserts in the bottom of the legs for adjustable feet and have the floor marked where to park it so they drop down preset. I know @CommunityUser5 would be appalled because I don’t do the fishing line test for coplanarity every time I move it but I’m only doing wood projects and micro variances just don’t make a difference to me - inlays and complex work have been fine so I don’t try to achieve milling machine accuracy (did I mention I’m working with a material that can swell or shrink more than the 3 decimal places of accuracy the table give me? ![]() ).
).
Exactly. Everything i have done (correctly) has been well within tolerance
Aloha from Honolulu - I have an Elite inbound and needing a folding table due to space limitations. I have Fishers plans but I really like some of the improvements you’ve incorporated @RockingMallet - Are your files available anywhere to incorporate those improvements in my build? Happy to pay to save me R&D time.
I used Fisher’s table as a starting point for my Elite Journeyman. A few adjustments had to be made.
- Fisher’s design is for a Woodworker machine. I changed the table size to 70 1/2 by 48. However, this is wider than it needed to be (but only by a few inches). I also increased the thickness of the torsion spacers to 3 3/4 inch.
- Given the size of the table, using a continuous 1 inch pipe as the pivot seemed like a good idea.
- Given the height of the Z gantry and the stiffy, I moved the axis (i.e. the pipe) to 5 inches from the back (instead of centered).
- Since the table was wider, the height of the cabinet and other support had be increased.
When it was completed and the journeyman installed, I was amazed how heavy this was. Getting it to rotate required considerable effort. I tried gas springs but could not find a good place to put them. An option that I did not explore is clamping the X gantry in the middle of the table.
Good Luck
That’s what surprised me too - it’s very heavy. But I left my pivot centered. It’s easy to tilt to put it away but takes muscle to pull it “open”. I had a spare 12V DC winch from HF, attached it to the lower frame, ran the cable up to a D-ring I screwed into the torsion box and use the winch remote to pull it down.
BTW, I also added a locking pin to keep it in the flipped up position. I just ran a steel rod through the frame end opposite the cabinets (drawers in my case) and into a corresponding hole in the side of the torsion box. With the rod in place it won’t continue rotating if I take the winch cable off.
I really like your winch idea.
One other thing to point out … I tried Fisher’s idea for the legs for the table (legs held in place with T track and T Bolts). That did not work. The T Bolts and the knobs would not stay tight enough to keep the legs folded up.
Thanks
-grank
Mine initially fell as well. I used different knobs and now I can tighten them and they stay in place. I also added a bit of thin rubber sheeting between the leg and the torsion box which allows for gripping a bit better I think. You can put it on the torsion box above/below the t-track or on the backside of the legs. I did try a pin that I could push through a hole drilled through both legs and the torsion box but it was a PITA to have to remember to pull it out or push it back in every time I flipped the table.
Aloha Adam.
Thanks for the compliment. I dig my table a lot.
Shot you a pm on what i have available if helpful.
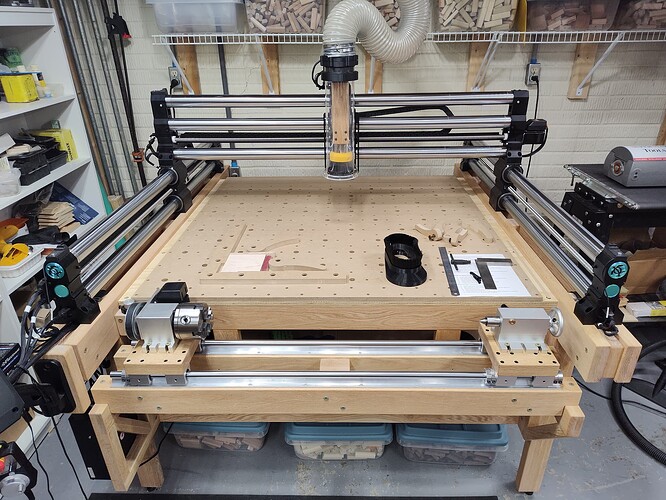
A few pics from the start of my build process…
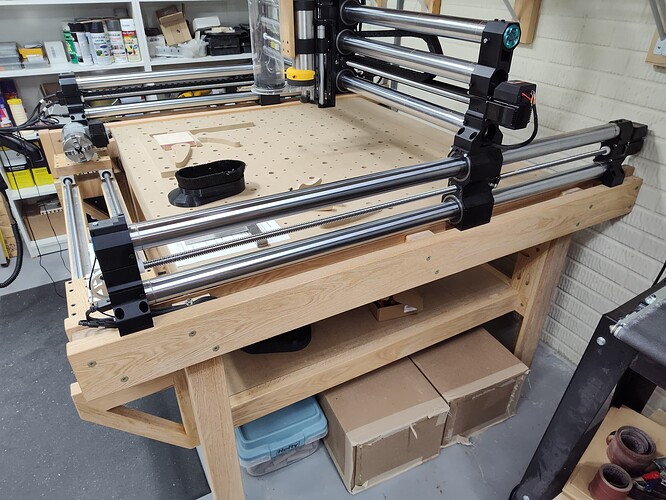
It’s all made from 4/4 oak laminated to 8/4 for stability, which is likely a bit overkill, but I had several hundred board feet in the shop left over from another project. So, I figured what the heck, at least it’ll be heavy and stiff.
And now basically finished.
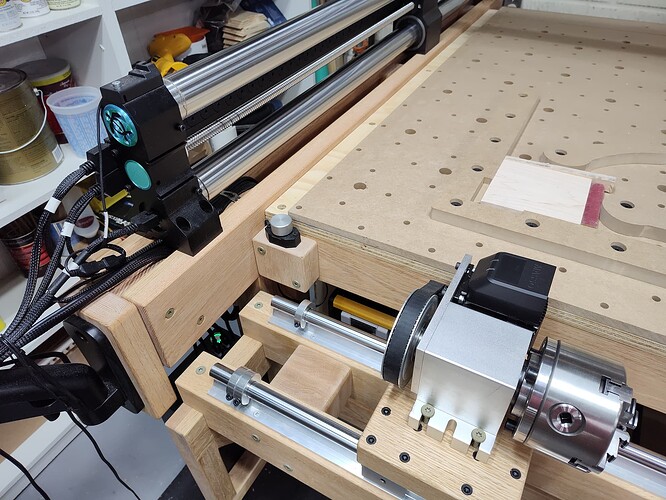
A few basic carve projects done and the 4th axis in place (though not wired yet).
I like it. I like it a lot.
A couple of things that I modified:
Overall, I love this machine, but I think the Masso controller mounting arm is pretty lame. I found an articulated monitor arm on amazon for about $35 and it’s MUCH better. The controller is completely out of the way for homing, etc., even with the dust boot installed.
One consequence of the longer arm was needing to mount the power supply high up on the left side of the table, so that most of the cables would reach. I did have to make an extension for the B cable. With the cutout for the 4th axis, there was just no way it would reach.
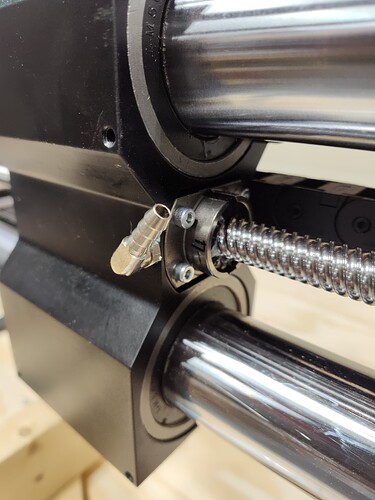
I added a right angle fitting to the X axis oil port so that I can add oil via the port without removing the Z axis.
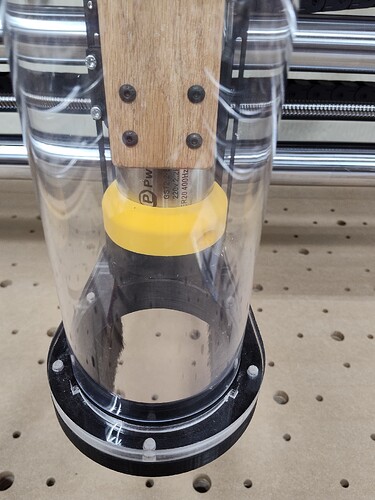
When using a stock dust boot, the hose kept catching on the Z stepper, maybe because the braking stepper is taller, but not sure. So, I added a polycarbonate tube to raise the flexible portion above the Z stepper. As a bonus, this enables me to see the carving area. I was curious if it would get scratched / less clear from the chips, but so far it’s held up well.
Just wanted to update!
I also started with purchasing the Fisher plans and modified per recommendations from others. Thanks for the feedback to date!
I’ve ended up with a 68" X 48" flip type top. Think I went overkill with the cabinet end. It is basically 24" wide and 24" deep - will make for some spacious drawers, but makes the whole thing 8’ long and I agree with others…it’s a brute!
Still waiting on my Journeyman, hope it arrives soon. Looks like the spindle will beat it here by at least a week!
I can’t afford the extruded aluminum (unless you have a cheaper source than McMaster’s) but I love the table and idea…

