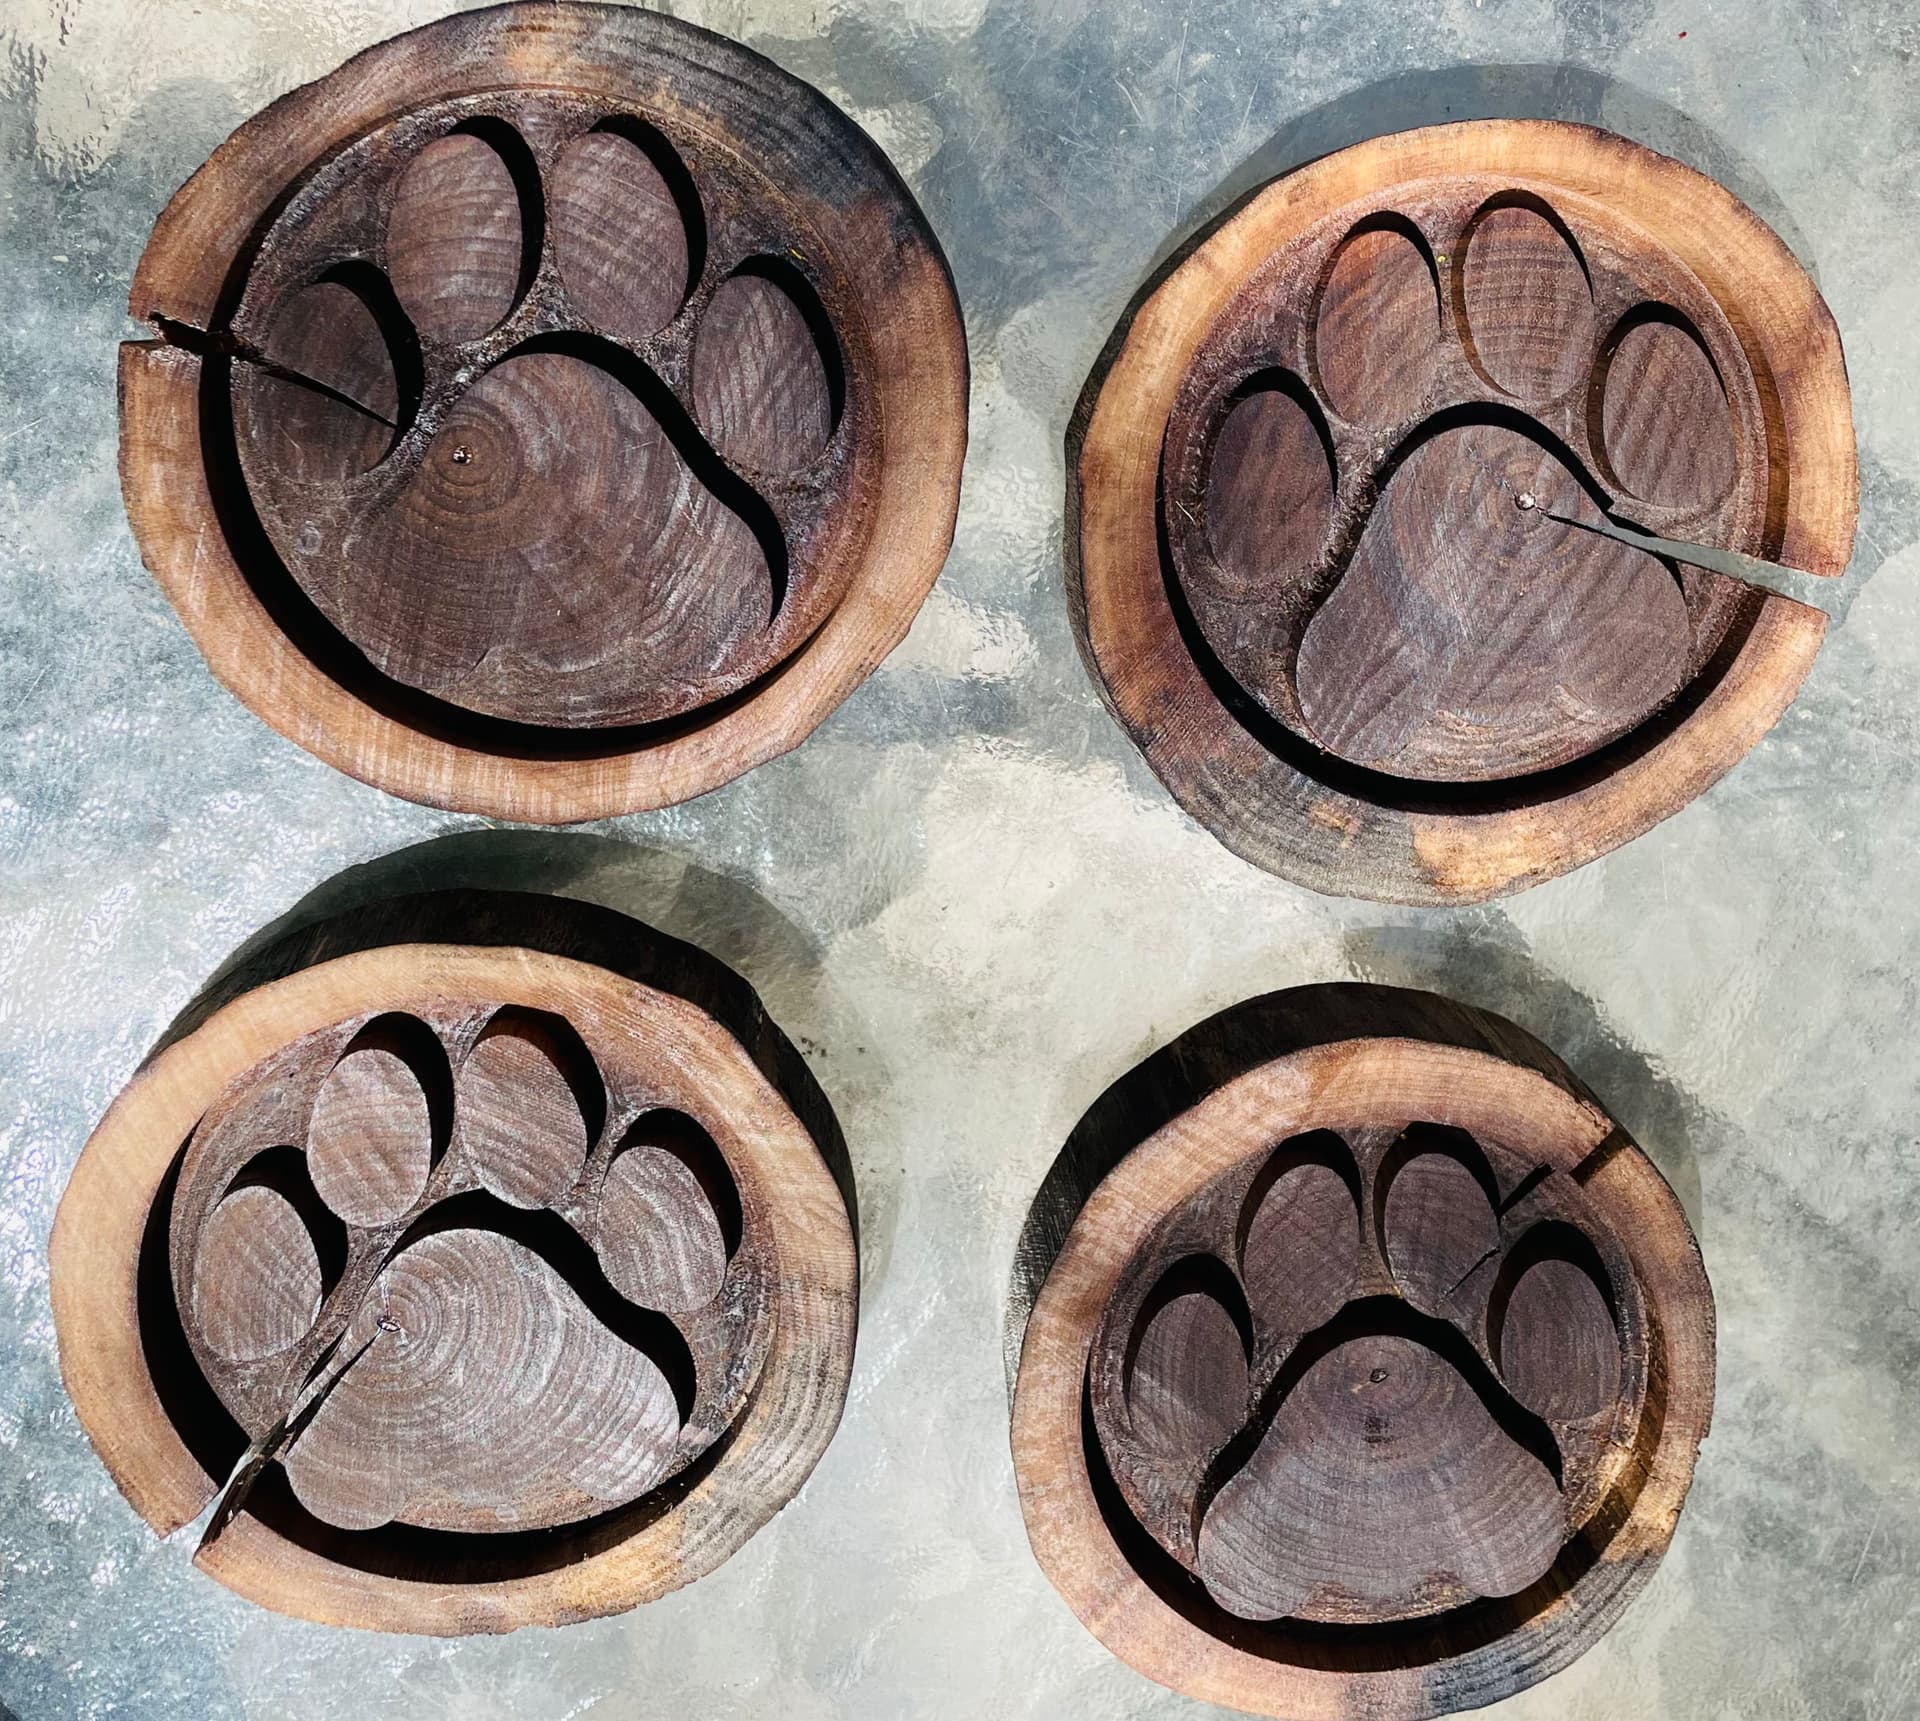
I wanted to make a simple carve on a round walnut puck, possibly to use as a coaster. I’m trying to figure out how to keep all the pink areas raised and then pocket the remaining area down to maybe 0.3" depth. So pretty much inverting my current selection. I know this is likely very easy to do but I can’t think right now at how to do this.
Trevor,
I’m a bit confused. Are you saying you want the “toes” and “palm” areas raised? What about the outer ring(s)? Also, it would be useful to know which software package you are using. A little more info will likely speed up an answer from the group.
Hi John. Yes, I would like to keep the entire paw (toes/palm) raised as well as the area between the two outer rings. So essentially, carve everything out and leave the paw/outer circles even with material surface. I’m using V-Carve Pro. Maybe I need to be working in 3D? I thought I read somewhere about being able to select this area to be pocketed but I can’t remember how. If this was Photoshop, then I’d select the objects, inverse the selection and bob’s your uncle! This is an entirely different learning curve for me coming from a Photographic background and being new to all of this.
Select everything except the outer circle and then create your pocket toolpath. It should leave the paw print raised and carve out everything between it and the other circle.
This may go without saying, but to tag along with Grim, the final step would be to select just the outer circle, 2d Profile Path, and select Machine vectors Outside/Right.
Thanks Dean. I wanted to keep the original somewhat circular profile of the wood, so I didn’t need to do a profile cutout this time around. I posted a few pics attached to my response to Grim to show you how they turned out. Thanks for your input!