Thought I would share a super-useful workflow I use with my machine. It has become my go-to. I don’t see much talk about this type of thing on the thread, so figure many people don’t know about it.
What is a Program Stop (M00) command?
I use a “Program Stop” (M00) command to pause the machine mid-carve and allow me to install screws in the part to hold it down. It essentially pauses the machine at a precise point in the program, and resumes when the operator presses the green cycle start button.
Why do this?
When you cut a part you typically cut the features on the inside, then finish by cutting the perimeter of the part. Any clamps you have holding the part often get in the way of the toolpath. Using a program stop allows the operator to add some screws to the part to hold the piece(s) down to the table, remove any clamps, then continue cutting.
Message command too??
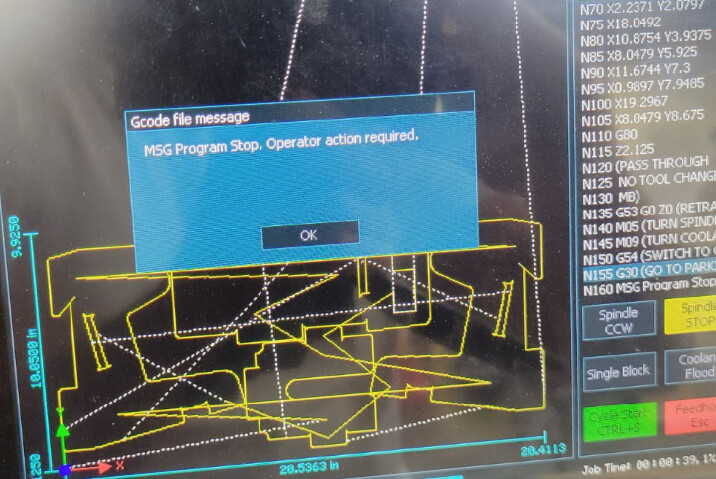
I almost aways use a “MSG” command with a program stop (M00) command. The machine will pause, then display a message on the Masso screen with custom text to help the operator understand why the program paused. Normally my message just says “Program Stop, Operator action required”, but it can be anything you want it to be up to ~32 characters.
Here’s how it is used in practice…
Let’s say I want to create a program to cut these 4 shapes in a single program.

I will load a piece of material on the spoilboard, clamp it down with plain old t-track clamps, and start the program. Right from the start, the program will drill a bunch of 1/8” holes.
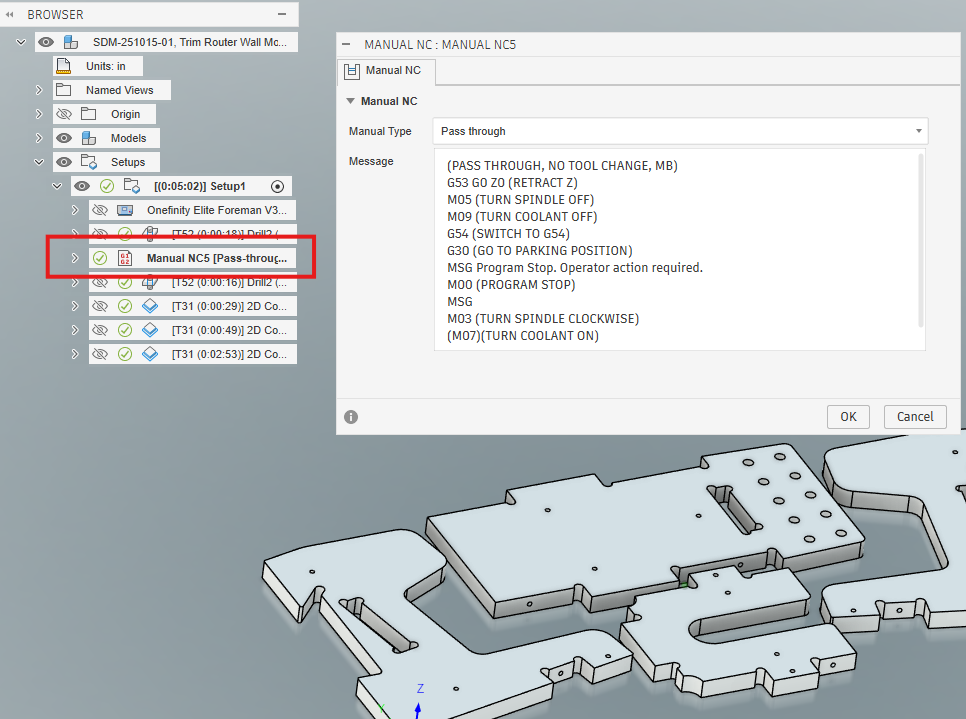
Then the G-code has the secret sauce added:

The spindle retracts, stop spinning, then heads over to the parking position I’ve set on the Masso F4 screen. Then it displays a message on the Masso screen, and waits there.
While the spindle is sitting idle at the back of the machine. I will put a screw in each of the holes the machine just drilled, and I’ll remove whatever clamps might get in the way of the rest of the program.
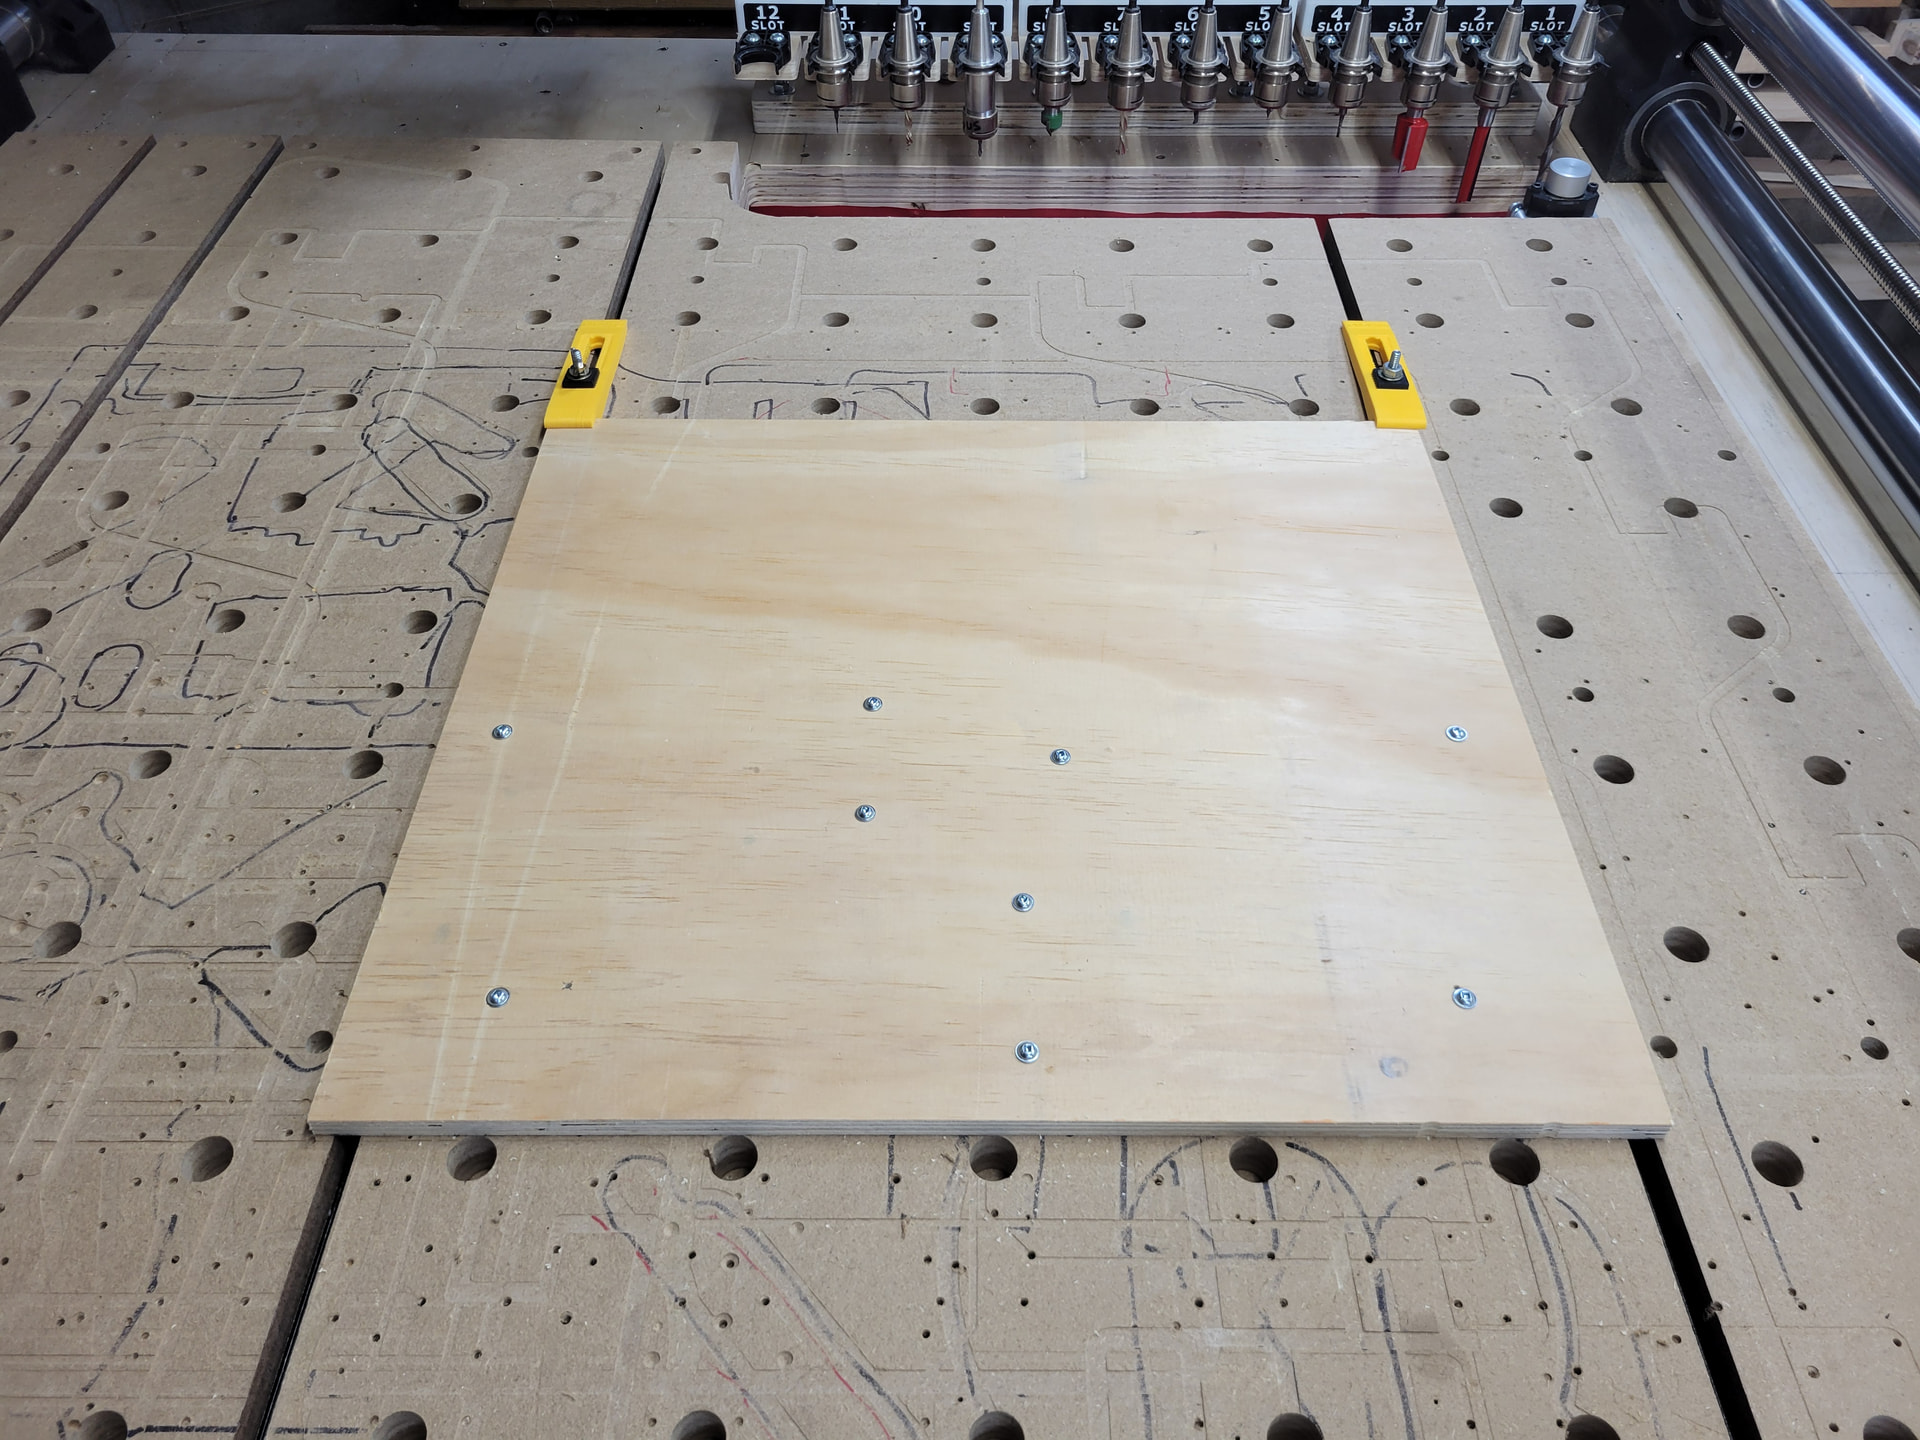
Then I will press the green “cycle start” button on the controller, the message will disappear from the Masso screen, the spindle will spin up again, and proceed to start cutting again. The screws are strategically placed to hold all the individual parts down as they are cut and separated from the rest of the stock.

Parts are done, in a SINGLE program, and can be assembled!
SHAMELESS PLUG: These parts are for a trim router holder available as a digital download on my Etsy page. A great project to try this technique.

How do you insert lines of G-code in?
Fusion has a super handy “Pass Through” feature that will allow you to type out the lines of G-code into fusion. Fusion will directly send those lines into the toolpaths when you post.
You can even store the entire block of code in as a template and paste it all in just a few clicks. No need to memorize the code.
I’m not sure if Vectric or other CAM programs can manually insert G-code through the program or not. You can always insert the added lines manually in a text editor after it’s posted.
There are other ways to achieve this, but the method above is the most streamlined I have been able to come up with.
Alternatively, you can write two separate programs, one that just pre-drills the holes, and the second that cuts the rest. This works well, but if you make a change to the part, you now have 2 programs to remember to update. At the machine, the operator has to be a little more focused that day to make sure they run the right programs in the right order. Definitely do-able for a one-time program, but not really right for production work.
Personally, I put a lot of value in one-and-done programming. I try to write a single program that cuts an entire project in one go.
I hope this is as useful to others as it has been to me!