Hoping someone can help me recover my project.
I am using VCarve pro 11.5 with an X50 woodworker
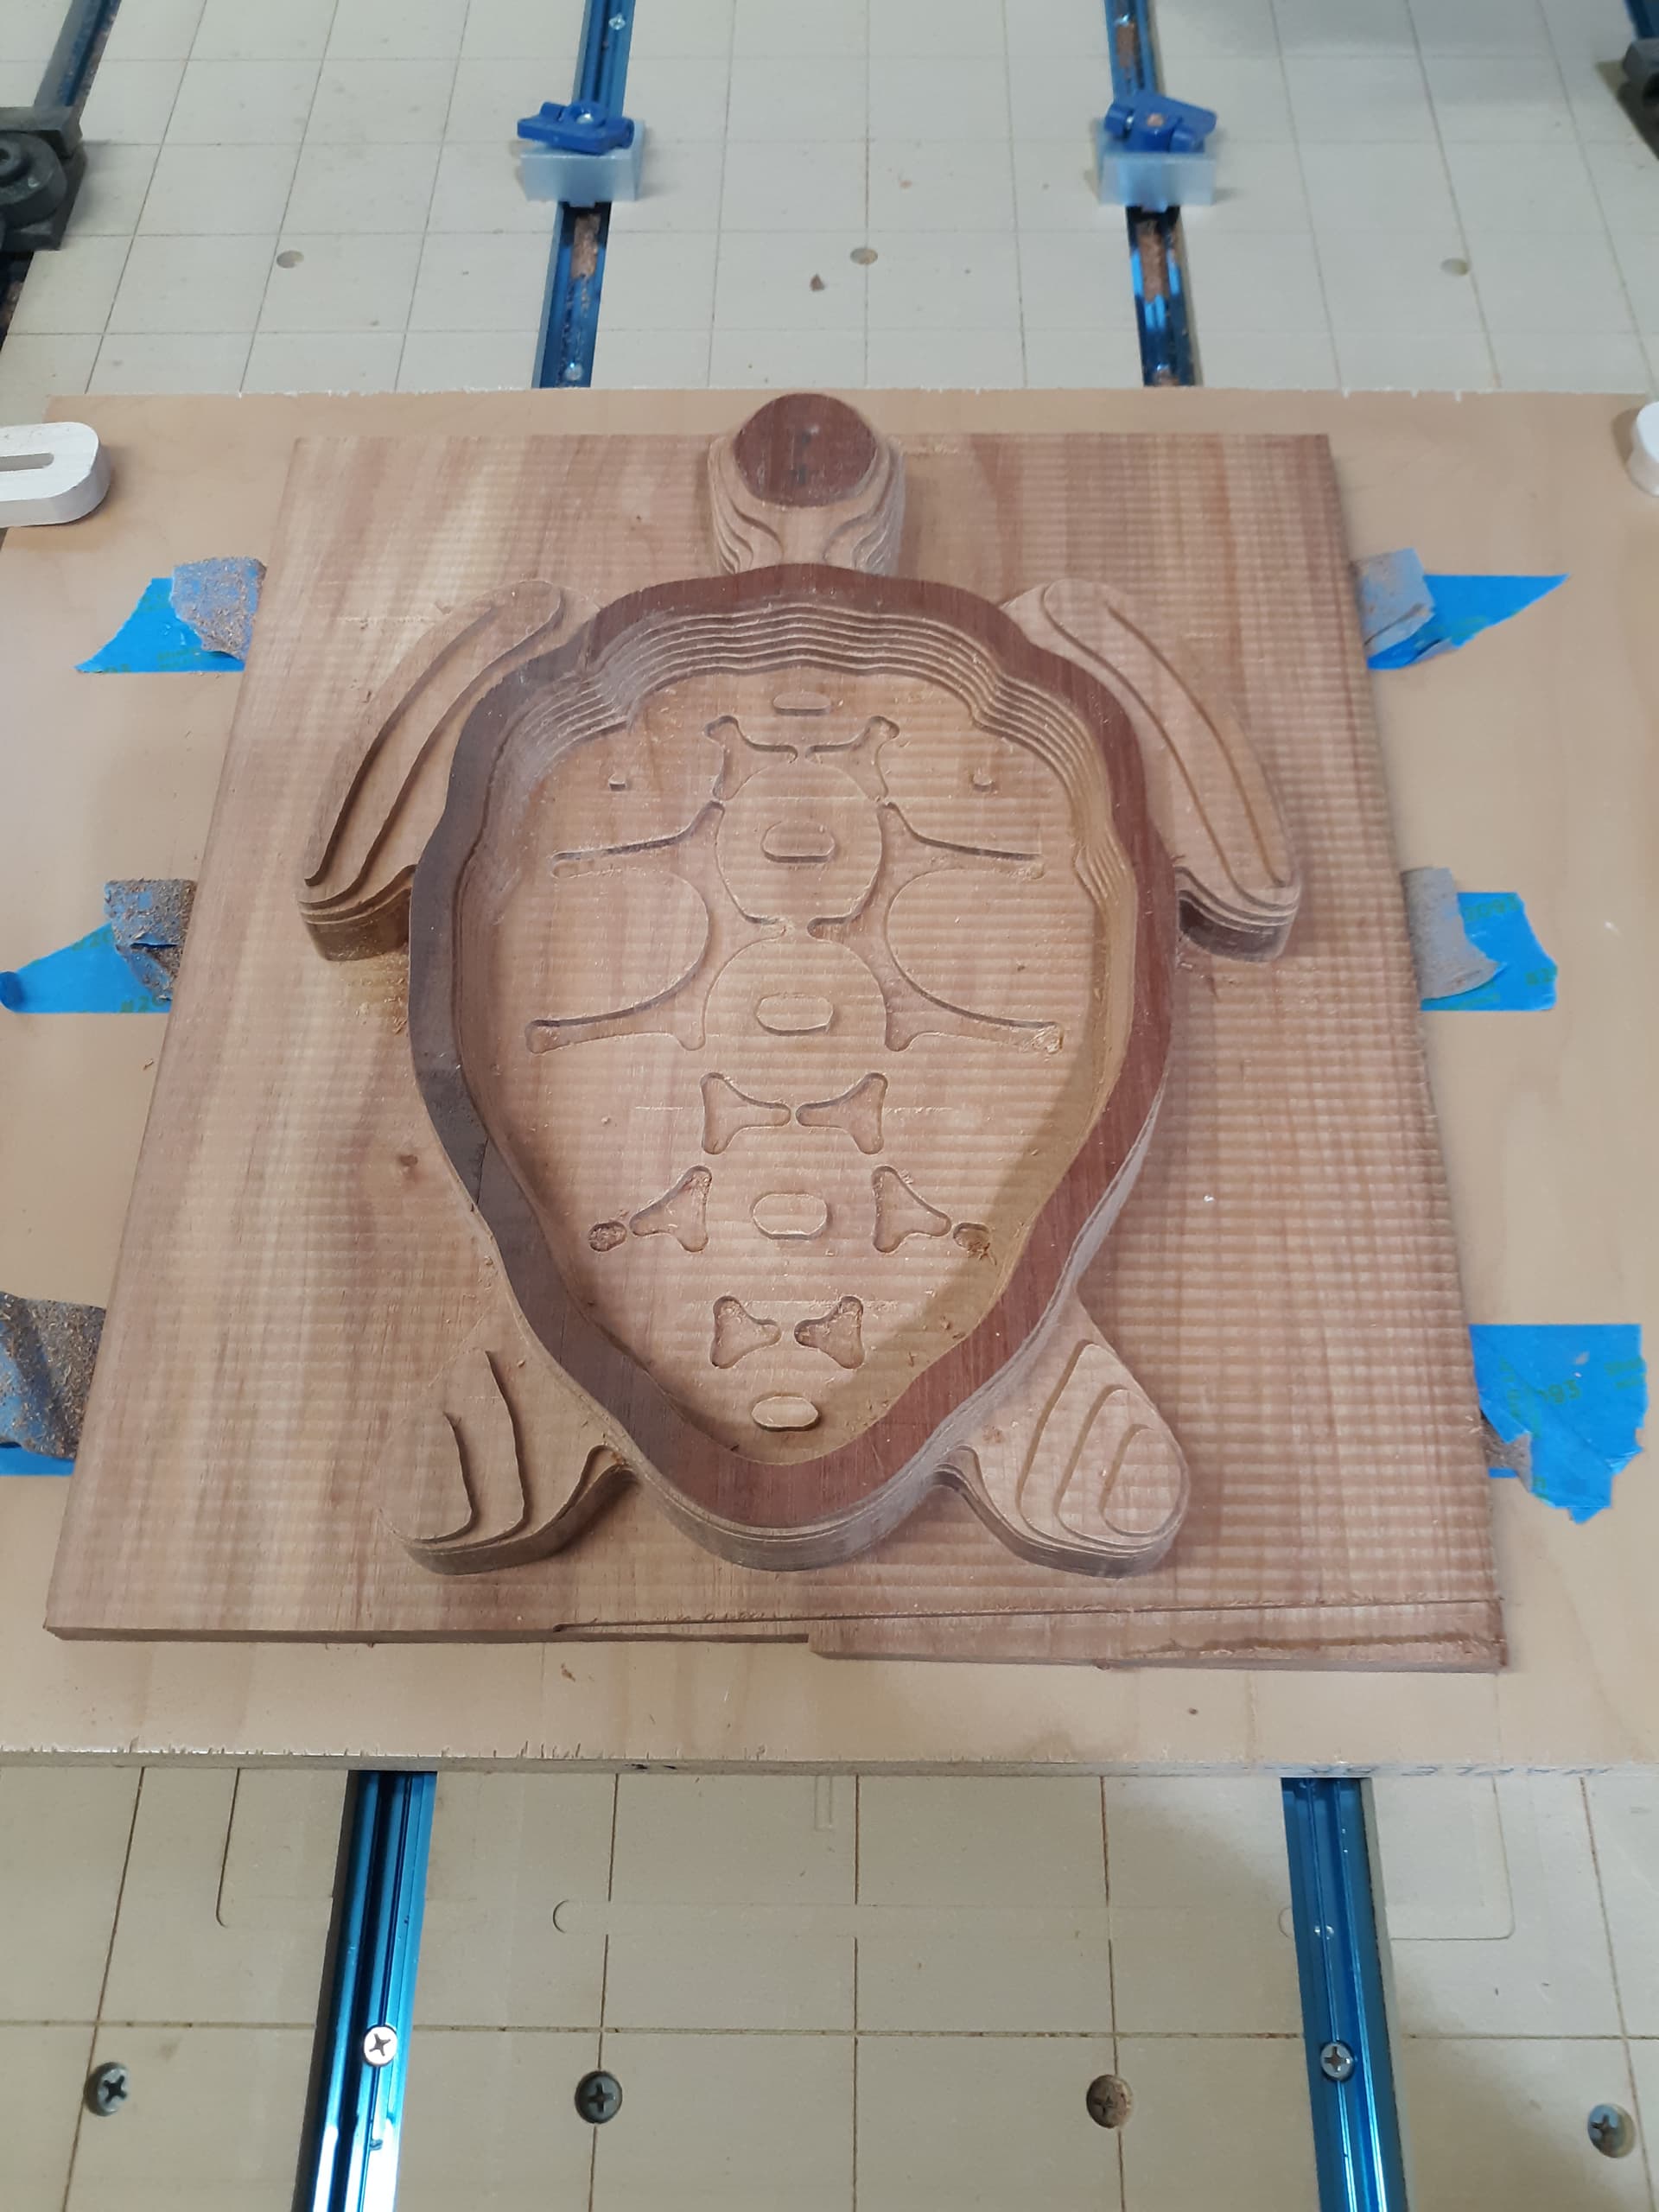
I was starting one of the last few roughing passes, when I decided to pause and remove the dust boot.
well I resumed without starting my router and it pushed my project off center.
I made note of the line in my g code 50375.
You can see where it started the next pass (off at an angle and didn’t go all the way accross.
I am assuming that my x axis skipped a few beats.
I have read someplace that you can edit the G code to remove most of the lines and start from where I left off?
I believe I can still use the lower left corner as my x,y probe just not sure how to set my Z.
Since the job was pushed sideways have you thought about how you will get is squared up again? Hopefully you had one edge parallel to an axis that you can line it up to reclamp it properly. This I think might be the trickiest part of recovering this project successfully.
For setting your Z0: is the highest point on your turtle shell the original surface?
It appeared from the code that it did not cut that area so if you started with a flat board then it probably is. You can use the paper method to set Z0 there or flip the probe base over and set it up on that surafce.
Check this: the last good pass on the outside of the turtle should be Z-1.1250
I got that from the lines of code just before 50375.
You would be wise to set your Z0 an inch or 2 above the real Z0 and run the program in the air - just for a couple minutes to see that it starts correctly. Then reset z0 to the correct place to run it for real.
All that is left to go in this restart file is 3 passes deeper on the flat area outside the turtle down to a final depth of 1.5 inches.
Let me know if you want any more info before you try it.
On thinking about this some more…
It looks like, from the code that you are intending to cut away all of the outside area and just be left with the turtle?
If so then if you have a band saw and flush trim router or belt sander then don’t try to finish the program. Just saw it out and sand it flush on the outside.
Possibly cut with bandsaw like stated above then flip project over and use flush cut router bit to run bearing of bit along machined surface? Good luck!!
ChrisM,
Thank you so much.
I have gridlines on my spoil board and can come pretty close to where it was before.
I should be able to use my probe and set my x and y start point.
also I can set my z zero to the material surface (yes the first cut did not cut the top of the turtle head)
Am I right in thinking that the mods you made will start my cut at Z -1.250
Each pass is .125 and as I am going to -1.50 then should be an additional 3 passes for the rough cut.
Yes I will be using my bandsaw and trim router to finish the underside. (after the finish pass)
I’m going to have to wait till Wednesday to try this, will let you know how it turn out.
Hey Chris, that is an awesome reply and explanantion. Do you think he can recreate his alignment if he added thru holes in his project piece in the areas that will be cut out, and also a set in his spoilboard and used dowels in the same way you would do a double sided carve? I have not thought it all the way through, so not sure if this would work…just thinking out loud.
Hi Ben, Yes if dowel holes had been put in before starting that would work but leaving the dowels in while cutting may not have been the best in this case since either the cutter would have snapped or the dowels would have snapped ( or more likely distorted the dowel holes in the wasteboard ). If the job is something where the origin corner gets milled away I may do that however if the corner is preserved for nearly the whole job as in this case I would just get the board square on the table in a way that i could resquare it if needed.
I usually start with one side sawn straight and clean from the table saw. Then I use a square on the wasteboard when sticking it down to make sure that edge is square on the table. I made my waste board with the front squared up with the X axis so i can use a square from the front of the waste board.
I also have dog holes in the waste board which are very handy for squaring up. Put 2 dogs in, tape the board down while against the dogs, then remove the dogs before cutting.
I think it turned out pretty well.
This is really my first attempt at a 3D carve.
I learned a lot on this carve, like checking the thickness of the material against the dust boot to make sure it will clear when getting to the deepest part of the carve.
Also I had originally set a 1/8" ballnose as my finishing pass, but after the roughing pass it was clear to me that the 1/8’ was too short to reach the deepest part 1/2 " DOC wasn’t going to work when the material is 1 1/2 " thick.
I created a new finish path using a 1/4" ballnose.
I will need to purchase some longer bits.
not sure if a tapered ballnose would work or not.