How do I create a chamfer on 1 side edge of a vector? See photo screenshot2 for reference.
I want that edge to angle at 65’ and start downwards out. I downloaded the chamfer gadget but cant seem to get it to work in the direction I need it.
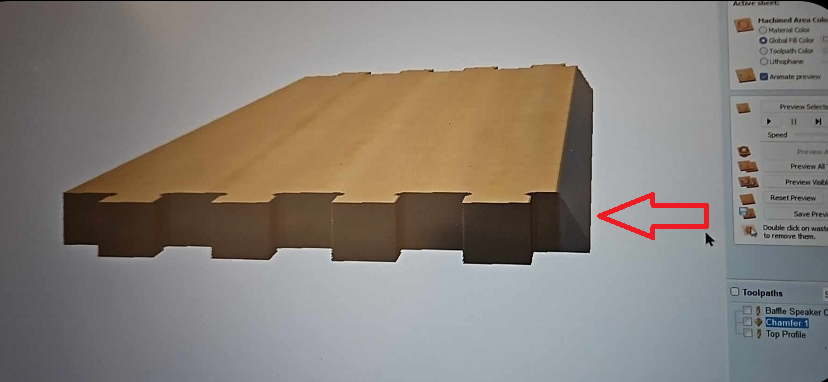
Ok, I used the moulding tool path. I created a line on the edge I wanted the angle to start at. However, It leaves that gap at the bottom. I want it to continue until cut through the material at the same 65’ angle.
Or is this because the angle is greater than 45’ so it will automatically leave a edge? Should i offset the line inwards so it lines up with the bottom corner when cutting though?
I’m not personally familiar with vectric, but could you just do a 1/4" ball mill parallel finishing operation that is confined to the angled edge area? So basically you’d be 3d carving this area, running the long way. I’ve done a bunch of mitered edges this way, but on a different machine+software setup. One important consideration is that you need to make sure the carve starts at the top surface and makes its way over and down, so it’s moving progressively deeper with each pass. If you setup the toolpath the wrong way, it will begin with a full depth plunge, and probably not be very cool. The other consideration is that you would need to run the ball a little ways down into the spoilboard if you want the angle to be completely milled all the way down to the bottom surface of the piece. I usually go just a bit into the spoilboard, maybe .1", and just sand off that bottom edge to clean it up.


