More signage done for a new customer, very close to home. ![]()
Had to tile the longer sign.

5 Likes
Super job keeping everything lined up across the tile boundary.
1 Like
Thanks Jim! The key to my success was pre-drilling (3) 1/8" holes in the plastic (by hand, with the help of a simple spacing jig) before putting it on the machine. I put 2 holes in the waste board and used them for program zero.


2 Likes
5.5" wide
3.375" deep
just over 1.75" tall
Finish was either Watco Danish oil or Linseed oil
Do you have a link to the game pieces and rivets you used?? This looks amazing!
I got them from Accessories– Across The Board Game however as you will see in their website they only allow one “replacement” set per address." It will allow you to buy one even if you never bought their game board (which I never did) so if you need one set its a great way to go but not if you want to product them.
I emailed them asking if I could buy in bulk… they never replied. ![]()
-Alex
1 Like
Very nice! I love seeing the creativity of so many. I can see a slot in in the base for business cards…
My wife saw a picture of one of these hooks in Pinterest and asked if I could make her a few. I told her that I can’t, but my robot can!


10 Likes
@RyMoe These are amazing! Do you have files for sale to run these? Would love to batch a couple out. Especially the larger standing version
2 Likes
Got a request for a Portland, OR topo map. First cut, lasered some of the major roads and water bodies.

18 Likes
Great job! How did you generate the map?
My daughter called, “Dad! I’m a broke student and I don’t have time to go shopping. Can you make something for mom for me to give her?” This was last Friday. So, did my first stacked text and molding tool path. I have been trying to sand it in the hotel (I travel for work)


8 Likes
how long did that take? size?
1 Like
This is going to be a rather lengthy post as this is the culmination of the past month of Saturdays. This is a baby gift for some good friends’ first baby.
Design in Fusion 360
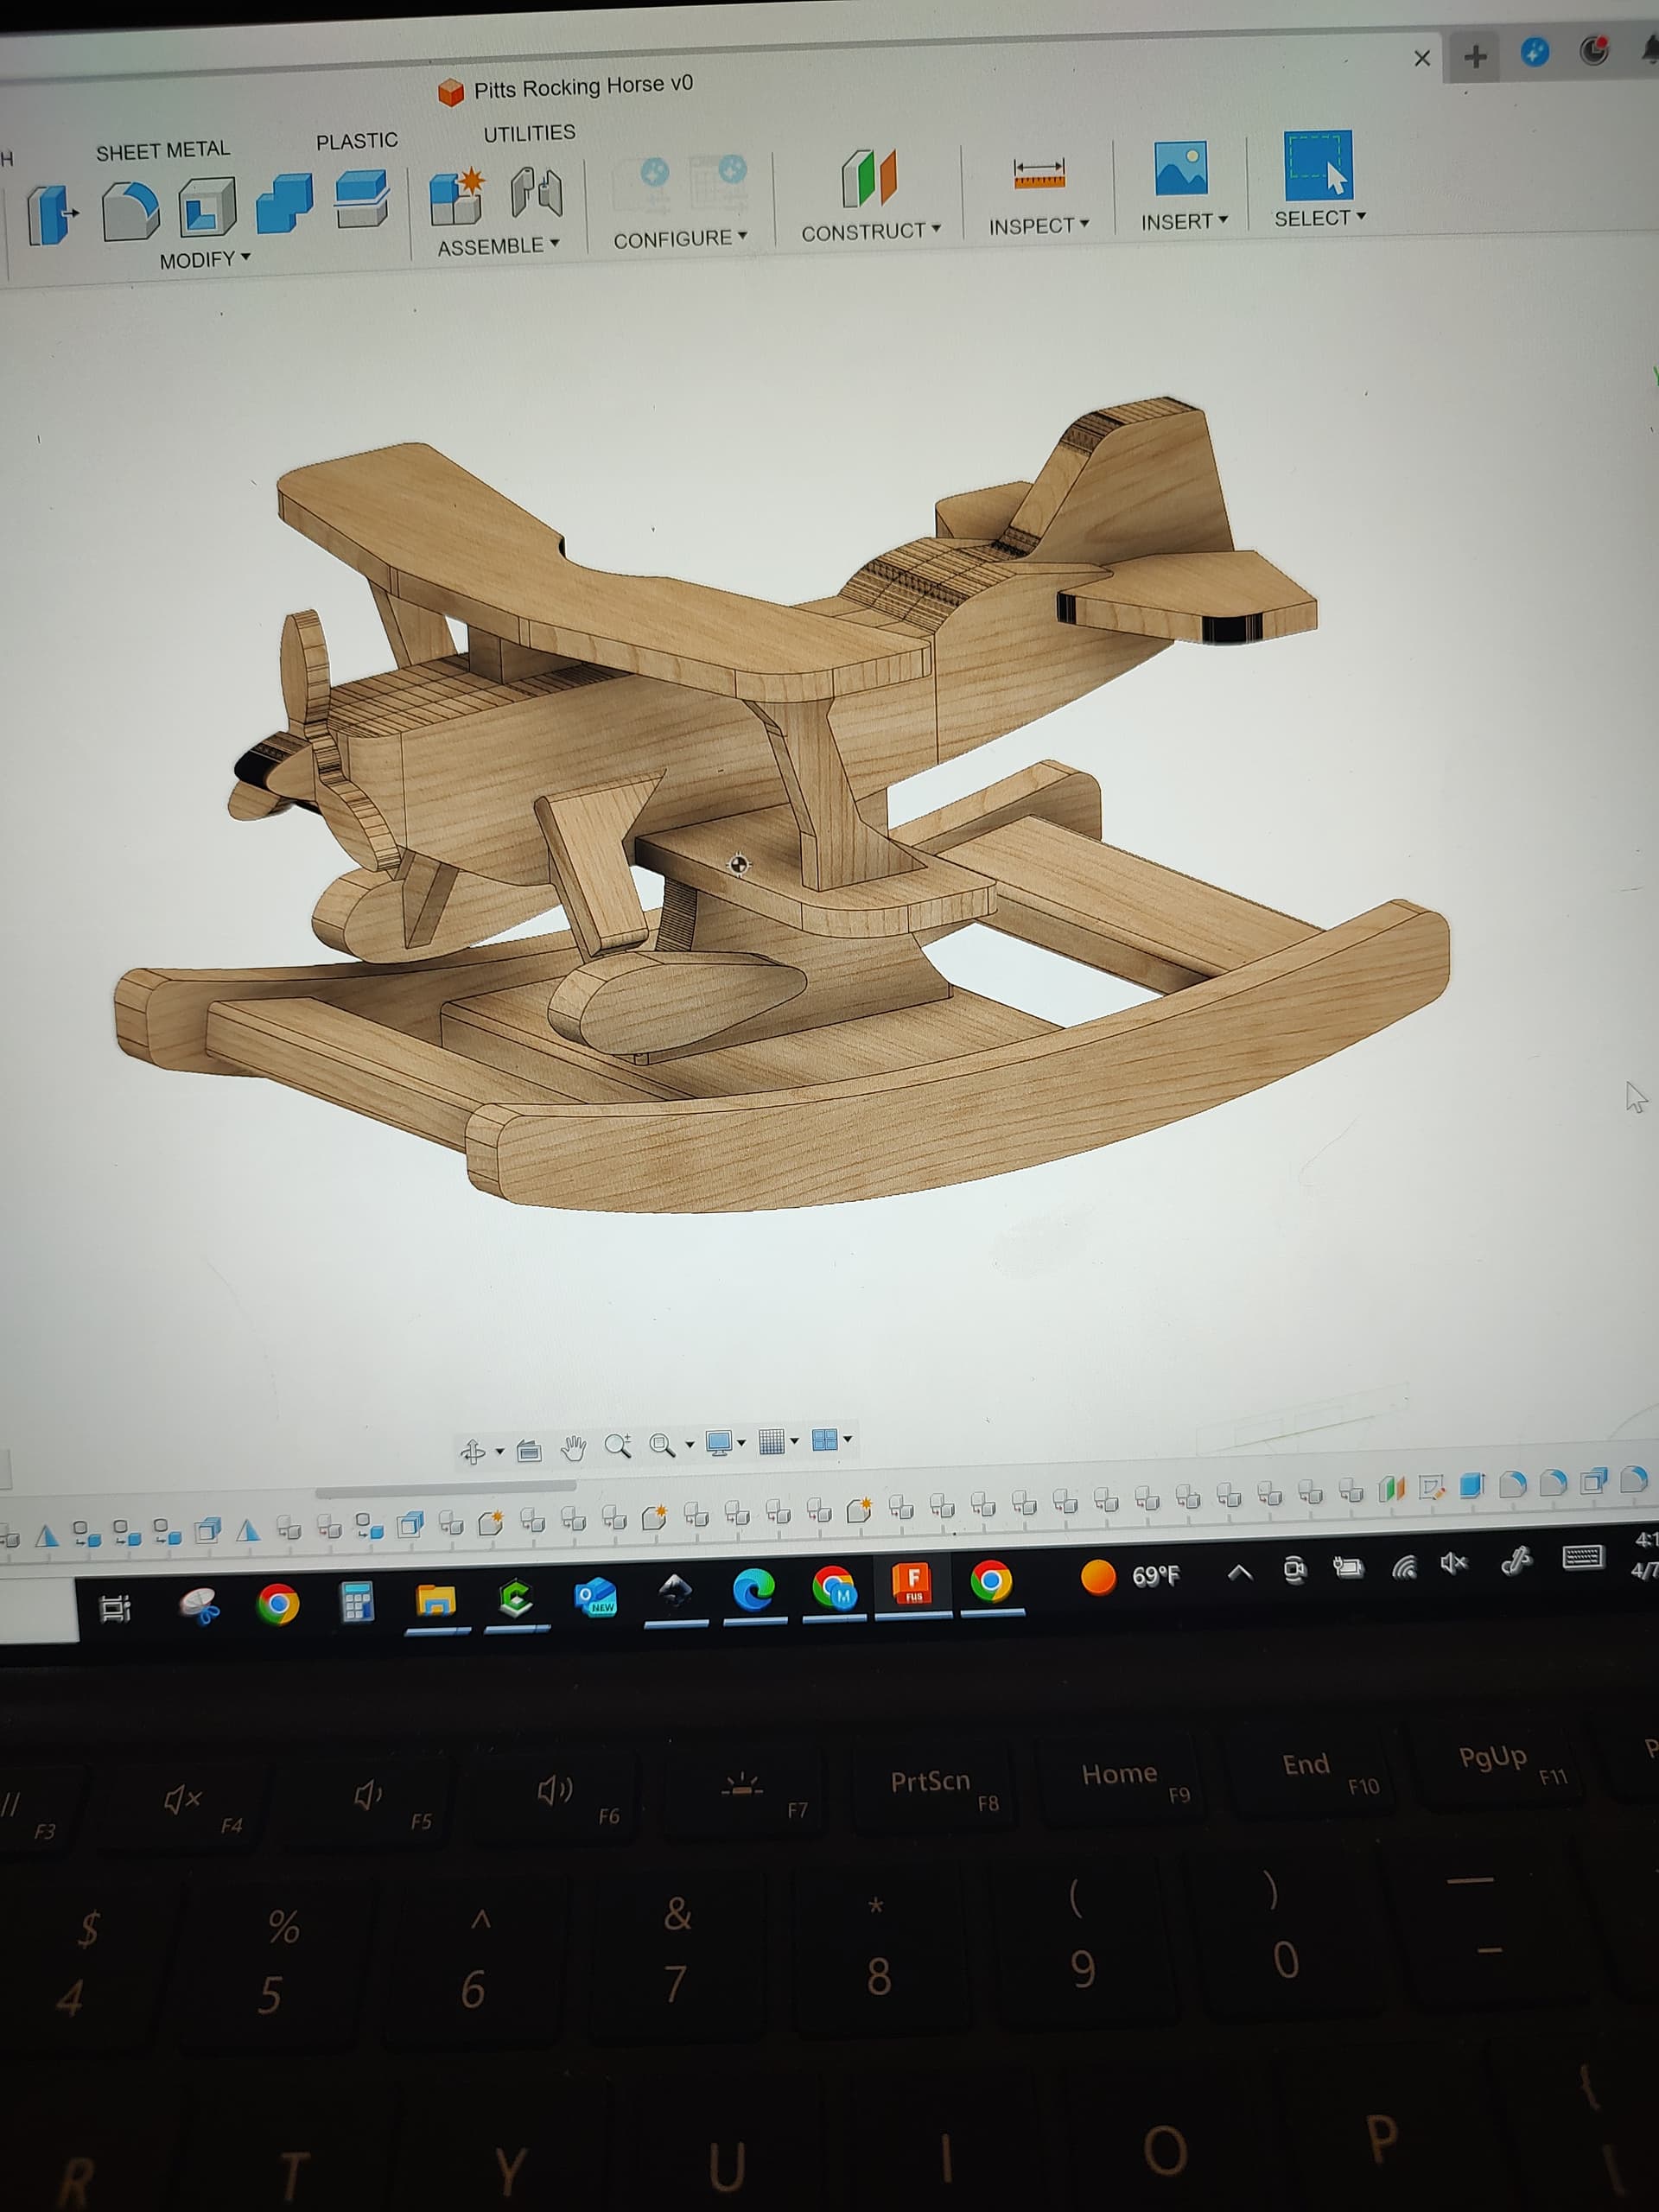
Cut out all 23 pieces


Assembly process


Finishing


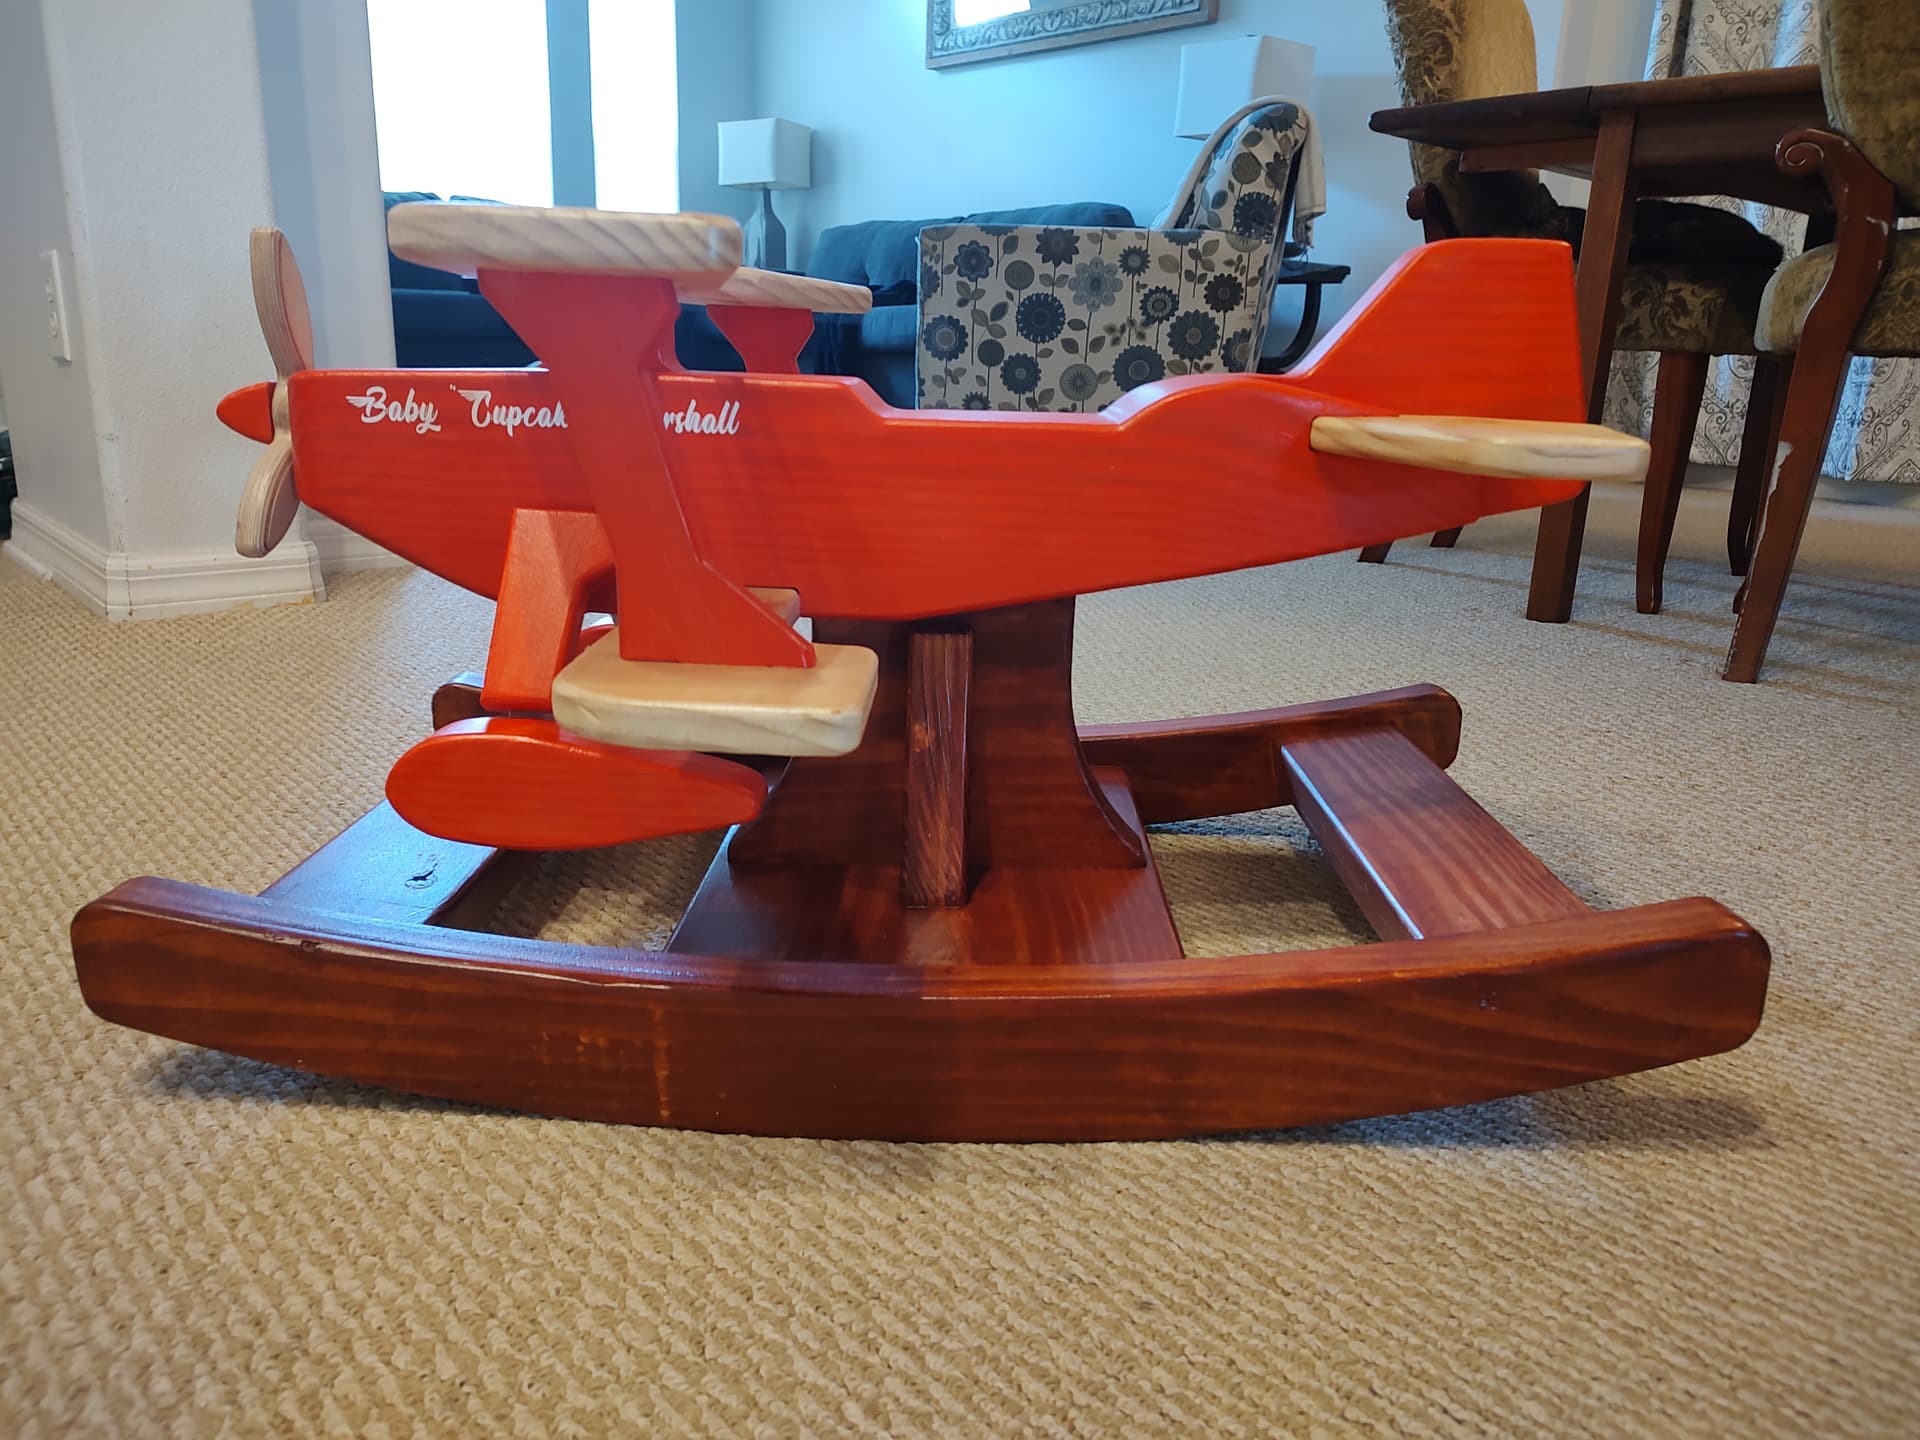
Final assembly and finish


16 Likes
Maple with epoxy inlay for lettering. Made the horses in poplar but haven’t finished yet. May paint in different colors.

7 Likes
Thanks! I use qgis to generate both the stl and laser vector files.
@crashaffinity - this is a 20x30in. In terms of cutting and lasering, it’s about 14 hrs total. In terms of programming/creating vector and cam files, sanding, finishing and everything else… it takes me longer. But there are faster and easier ways if all you want is to cut a low res map.
3 Likes
8x15. Took around 4.5 hours. The roughing I used the IDC Woodcraft Beast and Badger that was done in a total of 43 mins for both, but the final was with a 30 degreee and the and the border was done with a 1/4 ball nose. Here are some pictures of each stage.


4 Likes
Here is my first significant project with my Onefinity. It is red oak and was cut with a 30 degree engraving bit and a 1/4 inch down cut endmill. I applied VViViD vinyl masking film before cutting to keep the paint off of non-painted surfaces.
It was hand painted but I am wondering if it could have been painted with an airbrush? If anyone is using an airbrush for finishing, what do you think? Would it be possible to paint all of the nooks and crannies without pooling? Is it possible to spray sanding sealer with an airbrush?

8 Likes


