What kind of casters are you guys using? I am looking at adjustable height versions.

Also wondering where you all located the controller? What works the best with cable length and away from dust.
I won’t receive my machine until September, so I still have plenty of time to plan my table build as well. A few quick questions to piggyback everything above:
- I’m planning to forgo the t-tracks and go just with t-nuts. Is this something I’ll regret?
- Torsion box necessary or overkill? I’m planning to use MDF and was thinking two 3/4" sheets for the base with a 3/4" spoil board. 2x4 frame mounted to 4x4 legs - no casters.
- If I have full access from the front and both sides with the back of the table mounted to a wall, will that be adequate for limiting movement (increased rigidity) and allow full access for any maintenance?
- An enclosure won’t do much for noise unless foam or another sound absorption method is used, correct? It would only help with containing dust? Any link to the design by Mitz several have mentioned above?
Here is the plans that Mitz Pellicciotta made. He also has a few youtube videos showing his build process. It is a really nice design. I plan on making one myself…eventually.
CNC ROUTER ENCLOSURE 120620.pdf (2.0 MB)
Thank you! New here, so I don’t know all of the people to follow just yet.
I went the route of threaded inserts over T-track for two main reasons. First T-track is typically installed with some rather small screws to the base material and I’ve had these pull out when subjected to clamping forces. Second - in my workflows I use lots of fixtures to hold parts in specific locations/orientations and 2 sided milling so the 3x3 grid of threaded inserts gave me the ability to create the recessed bore for 1/2" dowel pins that I can put a machine screw through into the threaded insert below. Most of my designs start out with a grid of 4x0.5 holes outside of my finished workpiece on 3" centers - these become my reference and work holding for the remaining operations including if I need to flip the part for 2 sided machining. I went this route instead of continuously boring holes in random spots on the wasteboard for each project.
I used a torsion box mostly because I have mine on casters and the concrete floor isn’t flat in my shop, the torsion box keeps the setup rigid and flat. It has the added benefit of the inside making for a good shelf to keep things readily accessible for the machine.
@mhuntoon I went with t-nuts also. I wasn’t sure of the way to go with this either, but my thinking was it is a waste board after all so it’s not a decision I had to live with forever. So far they work just fine for me. I plan on using track next time just to try out a different way as I’m in learning mode.

@Techrise I got 1 29/32"

Thanks @rockytoptim. I was actually for the Y dimension. Sorry, my picture is a little deceiving.
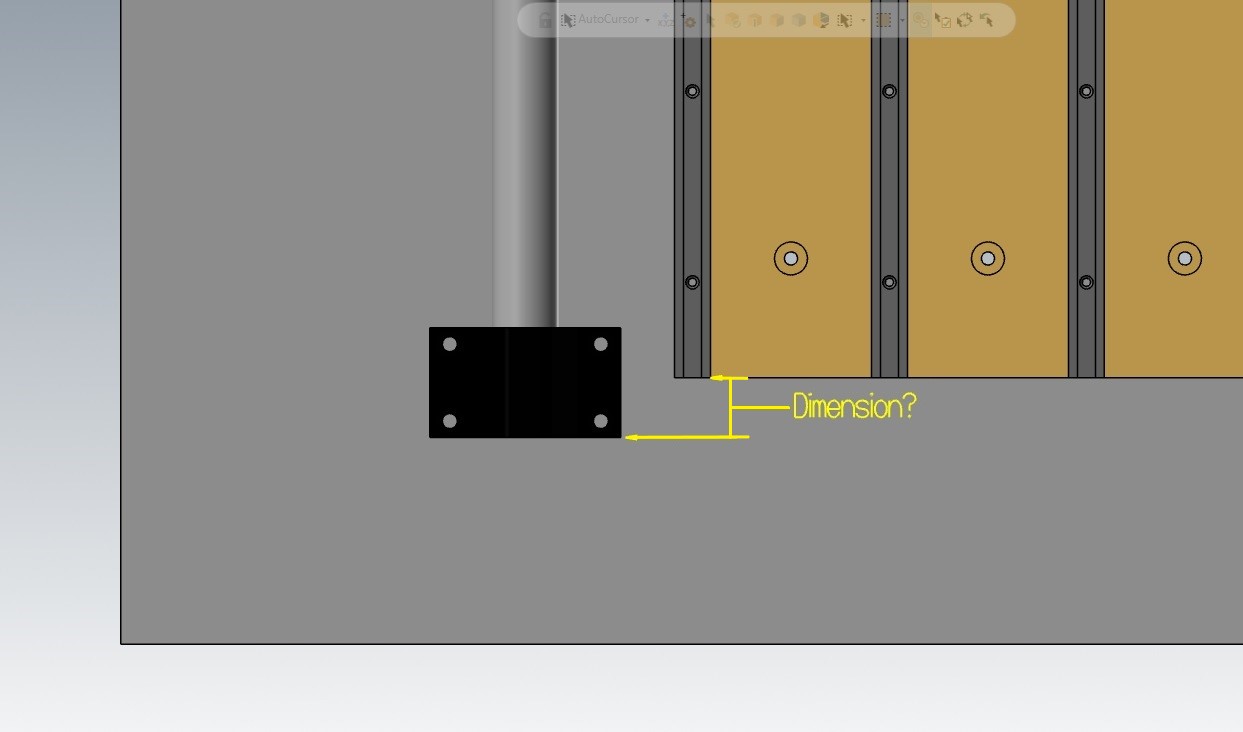

Awesome @rockytoptim! I am designing my table with an removable insert and needed to find the location of the cutting envelope. Thank you.
Do you find the table sagging at all being that there aren’t any cross beams in the middle? I’m thinking of the 64x64 kreg table but not sure if that long span will cause the wood to bend under the weight of the larger cnc.
Mike,
I have the 44x64, no sagging so far (knock on wood). 3/4 ply on bottom, with 3/4 MDF on top, glued and screwed from underneath. Will most likely put a few braces in when the Journeyman arrives in a few months to ensure future proofing for sag. BTW, I decided to reverse the y rails, so I can do an enclosure without worrying about the dustboot taking up more than the 49"+Trim depth I have.
@Bumpski I have the 48 x 64 kreg table. I haven’t seen any sagging. I have 3/4 plywood base the 3/4 mdf attached on top of that. Then the mdf wasteboard and t track on top of that.
I didn’t know you can put a brace on those tables
Thank you
Do you have pictures of your set up? I’m looking at the 44”x64” Kreg table as well
My order won’t be here until mid-September, but I have my son home from college right now, so I’m taking advantage of the help in building the table and moving things around in my workspace.
My plan is 4x4x30 legs (3 on each side), 2x4 framing (flush with top and 3-4" up from bottom on which I’ll place a shelf - likely 3/4" plywood), 48x48x3/4 MDF top (doubled up, so really 1 1/2" thick) and then 3/4" MDF spoil board which I’ll do when the machine arrives so I have exact measurements and can use it to drill out the t-nut holes every 4" in all directions.
I’m not planning to move it around, so I likely won’t get casters.
Anyone see any issues that should be addressed with the above plan? Will this be rigid enough? Should I add another 4x4 to the middle of the back? I want to leave the front wide open for access to anything underneath. Any suggestions will be greatly appreciated.
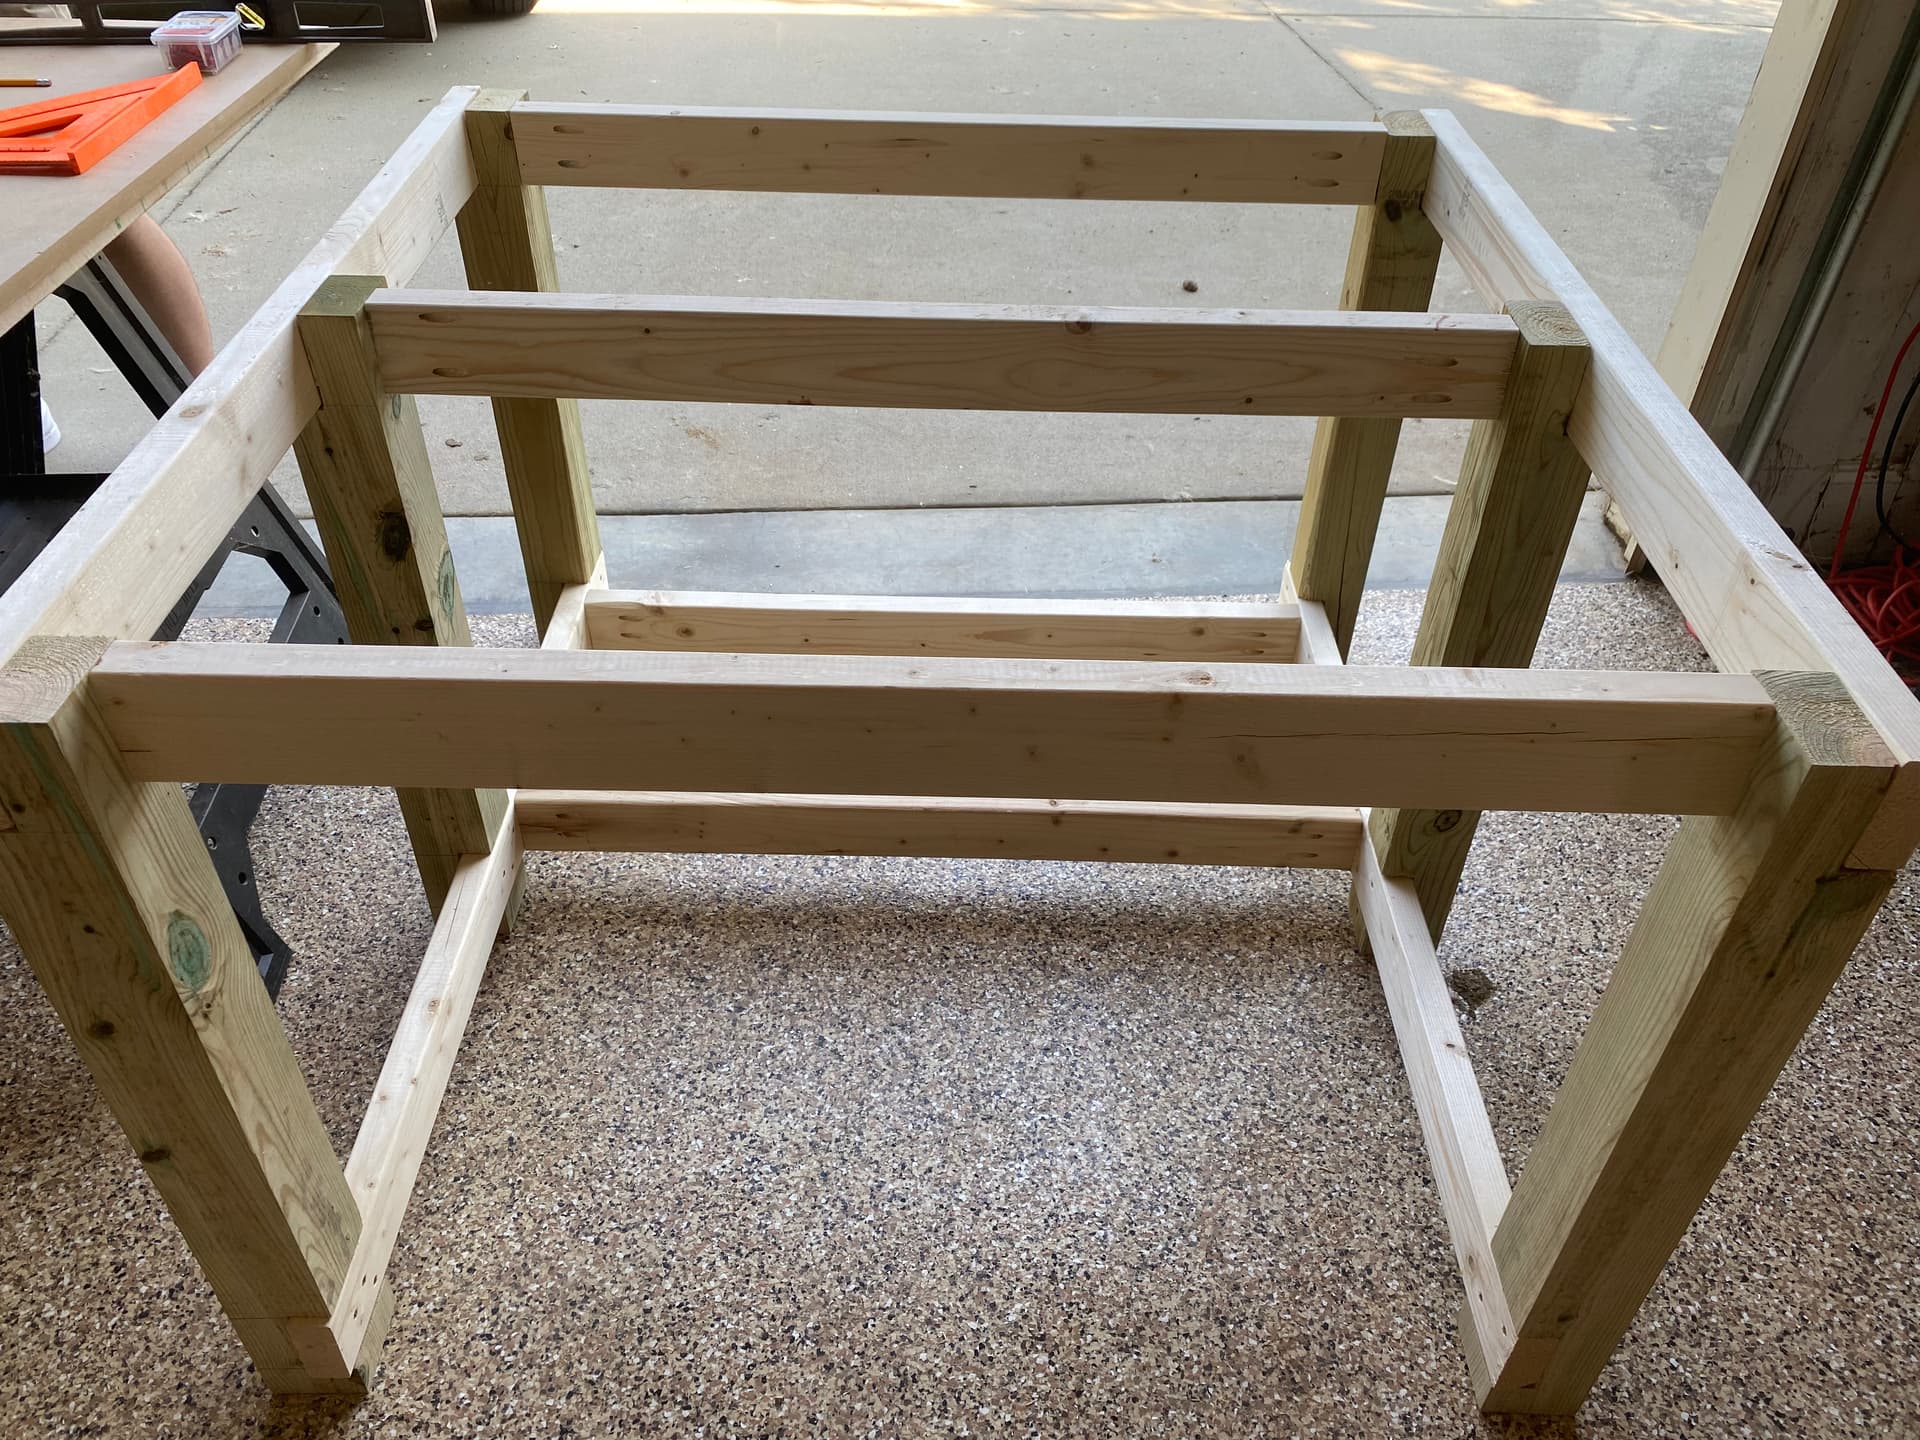
Ok, so I got the table put together today. Still need to attach the 2nd MDF board and bottom shelf (only the back half, similar to Brudaddy’s build).
Very anxious for the 1F to arrive, but I’m studying, reading this forum, and getting done what I can so I can hit the ground running.
Used the dado stack for the joints and connected cross pieces with pocket joints. Very excited it is all level on my garage floor in its own corner. The top is 48"x48", 4x4’s are 32" tall. Neglected to take a picture of the cross pieces, but you can sort of see it in one of the pics - the trashy looking 2x4.


Just wanted to share a post by @Tanukizilla. He has a lot of advice for those of us getting started. New User to Aspiring/New Users