Guess I will scrap the flip cart plans, and build a permanent space.
Hey Ryan,
you need something like the leveling feet anyway (fortunately they’re included with the QCW frame now) since otherwise you would not be able to get the machine coplanar. As this machine is of gantry-type, which means it has two Y axes with a considerable distance one from the other, you need to adjust it for coplanarity (=absence of twisting, for explanation please see here and here). A twisted machine can only produce twisted workpieces, starting with a twisted wasteboard ![]()
I for sure understand the importance of flatness. I’ll probably end up building a torsion box on a stand with leveling feet.
Hey Ryan,
did you already see this space saving table?
Okay, it’s been a minute since I updated my progress. I the pictures below you’ll see that I made my table 70x70. I have 2 large storage cabinets, french cleats for flex storage and a vertical clamping space at the back of the table.
I have a little trim to add to protect the mdf, but should all be ready when my Foreman arrives on Tuesday.


5 Likes
Hey Wes,
I like the joints you made, and the table looks good.
I hope you don’t rely on your floor alone when it comes to adjusting the coplanarity of the machine. Do you plan to use the QCW frame with the leveling feet with this table?
1 Like
Funny you should ask, on my assembly/finishing table i put leveling feet in the torsion box top, but Ive checked level across the top of this table and everything checks out as level. I was curious if i would need to use leveling feet.
Hey Wes,
since you have casters it is imaginable you move the table around, and usually the floor is not always the same everwhere. Also I don’t know how you check for twist of the machine, but checking with a one-bubble level is not accurate enough. Usually to detect twist (which is to eliminate before use of the machine), the fishing line method (over the rails of the machine) is much more accurate.
@ChrisS i saw that as well, but contradicts the ability to use the QCW that is shown with an Elite machine mounted on it with wheels that @ryans1 pointed out which means you are tipping it and rolling it and storing it vertically. I don’t see how its any different than what the fliptop table is proposing to do.
Storing vertically should be a non-issue as long as it is not being ran in the vertical position.
I still plan on using a flip table for storage. official answer from @OnefinityCNC would be appreciated though.
Yeah, i don’t know either… i would say cable length / management would be your achilles heel. I did find it comical that the wheel is on the controller side which doesn’t make sense to me personally
1 Like
I bought Fisher’s plan as well and modified them to my needs. I wanted the table as flat as possible so I made it out of 2x4 extruded aluminum and MDF. I made the sides wider so it could have supports and eliminate the folding legs. I also have a cleat on the wall for support and leveling. I have an Elite Woodworker ordered which I expect sometime in June.

10 Likes
@ColoBob table looks sharp. nice work. digging the cleat idea.
i say you modified Fishers plans way more than i did ![]()
i just got my shipping notification last night for my E-Journeyman so pretty stoked.
1 Like
So i was working out a design for my Elite Journeyman using a Husky Tool box I had sitting in the shop, these were the plans based on dimensions from onefinity.


And this is the result. The torsion box top was from a CNC that I built over many months. If I knew back then what I know now, I could have saved many dollars and lots of hours. When the Elite was released I immediately saw the solutions i had been chasing for so long. I dont have it yet, but will wait patiently for it’s arrival.


And yes it is level and rock solid…
7 Likes
I went outside just after I posted about my table and my Elite Woodworker was outside my garage!
They told me June. Love it!
1 Like
Congratulations. Hope springs eternal.
Great Idea, strong and stable and built in storage. Nicely done!
-Alex
Thanks. Always looking for ways to skin the cat.
So ive put my Foreman togeter on my table and im glad i made the top 70x70. The larger footprint provides an extra buffer to protect the motors from being bumped accidenttly.
Now I’m thinking that ill need to make the spoil board a full inch. The Makita doesnt seem to reach low enough with the z slider in the lowest position.
1 Like
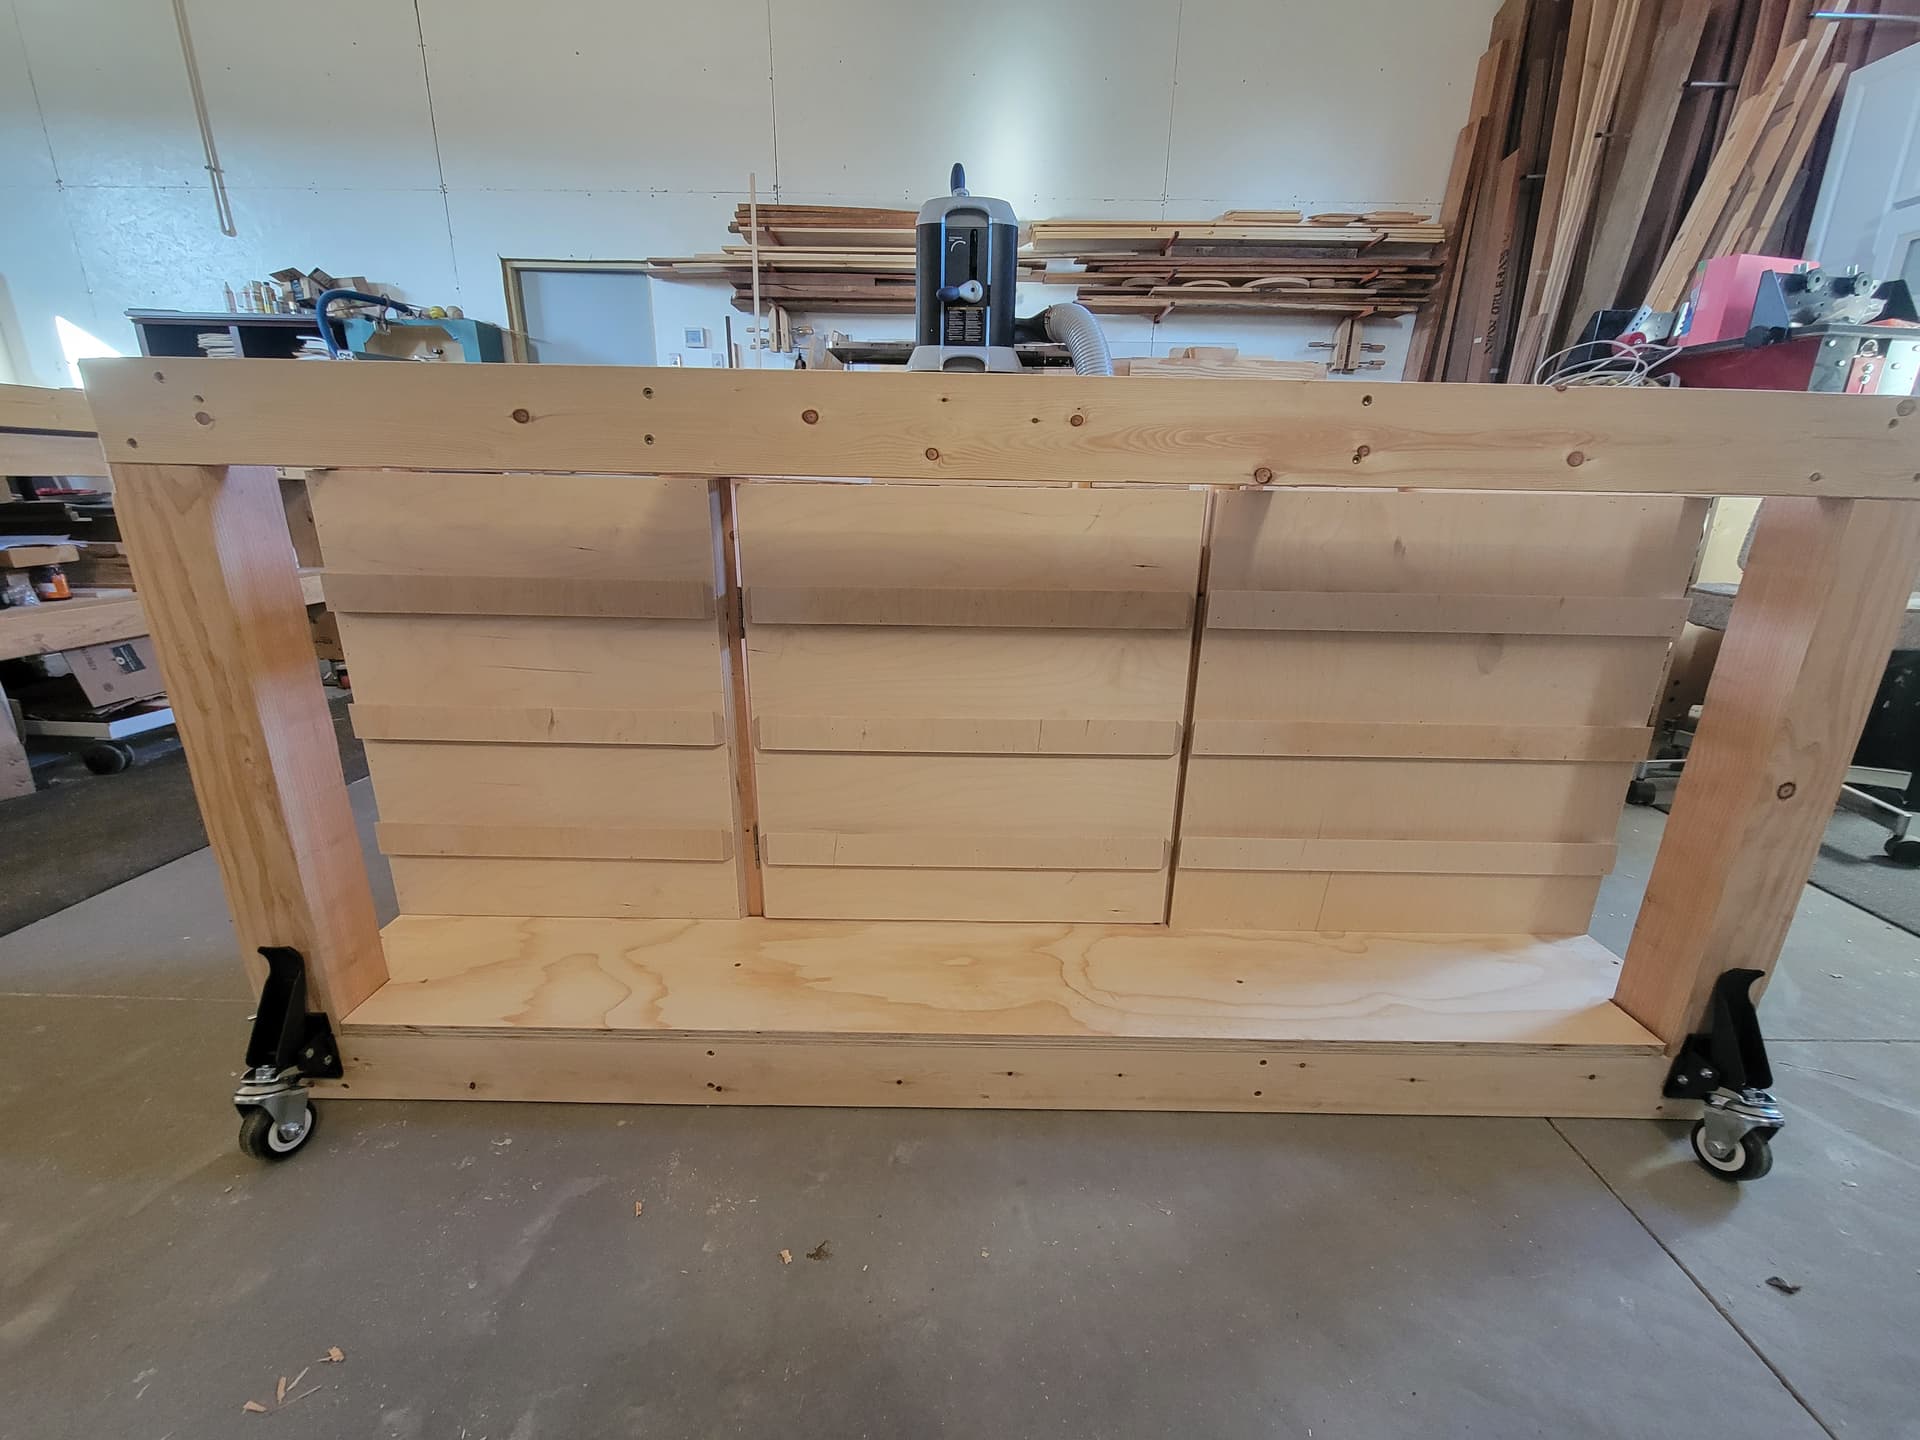
I’m more of a utilitariun, and don’t do pretty (for workshop purposes) well, but i figured i would show my table off too.
I have a 5/8" 5x5 Baltic birch im placing on top to set the cnc on, and 1" mdf spoilboard on top of that. Wish they (baltic birch & mdf [those 2 full sheets cost me $208]) didn’t cost me what it did, but dimensional lumber, casters, fasteners, Baltic birch, 1" mdf, and 20" soft close hinges, and a gallon (could have problably gotten a quart and been fine) of flat black paint, I’m all in for about $390. I had the bottom tongue in groove subfloor plywood for the lower level and the 3/4" Baltic birch plywood for my pull out keyboard tray on hand, just had to buy a house to get it…


5 Likes
@Wes_Jac_79 post up some photos when you get it set
2 Likes