The newest Makita RT0702C router features a anti-restart function that prohibits the router to start when the power is cycled. Sadly this makes it incompatible with users that use the remote control panel, or users that use their own relay / SSR setup to automatically start and stop the router when the g-code is running.
I’ve investigated the router and have good news, it’s a relative simple hack to make it compatible. I’ve written a complete guide on my website how to hack the RT0702C:
Hello ! I followed your tutorial to hack my Makita router, and everything goes well until I plug it. Then it blinks red, unless I unplug one of the black wires on the relay. Wich means that even if the relay is of, I have a contact between my two black wires. I tried with two différents relays and the result is the same… Have you an idea of what I did wrong ?
Thank you !
Hi, Just like Sebastien (May 23) I have followed (closely I believe) the clear instructions to hack the Makita RT0702C and the result is the router doesn’t work and the blinking red light is all I get. Any ideas why?
Alternatively can anyone identify a suitable 65mm router which **doesn’t ** have the anti-restart facility and, therefore can be switched. I’m setting up a Masuter Pro CNC for a School and could do with a little help.
@Saihb@geoffredstone I am so sorry I totally missed these replies. I’m not that active on this forum
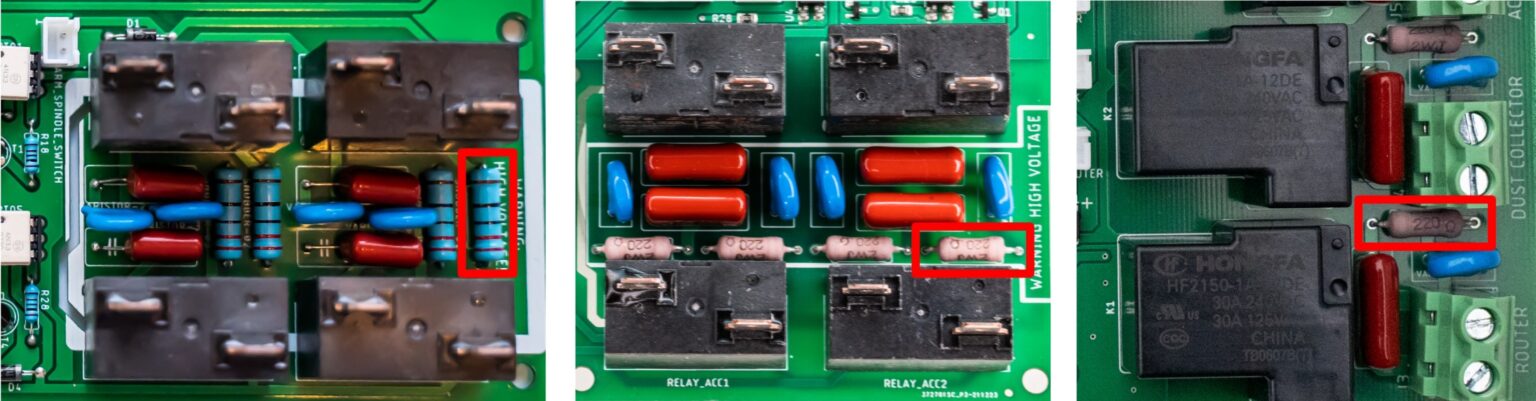
If you are using my remote control panel -pcb the problem is probably the snubber circuit on the relays. these prevent sparks and electrical noise. However, this circuit can create a small leakage current which might activate the anti-restart function failsafe on a Makita router.
If the router’s red LED is blinking, you must disable the snubber for that relay. Because the Makita has its own internal soft-start motor controller, the relay does not switch the inductive motor directly, making our board’s snubber circuit unnecessary.
To fix the issue, use a small wire cutter to carefully cut one leg of the snubber resistor for the router’s relay on the circuit board.